4.2.1 How to Transfer Files
- Establish a Remote Connection: First, connect to the remote device using the steps outlined in Section 4.1.
- Open the File Transfer Window: Click the "File Transfer" icon in the top toolbar of the remote control window. A new window will appear, displaying the file systems of both your local device (left) and the remote device (right).
- Select Files to Transfer: Navigate to the folder containing the files you want to transfer on your local device, select the files (you can select multiple files by holding the Ctrl key), and click the "Send" button (arrow pointing to the remote device). Alternatively, you can drag and drop files directly from your local folder to the remote folder.
- Monitor Transfer Progress: The file transfer progress will be displayed in a status bar, showing the transfer speed, remaining time, and percentage completed. Once the transfer is complete, you will receive a notification.
4.2.2 File Transfer Tips
- Large File Transfer: UltraViewer supports file transfers up to 2GB per file in the free version and unlimited file size in the premium version. For large files, we recommend using a high-speed internet connection to reduce transfer time.
- Folder Transfer: You can transfer entire folders by selecting the folder and clicking "Send". UltraViewer will preserve the folder structure and all subfiles during the transfer.
- Pause/Resume Transfers: If the transfer is interrupted (e.g., due to network issues), you can click "Pause" and resume the transfer later without having to restart from the beginning.
4.2.3 Use Case: Sharing Work Files with Colleagues
If you need to share a large project file with a colleague who is working remotely:
- Connect to your colleague’s device via UltraViewer.
- Open the file transfer window and select the project file from your local device.
- Send the file to your colleague’s device. They can then save the file to their computer and access it immediately, eliminating the need for email attachments or cloud storage services.
4.3 Screen Sharing: Collaborate in Real Time
Screen sharing is ideal for collaborative scenarios like online meetings, training sessions, and project discussions, allowing multiple users to view the same screen simultaneously.
4.3.1 How to Share Your Screen
- Launch UltraViewer and Click "Screen Share": On your UltraViewer main interface, click the "Screen Share" button (instead of "Connect") to initiate a screen sharing session.
- Generate a Sharing Link: UltraViewer will generate a unique sharing link and password. You can copy the link and password and share them with the participants (via email, chat, or SMS).
- Participants Join the Session: Participants can join the screen sharing session by opening the link in a browser or entering the ID in their UltraViewer. They will need to enter the password to access the shared screen.
- Control Screen Sharing: As the host, you can control who has access to the shared screen, pause the sharing session, and allow participants to take control of the screen (by clicking the "Allow Remote Control" button).
4.3.2 Screen Sharing Tips
- Select Specific Screen/Window: Instead of sharing your entire screen, you can choose to share a specific window (e.g., a PowerPoint presentation or Excel spreadsheet) by clicking the "Select Window" option in the screen sharing settings. This helps protect sensitive information on your other screens.
- Add Annotations: During the screen sharing session, you can use the annotation tools (e.g., pen, highlighter, text box) to mark important points on the screen, making the presentation or discussion more effective.
- Record the Session: You can record the entire screen sharing session by clicking the "Record" icon, which is useful for later review or for participants who were unable to attend the live session.
4.3.3 Use Case: Online Training Session
If you’re conducting an online training session for your team:
- Prepare your training materials (e.g., slides, tutorials) and open them on your computer.
- Launch UltraViewer’s screen sharing feature and share the link with your team members.
- During the session, share your screen to present the materials, use annotations to highlight key points, and allow team members to ask questions or take control of the screen to practice tasks, creating an interactive training experience.
4.4 Multi-Device Management: Control Multiple Devices Simultaneously
UltraViewer’s multi-device management feature (available in the premium version) allows you to connect to and control multiple devices at the same time, making it ideal for IT administrators and businesses managing a fleet of devices.
4.4.1 How to Manage Multiple Devices
- Log in to Your UltraViewer Account: First, create a UltraViewer account on the official website (https://ultraviewer-cn.com) and log in to the software.
- Add Devices to Your Account: Ask the users of the devices you want to manage to download UltraViewer, log in with the same account, and grant you management permissions. Alternatively, you can send them an invitation link to add their devices to your account.
- View and Control Devices: Once the devices are added, you can view all connected devices in the "Device Management" tab. Click on a device to initiate a remote connection, and you can switch between multiple connected devices by clicking the "Switch Device" icon in the top toolbar.
4.4.2 Multi-Device Management Tips
- Group Devices: You can group devices by department, location, or type (e.g., "Marketing Team Devices", "Office Laptops") for easier management. This allows you to quickly find and connect to specific devices.
- Set Access Permissions: You can set different access permissions for each device (e.g., "Full Control", "View Only", "File Transfer Only") to ensure that users have only the necessary level of access.
- Schedule Maintenance: Use the "Schedule" feature to set up regular maintenance tasks (e.g., software updates, virus scans) for multiple devices at once, saving time and ensuring consistency across your device fleet.
5. Advanced Tips to Boost Remote Access Efficiency
Once you’ve mastered the basic features of UltraViewer, these advanced tips will help you further enhance your remote access experience and productivity:
5.1 Customize Hotkeys for Quick Operations
UltraViewer allows you to customize hotkeys for frequently used functions, such as initiating a remote connection, opening file transfer, and taking screenshots. To set custom hotkeys:
- Click the "Settings" icon in the main interface.
- Select "Hotkeys" from the left menu.
- Click on the function you want to customize (e.g., "Connect") and press the desired key combination (e.g., Ctrl+Shift+C).
- Click "Save" to apply the changes. Using custom hotkeys can save time and make operations more efficient.
5.2 Enable Offline Access for Remote Devices
If you need to access a remote device that is not currently online, you can enable the "Offline Access" feature (available in the premium version):
- On the remote device, open UltraViewer and go to "Settings" > "Offline Access".
- Enable "Allow Offline Access" and set a unique offline password.
- When the remote device is offline, you can log in to your UltraViewer account on the official website and send a wake-up signal to the device (if it supports Wake-on-LAN). Once the device is online, you can connect to it using the offline password.
5.3 Integrate UltraViewer with Other Tools
UltraViewer can be integrated with other software and tools to streamline your workflow:
- CRM Integration: For businesses, UltraViewer can be integrated with CRM systems like Salesforce and HubSpot, allowing you to initiate remote support sessions directly from customer profiles.
- Ticketing System Integration: Integrate UltraViewer with ticketing systems like Zendesk and Jira to automatically log remote support sessions and update ticket statuses.
- Voice Chat Integration: Use third-party voice chat tools like Zoom or Microsoft Teams alongside UltraViewer for real-time communication during remote sessions, enhancing collaboration.
5.4 Optimize Connection Quality for Low-Bandwidth Environments
If you’re working in a low-bandwidth environment (e.g., rural areas, public Wi-Fi), you can optimize UltraViewer’s connection quality by:
- Reducing the screen resolution and frame rate in the connection settings.
- Disabling unnecessary features like audio transmission and screen recording.
- Closing other applications that consume bandwidth (e.g., video streaming services, cloud backups) during the remote session.
6. 2025 UltraViewer New Version Highlights (Available via Official Download)
UltraViewer continues to evolve with regular updates, and the 2025 version introduces several new features and improvements to enhance the user experience:
6.1 AI-Powered Remote Support
The 2025 version integrates AI technology to provide intelligent remote support. The AI assistant can automatically diagnose common issues (e.g., software crashes, network problems) and suggest solutions, reducing the need for manual troubleshooting. Additionally, the AI can generate step-by-step guides for users based on their specific needs, making remote support more efficient.
6.2 Enhanced Security Features
New security features include two-factor authentication (2FA) for account login, advanced malware scanning for file transfers, and automatic session timeout for inactive connections. These features further protect user data and prevent unauthorized access.
6.3 Improved Cross-Platform Synchronization
The 2025 version offers seamless synchronization between devices. Your connection history, favorite devices, and custom settings are automatically synced across all your UltraViewer installations (Windows, Mac, Android, iOS), allowing you to switch devices without reconfiguring settings.
6.4 Faster File Transfer Speed
UltraViewer has optimized its file transfer protocol, increasing transfer speeds by up to 30% compared to previous versions. This makes it faster to share large files like videos, design files, and software installations.
6.5 User Interface Refresh
The 2025 version features a modernized user interface with a cleaner design and improved navigation. Core functions are more prominently displayed, and the interface is fully customizable (e.g., dark mode, color themes), allowing users to personalize their experience.
To access these new features, be sure to download the latest version of UltraViewer from the official website (https://ultraviewer-cn.com).
7. Conclusion: Unlock Seamless Remote Control with Official UltraViewer Download
In 2025, remote work and collaboration are more prevalent than ever, and UltraViewer stands out as a reliable, user-friendly, and secure remote control tool that meets the diverse needs of individuals and businesses. By choosing the official channel for UltraViewer download, you ensure that you get a genuine, safe, and fully functional version of the software, free from the risks associated with third-party sources.
This guide has provided a comprehensive overview of the UltraViewer download process for all major platforms, step-by-step installation instructions, core feature tutorials, advanced tips, and the latest 2025 version highlights. Whether you’re using UltraViewer for personal use (e.g., assisting family members, accessing your home computer from work) or business purposes (e.g., remote team collaboration, IT support), this guide will help you master the software and unlock its full potential.
Don’t wait any longer—visit the official UltraViewer website (https://ultraviewer-cn.com) to download the latest version today and experience seamless, secure, and efficient remote control. With UltraViewer, distance is no longer a barrier to productivity and collaboration.
How to Use UltraViewer: Step-by-Step Tutorial with Official UltraViewer Download for Windows & Mac
In today’s fast-paced digital world, remote access has become a necessity for both personal and professional use. Whether you need to work from home, collaborate with colleagues across time zones, or provide technical support to clients, a reliable remote control tool can make all the difference. UltraViewer has emerged as a top choice for millions of users worldwide, thanks to its simplicity, speed, and versatility. However, to get the most out of this tool, it’s crucial to follow the correct UltraViewer download and installation process, then master its key features through a step-by-step tutorial. This article will guide you through everything you need to know—from downloading the official version to using UltraViewer for remote control, file transfer, and more—making it ideal for beginners and experienced users alike.
1. Introduction: Why UltraViewer is the Best Remote Control Tool for 2025
With so many remote control tools available on the market, you might wonder why UltraViewer stands out. Here are the key reasons why it’s the top choice for users in 2025:
1.1 Simplicity for Beginners, Power for Pros
UltraViewer’s interface is designed to be intuitive, so even users with no technical experience can start using it within minutes. At the same time, it offers advanced features like multi-device management, file transfer, and screen sharing that cater to the needs of IT professionals and businesses.
1.2 Exceptional Speed and Stability
One of the biggest frustrations with remote control tools is lag and connection drops. UltraViewer addresses this by using advanced compression algorithms and a global server network, ensuring fast and stable connections even over long distances. Whether you’re controlling a device across the street or across the globe, you’ll experience smooth performance.
1.3 Strong Security and Privacy
Security is a top concern when accessing devices remotely, and UltraViewer takes this seriously. It uses 256-bit AES encryption for all data transmissions, ensuring that your sensitive information (like passwords, files, and screen content) is protected from unauthorized access. Additionally, it offers features like temporary access passwords and session logging to enhance security further.
1.4 Cross-Platform Support
UltraViewer works seamlessly on Windows, Mac, Android, and iOS, allowing you to control any device from any other device. This cross-platform flexibility is perfect for users who work with multiple devices or need to support clients with different operating systems.
1.5 Free and Affordable Pricing
UltraViewer’s core features are completely free to use, making it accessible to everyone. For users who need advanced features like multi-device management and priority support, the premium plans are affordable and offer excellent value for money compared to competitors like TeamViewer.
To experience these benefits, the first step is to download UltraViewer from the official website. In the next section, we’ll walk you through the official UltraViewer download and installation process for Windows and Mac, which are the most commonly used platforms for remote control.
2. Official UltraViewer Download: Step-by-Step to Get the Safe Version
Downloading UltraViewer from the official website is crucial to ensure that you get a safe, genuine version of the software. Below is a detailed guide to the official UltraViewer download process for Windows and Mac.
2.1 Pre-Download Checklist
Before you start the UltraViewer download, make sure your device meets the minimum system requirements:
- Windows: Windows 10 or 11 (32-bit or 64-bit)
- Mac: macOS 12 (Monterey) or later
- Internet Connection: A stable internet connection with a minimum speed of 1 Mbps
- Free Disk Space: At least 100 MB of free space on your hard drive
2.2 UltraViewer Download for Windows
- Open Your Browser: Launch your preferred web browser (Chrome, Edge, Firefox, etc.).
- Visit the Official Website: Type https://ultraviewer-cn.com into the address bar and press Enter. This is the official UltraViewer website, where you can download the safe and latest version of the software.
- Navigate to the Download Section: Once on the homepage, you’ll see a prominent "Download" button in the top navigation bar. Click this button to go to the download section.
- Select the Windows Version: In the download section, you’ll see options for different platforms. Locate the "Windows" version (it should be labeled with the latest version number, e.g., UltraViewer 6.6.0 2025) and click the "Official Download" button next to it.
- Wait for the Download to Complete: The UltraViewer download will start automatically. The installation package is small (about 15 MB), so the download should take only 1-2 minutes depending on your internet speed. You can monitor the download progress in your browser’s download bar.
2.3 UltraViewer Download for Mac
- Open Safari or Chrome: Launch your browser and go to https://ultraviewer-cn.com.
- Go to the Download Section: Click the "Download" button in the top navigation bar.
- Choose the Mac Version: Find the "Mac" version in the download section and click "Official Download". The download file will be in .dmg format, which is the standard format for Mac applications.
- Complete the Download: The Mac installation package is approximately 20 MB, and the download should finish quickly. Once the download is complete, you’ll find the .dmg file in your "Downloads" folder.
2.4 Why Avoid Third-Party Download Sources?
It’s important to avoid downloading UltraViewer from third-party websites. These sites often offer modified or cracked versions of the software that may contain malware, spyware, or adware. Additionally, third-party versions may be outdated, missing critical security updates, or lacking core features. By downloading from the official website (https://ultraviewer-cn.com), you can be confident that you’re getting a safe, up-to-date, and fully functional version of UltraViewer.
3. Installation Walkthrough: Windows and Mac
Once you’ve completed the UltraViewer download, the next step is to install the software on your device. Below is a step-by-step installation guide for Windows and Mac.
3.1 Installation on Windows
- Locate the Installation File: Go to your "Downloads" folder and find the UltraViewer installation file (named "UltraViewer_Setup_2025.exe").
- Run the Installation File: Double-click the file to launch the installation wizard. If Windows displays a User Account Control (UAC) prompt asking if you want to allow the app to make changes to your device, click "Yes" to proceed.
- Accept the License Agreement: The first screen of the installation wizard will display the license agreement. Read through the agreement and click the "I Agree" button to continue.
- Choose the Installation Path: The wizard will suggest a default installation path (C:\Program Files\UltraViewer). If you want to install UltraViewer in a different location, click the "Browse" button and select a new folder. We recommend keeping the default path unless you have a specific reason to change it.
- Select Additional Options: You can choose to create a desktop shortcut and add UltraViewer to your startup programs. These options are checked by default, but you can uncheck them if you prefer.
- Start the Installation: Click the "Install" button to begin the installation process. The wizard will extract the files and install UltraViewer on your device. This takes approximately 30 seconds.
- Complete the Installation: Once the installation is finished, click the "Finish" button. UltraViewer will launch automatically, and you’ll see the main interface with your unique ID and password.
3.2 Installation on Mac
- Mount the .dmg File: Go to your "Downloads" folder and double-click the UltraViewer .dmg file. This will mount the file and open a new window with the UltraViewer icon and the "Applications" folder icon.
- Install UltraViewer: Drag the UltraViewer icon from the mounted window to the "Applications" folder. This copies UltraViewer to your Applications folder, completing the installation.
- Eject the .dmg File: After copying, you can eject the .dmg file by right-clicking it on your desktop and selecting "Eject".
- Launch UltraViewer: Open the "Applications" folder and find UltraViewer. Double-click the icon to launch the software. On first launch, macOS may display a security prompt saying that the app is from an identified developer. Click "Open" to confirm (this is a standard security measure for apps downloaded from the internet).
- Set Up UltraViewer: When UltraViewer launches, you’ll see the main interface with your ID and password. You can customize the settings (like language and connection quality) by clicking the "Settings" icon in the top-right corner.
3.3 Post-Installation Checklist
After installing UltraViewer, perform these quick checks to ensure everything is working correctly:
- Verify the Main Interface: The main interface should display your ID and password. If these are missing, restart UltraViewer or reinstall the software.
- Test the Connection: Ask a friend or colleague to download UltraViewer and share their ID and password with you. Try connecting to their device to ensure the remote control function works.
- Check for Updates: Click the "Help" menu and select "Check for Updates" to ensure you’re using the latest version of UltraViewer.
4. Step-by-Step UltraViewer Usage Tutorial: From Setup to Advanced Control
Now that you’ve completed the UltraViewer download and installation, it’s time to learn how to use the software. This section will guide you through the basic and advanced features of UltraViewer, with step-by-step instructions and practical examples.
4.1 Basic Setup: Get Your ID and Password
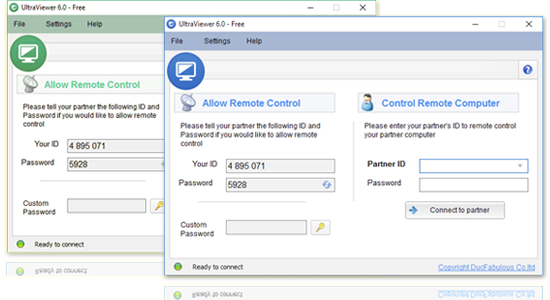
When you launch UltraViewer, the main interface displays two key pieces of information:
- ID: A unique identifier for your device (e.g., 123456789).
- Password: A temporary password that allows others to access your device remotely (you can change this password by clicking the "Refresh" icon next to it).
To allow someone to control your device, you need to share your ID and password with them. Conversely, to control another device, you need their ID and password.
4.2 How to Control Another Device (Basic Remote Control)
Controlling another device with UltraViewer is simple. Follow these steps:
- Obtain the Target Device’s ID and Password: Ask the person whose device you want to control to open UltraViewer and share their ID and password with you.
- Enter the ID and Password: On your UltraViewer main interface, enter the target device’s ID in the "Partner ID" field. Then, enter their password in the "Password" field.
- Click "Connect": After entering the ID and password, click the "Connect" button. UltraViewer will attempt to establish a connection with the target device.
- Authorize the Connection (On the Target Device): The target device will display a prompt asking if they want to allow remote control. They need to click "Allow" to grant access.
- Start Controlling the Device: Once the connection is established, you’ll see the target device’s screen in a window on your computer. You can use your mouse and keyboard to control the device as if you were sitting in front of it.
4.2.1 Basic Remote Control Tips
- Zoom In/Out: Use the mouse wheel to zoom in on the remote screen for a closer look, or zoom out to see the entire screen.
- Full-Screen Mode: Click the "Full-Screen" button in the top toolbar to view the remote screen in full-screen mode. Press the Esc key to exit full-screen mode.
- Disconnect: To end the remote control session, click the "Disconnect" button in the top toolbar or close the UltraViewer window.
4.3 File Transfer: Send and Receive Files Remotely
UltraViewer’s file transfer feature allows you to share files between your device and the remote device without using email or cloud storage. Here’s how to use it:
4.3.1 Send Files to the Remote Device
- Establish a Remote Connection: Follow the steps in Section 4.2 to connect to the remote device.
- Open the File Transfer Window: Click the "File Transfer" icon in the top toolbar of the remote control window. This opens a new window with two panels: the left panel shows your local files, and the right panel shows the remote device’s files.
- Select Files to Send: Navigate to the folder containing the files you want to send in the left panel. Select the files (hold Ctrl to select multiple files) and click the "Send" button (arrow pointing to the right).
- Monitor the Transfer: The file transfer progress will be displayed in the bottom of the window. Once the transfer is complete, the files will appear in the remote device’s folder.
4.3.2 Receive Files from the Remote Device
- Open the File Transfer Window: While connected to the remote device, click the "File Transfer" icon.
- Select Files to Receive: In the right panel (remote device’s files), select the files you want to receive and click the "Receive" button (arrow pointing to the left).
- Choose a Local Folder: Select a folder on your local device where you want to save the received files and click "OK".
- Complete the Transfer: The files will be downloaded to your local folder, and the progress will be displayed in the window.
4.4 Screen Sharing: Share Your Screen with Others
Screen sharing is useful for presentations, training sessions, and collaborative work. Here’s how to share your screen with others using UltraViewer:
- Click "Screen Share": On your UltraViewer main interface, click the "Screen Share" button (instead of "Connect").
- Generate a Sharing Link: UltraViewer will generate a unique sharing link and password. You can copy the link by clicking the "Copy" button.
- Share the Link and Password: Send the link and password to the people you want to share your screen with (via email, chat, or SMS).
- Others Join the Session: People can join the screen sharing session by clicking the link and entering the password. They don’t need to have UltraViewer installed—they can join via a web browser.
- Control the Sharing Session: As the host, you can pause the sharing, allow participants to control your screen, and use annotation tools to highlight important points.
4.5 Advanced Remote Control Features
UltraViewer offers several advanced features that can enhance your remote control experience:
4.5.1 Multi-Monitor Support
If the remote device has multiple monitors, you can switch between them by clicking the "Monitor" icon in the top toolbar and selecting the monitor you want to view.
4.5.2 Audio Transmission
You can transmit audio from the remote device to your device by clicking the "Audio" icon in the top toolbar. This is useful for listening to videos, music, or voice calls on the remote device.
4.5.3 Remote Reboot
If the remote device freezes or needs to be rebooted, you can click the "Reboot" icon in the top toolbar to restart the device remotely. The connection will be automatically re-established after the reboot.
4.5.4 Black Screen Mode
For added privacy, you can enable "Black Screen Mode" by clicking the "Black Screen" icon. This blacks out the remote device’s screen, preventing anyone physically present at the remote device from seeing what you’re doing.
5. Common Use Cases: How to Apply UltraViewer in Work & Life
UltraViewer is a versatile tool that can be used in a variety of scenarios. Below are some common use cases to help you get inspired:
5.1 Remote Work
If you work from home, UltraViewer allows you to access your office computer remotely. You can open files, run applications, and use software that’s only installed on your office computer, just as if you were sitting at your desk. This is especially useful for people who need to use specialized software that can’t be installed on their home devices.
5.2 Technical Support
Whether you’re helping a family member with their computer or providing support to clients, UltraViewer makes it easy to diagnose and fix issues remotely. You can take control of the device, troubleshoot problems, and even install software or updates without having to be physically present.
5.3 Collaborative Work
UltraViewer’s screen sharing and file transfer features make it easy to collaborate with colleagues on projects. You can share your screen to present ideas, transfer files to each other, and even work on the same document simultaneously (by controlling each other’s devices or using screen sharing).
5.4 Accessing Home Devices
If you’re away from home and need to access a file or application on your home computer, UltraViewer allows you to do so. Simply share your home computer’s ID and password with your mobile device or laptop, and you can control your home computer from anywhere in the world.
5.5 Online Training
Teachers and trainers can use UltraViewer to conduct online training sessions. You can share your screen to present materials, use annotation tools to highlight key points, and allow students to take control of the screen to practice tasks. This creates an interactive learning experience that’s similar to in-person training.
6. Troubleshooting Guide for UltraViewer New Users
Even with a user-friendly tool like UltraViewer, you may encounter issues from time to time. Below are some common problems and their solutions:
6.1 Connection Failed
- Check the ID and Password: Ensure that you’ve entered the correct ID and password for the remote device. The password is case-sensitive, so make sure Caps Lock is off.
- Verify the Remote Device is Online: The remote device must be connected to the internet and have UltraViewer running. Ask the user to check their internet connection and ensure UltraViewer is open.
- Check Firewall Settings: Firewalls on both your device and the remote device may be blocking the connection. Temporarily disable the firewall or add UltraViewer to the list of allowed applications.
- Update UltraViewer: Outdated versions of UltraViewer may have compatibility issues. Click "Help" > "Check for Updates" to ensure you’re using the latest version.
6.2 Lag or Slow Connection
- Reduce Screen Resolution: Lower the screen resolution in the connection settings to reduce bandwidth usage. Click the "Settings" icon in the remote control window and select a lower resolution.
- Close Background Applications: Close any applications that are consuming bandwidth (like video streaming services, cloud backups, or file downloads) on both your device and the remote device.
- Check Internet Speed: Use an internet speed test tool to check your connection speed. A minimum speed of 1 Mbps is recommended for smooth remote control.
6.3 File Transfer Failed
- Check File Size: The free version of UltraViewer supports file transfers up to 2GB. If you’re trying to transfer a larger file, upgrade to a premium plan or split the file into smaller parts.
- Verify File Permissions: Ensure that you have permission to access the file on the remote device. If the file is password-protected or stored in a restricted folder, you may not be able to transfer it.
- Check Storage Space: The remote device must have enough free storage space to receive the file. Ask the user to check their hard drive space and free up space if necessary.
6.4 UltraViewer Crashes or Freezes
- Restart UltraViewer: Close UltraViewer and restart it. This often resolves temporary glitches.
- Reinstall UltraViewer: If restarting doesn’t work, uninstall UltraViewer and reinstall it using the official installation package from https://ultraviewer-cn.com.
- Check System Requirements: Ensure that your device meets the minimum system requirements for UltraViewer. If your device is outdated, you may experience performance issues.
7. 2025 UltraViewer Updates: What’s New for Better Remote Experience
UltraViewer is constantly updating to improve performance, add new features, and address user feedback. Here are the key updates in the 2025 version:
7.1 Improved AI Assistant
The 2025 version introduces an enhanced AI assistant that can help with troubleshooting, answer questions about UltraViewer’s features, and even automate common tasks (like connecting to frequently used devices). The AI assistant is available via the "Help" menu and can save you time by providing quick solutions to common problems.
7.2 Faster Connection Speed
UltraViewer has optimized its server network and connection protocol, resulting in faster connection speeds and reduced lag. The 2025 version connects up to 50% faster than previous versions, making remote control even more seamless.
7.3 Enhanced File Transfer
The file transfer feature has been improved to support faster transfer speeds and larger file sizes. Premium users can now transfer files up to 10GB, and the transfer process is more reliable, with automatic resume for interrupted transfers.
7.4 Better Mobile Experience
The Android and iOS versions of UltraViewer have been updated with a redesigned interface that’s easier to use on touchscreens. Additionally, mobile users can now control remote devices using gestures (like pinch to zoom and swipe to scroll), making the mobile experience more intuitive.
7.5 Advanced Security Features
The 2025 version adds new security features like two-factor authentication (2FA) for account login and advanced malware scanning for file transfers. These features provide an extra layer of protection for your data and devices.
To enjoy these new features, make sure to download the latest version of UltraViewer from the official website (https://ultraviewer-cn.com).
8. Conclusion: Start Your Seamless Remote Control Journey with UltraViewer
UltraViewer is a powerful, user-friendly, and secure remote control tool that meets the needs of users in 2025. Whether you’re working from home, providing technical support, collaborating with colleagues, or accessing devices remotely, UltraViewer makes it easy to stay connected and productive.
By following the official UltraViewer download process from https://ultraviewer-cn.com, you ensure that you get a safe, genuine version of the software. The step-by-step installation guide for Windows and Mac makes it easy to set up UltraViewer, and the detailed usage tutorial helps you master all the key features—from basic remote control to advanced file transfer and screen sharing.
With its cross-platform support, fast connection speeds, strong security, and free core features, UltraViewer is the ideal remote control tool for beginners and experienced users alike. The 2025 updates further enhance the user experience, making it even more efficient and versatile.
Don’t let distance be a barrier to productivity and collaboration. Visit the official UltraViewer website today to download the latest version and start your seamless remote control journey. Whether you’re using it for personal or professional use, UltraViewer is sure to become an indispensable tool in your digital toolkit.