2025 UltraViewer Download Ultimate Guide: Official Installation + Remote Control Full Tutorial for Seamless Access
In the era of global remote collaboration and technical support, a reliable remote control tool has become an indispensable asset for businesses, IT professionals, and even individual users. UltraViewer stands out as a lightweight, high-speed, and user-friendly remote access solution, trusted by millions worldwide for its stable connection, intuitive operation, and comprehensive features. However, many users encounter risks like malware, incomplete functions, or connection failures when searching for "UltraViewer download" through non-official channels. This 2025 ultimate guide will walk you through the official UltraViewer download process, multi-device installation steps, core function tutorials, and real-world application scenarios, ensuring you enjoy secure and efficient remote control without any hiccups.
Why You Must Choose Official UltraViewer Download
Before initiating the UltraViewer download, it’s crucial to recognize that the official channel is the only way to guarantee security, full functionality, and a smooth user experience. Third-party "cracked versions" or "modified editions" may seem appealing with "free premium features," but they hide significant risks that can compromise your devices and data.
1. Robust Data Security & Privacy Protection
Remote control involves accessing sensitive data, such as work documents, system settings, and personal information. Third-party cracked UltraViewer versions often contain malicious code designed to steal data, monitor operations, or even take control of your device without permission. In contrast, the official UltraViewer download from https://ultraviewer-cn.com adheres to global data security standards, employing end-to-end AES-256 encryption for all remote sessions and file transfers. Your connection logs and operation records are only accessible to you and the remote party, ensuring no unauthorized access or data leakage—a key reason why enterprises and IT teams prioritize official UltraViewer download.
2. Complete Features & Stable Performance
Cracked versions frequently disable core functions like high-definition screen sharing, file transfer, multi-monitor support, or remote sound transmission. They also lack official updates, leading to compatibility issues with new operating systems (such as Windows 11 2025 Update or macOS Sonoma) and frequent crashes during critical remote sessions. The official UltraViewer download provides full access to all features, including real-time remote control, one-click file transfer (up to 10GB per file), screen recording, and chat support. With regular updates (5-8 iterations annually), it continuously optimizes connection stability and fixes bugs, ensuring a lag-free experience even with low-bandwidth networks (minimum 1Mbps required).
3. Adware-Free & Quick Installation
Third-party download platforms often bundle adware, browser hijackers, or unwanted software with the UltraViewer installer, cluttering your device and slowing down system performance. The official UltraViewer download is 100% free of adware and bundled programs. The installer size is only 3-5MB, and the entire installation process takes less than 2 minutes—no complicated configurations required. You can start using UltraViewer immediately after installation, focusing solely on your remote tasks.
Whether you’re an IT technician providing remote support, a team collaborating across locations, or a user helping family members troubleshoot devices, the official UltraViewer download is the safest and most reliable choice. Visit https://ultraviewer-cn.com now to get the authentic installer and avoid the risks of third-party versions.
2025 Latest UltraViewer Download & Installation Guide (Multi-Device Coverage)
UltraViewer supports Windows, macOS, Android, and iOS devices, catering to diverse remote control scenarios—from desktop-to-desktop collaboration to mobile-to-desktop troubleshooting. Below is a detailed step-by-step guide for each platform, designed for both beginners and experienced users.
1. Windows Desktop (Compatible with Windows 10/11)
Windows is the most widely used platform for remote control, and UltraViewer’s Windows version offers advanced features like multi-session management and keyboard/mouse synchronization. Here’s how to complete the UltraViewer download and installation:
- Open your preferred browser (Chrome, Edge, or Firefox) and navigate to the official website https://ultraviewer-cn.com. Locate the "Download Center" in the top navigation bar and select "Windows Version" to initiate the UltraViewer download. Thanks to global CDN acceleration, the download speed averages 15MB/s, and the 4MB installer will finish downloading in just 1-2 seconds.
- Once the download is complete, find the installer file (named "UltraViewer_Setup.exe") in your "Downloads" folder. Double-click the file to launch the installation wizard. When the "User Account Control" prompt appears, click "Yes" to proceed.
- In the installation wizard, you can customize the installation path (default is "C:\Program Files\UltraViewer"). We recommend keeping the default path unless you have specific storage needs. Check the boxes for "Create a desktop shortcut" and "Add to Start Menu" for easy access later, then click "Install."
- The installation will complete automatically in 30-60 seconds. Click "Finish" to launch UltraViewer. Upon first startup, you’ll see a main interface displaying your "ID" and "Password"—these are required for remote connections. You can also set a permanent password by clicking "Settings" > "Security" > "Set Permanent Password," eliminating the need to share a temporary password each time.
2. macOS (Compatible with macOS 12.0+)
UltraViewer’s macOS version is fully optimized for Apple’s ecosystem, supporting Retina displays and macOS-specific shortcuts. Follow these steps for UltraViewer download and installation:
- Open Safari or Chrome on your Mac and visit https://ultraviewer-cn.com. Go to the "Download Center" and select "macOS Version" to start the UltraViewer download.
- After the download finishes, locate the .dmg installer file in your "Downloads" folder. Double-click the file to mount the disk image, then drag the "UltraViewer" icon to the "Applications" folder to complete the installation (this takes 1-2 minutes).
- Open UltraViewer from the "Applications" folder. macOS may prompt you to "Allow this app to run" since it’s downloaded from the official website—click "Open" to confirm. You may also need to enable accessibility permissions: go to "System Settings" > "Privacy & Security" > "Accessibility," and check the box next to "UltraViewer" to grant remote control access.
- Once launched, the main interface will display your Mac’s ID and password. You can now receive remote connections or initiate connections to other devices by entering their ID and password.
3. Android (Compatible with Android 9.0+)
The Android version of UltraViewer allows you to control Windows/macOS devices from your smartphone or tablet, making it ideal for on-the-go technical support. Here’s the UltraViewer download and installation process:
- Open the browser on your Android device and visit https://ultraviewer-cn.com. Navigate to the "Download Center" and select "Android Version" to start the UltraViewer download. Some devices may display a "Blocked by Play Protect" warning—tap "More Details" > "Install Anyway" to proceed (the official installer is 100% safe).
- After the download completes, tap the installer file in the notification bar to launch the installation. The system will request permissions for "Storage" (to transfer files), "Camera" (for video calls), and "Microphone" (for voice chat)—tap "Allow" for all permissions to ensure full functionality.
- The installation takes 30 seconds. Tap "Open" to launch UltraViewer. On the main interface, you can either "Connect to a Device" by entering the remote ID and password or "Share Your Device" to allow others to control your phone (useful for troubleshooting mobile issues).
4. iOS (Compatible with iOS 15.0+)
UltraViewer’s iOS version focuses on simplicity and stability, allowing iPhone/iPad users to control desktop devices seamlessly. Follow these steps for UltraViewer download and installation:
- Open Safari on your iPhone/iPad and visit https://ultraviewer-cn.com. Go to the "Download Center" and select "iOS Version"—you will be redirected to the App Store.
- Tap "Get" (or the cloud icon if you’ve downloaded it before) and authenticate with Face ID, Touch ID, or your Apple ID password. The app will download and install automatically (takes 1-2 minutes).
- Launch UltraViewer from your home screen. You may need to enable notifications to receive connection alerts. The iOS interface is streamlined: enter the remote device’s ID and password to initiate a connection, and use intuitive on-screen controls (tap, swipe, pinch) to operate the desktop.
Troubleshooting Common UltraViewer Download & Installation Issues
- Slow download speed: Switch to a stable WiFi or 5G network, close VPNs or proxy tools, and refresh the official website https://ultraviewer-cn.com to restart the UltraViewer download. The official server supports resumable downloads, so you won’t need to re-download the entire file if the connection is interrupted.
- Installation failure on Windows: Right-click the installer and select "Run as administrator" to bypass permission restrictions. Temporarily disable antivirus software if it mistakenly flags the installer as suspicious (remember to re-enable it after installation).
- Can’t launch on macOS: Ensure you’ve granted accessibility permissions (as outlined in Step 3 of the macOS installation). If the app still won’t open, drag it from "Applications" to the Trash and re-download the installer from the official website.
- Connection issues on mobile: Verify that both devices are connected to the internet and that the remote device’s ID and password are entered correctly. For Android users, ensure UltraViewer is not restricted by battery optimization (go to "Settings" > "Battery" > "UltraViewer" > "Unrestricted").
Essential Features to Master After UltraViewer Download
Once you’ve completed the UltraViewer download and installation, mastering these core features will elevate your remote control experience, whether you’re providing technical support, collaborating with teammates, or accessing your home computer remotely.
1. Remote Control: Seamless Device Access
The core function of UltraViewer is remote control, which allows you to operate another device as if you were sitting in front of it. Here’s how to use it:
- Initiate a connection: Open UltraViewer and enter the remote device’s "ID" and "Password" in the "Control" tab. Click "Connect" to send a connection request. The remote user will receive a pop-up notification—once they click "Allow," the connection is established.
- Control modes: UltraViewer offers two control modes: "Full Control" (access to all keyboard, mouse, and system functions) and "View Only" (only view the remote screen without controlling it). You can switch modes at any time by clicking the "Mode" button in the toolbar.
- Keyboard/mouse synchronization: All keyboard shortcuts (e.g., Ctrl+C, Alt+Tab) and mouse gestures work seamlessly during remote sessions. For macOS users, UltraViewer automatically maps Windows shortcuts to macOS equivalents (e.g., Ctrl to Cmd) to avoid confusion.
- Multi-monitor support: If the remote device has multiple monitors, click the "Monitor" button in the toolbar to switch between them or view all monitors simultaneously in a split-screen layout.
2. File Transfer: Fast & Secure Data Sharing
UltraViewer’s built-in file transfer feature eliminates the need for third-party tools like WeTransfer or Dropbox, enabling direct file sharing between connected devices:
- One-click file transfer: During a remote session, click the "File Transfer" button in the toolbar to open the file manager. Navigate to the file/folder you want to send, select it, and click "Send"—the file will be transferred to the remote device’s default download folder (you can customize the path in "Settings" > "File Transfer").
- Large file support: UltraViewer allows transferring files up to 10GB in size, with a transfer speed of up to 10MB/s (depending on network conditions). The transfer is encrypted end-to-end, ensuring data security.
- Batch transfer: Select multiple files or entire folders to transfer at once, saving time when sharing multiple documents, photos, or videos.
- Transfer status: A progress bar displays the transfer speed and remaining time. You can pause or cancel the transfer at any time without data loss.
3. Screen Sharing & Recording: Collaborative Problem-Solving
Screen sharing and recording are invaluable for technical support, training, and team collaboration:
- Screen sharing: During a remote session, click the "Share Screen" button to share your local screen with the remote user (or vice versa). You can choose to share the entire screen or a specific application window to protect sensitive information.
- Screen recording: Click the "Record" button to capture the remote session (including audio and video). The recording is saved in MP4 format, which you can review later or share with colleagues for training purposes. You can adjust the recording quality (720p/1080p) and frame rate in the settings.
- Annotation tools: Use the built-in annotation tools (pen, highlighter, text, shapes) to mark key areas on the screen during sharing or recording. This is particularly useful for explaining complex issues or guiding remote users through steps.
4. Chat & Voice Call: Real-Time Communication
UltraViewer integrates chat and voice call features to facilitate communication during remote sessions, eliminating the need for separate messaging apps:
- Text chat: Click the "Chat" button to open a text box where you can send messages to the remote user. Messages are synchronized in real time, and you can attach files to the chat (up to 200MB per file).
- Voice call: For more efficient communication, click the "Voice Call" button to initiate a voice chat. UltraViewer uses noise-canceling technology to ensure clear audio, even in noisy environments. No additional software or plugins are required—just a working microphone and speaker.
- Call recording: You can record voice calls by clicking the "Record Call" button, which is useful for documenting important discussions or technical support sessions.
5. Additional Useful Features
- Remote restart: If the remote device freezes or needs a restart, click "Remote" > "Restart" to restart it. UltraViewer will automatically reconnect after the device boots up, saving you from having to ask the remote user to re-establish the connection.
- Blank remote screen: Click "Remote" > "Blank Screen" to black out the remote device’s screen, protecting privacy during sensitive operations (e.g., entering passwords or accessing confidential data). The remote user will see a black screen until you disable the feature.
- Auto-accept connections: For trusted devices (e.g., your home computer), you can set UltraViewer to auto-accept connections by adding the local device’s ID to the "Trusted List" in "Settings" > "Security." This eliminates the need to manually approve connections each time.
Real-World Scenarios for UltraViewer After Download
UltraViewer’s versatility makes it suitable for a wide range of scenarios, from professional technical support to personal use. Below are practical use cases to help you maximize the tool’s potential.
1. IT Technical Support
IT teams and freelance technicians rely on UltraViewer to provide efficient remote support to clients or internal employees:
- Troubleshoot software issues: Connect to the user’s device to diagnose and fix software errors, install updates, or configure settings—all without being physically present. Use the annotation tools to guide the user through simple steps if full control isn’t needed.
- Resolve system problems: Fix issues like blue screens, driver errors, or network connectivity problems by accessing the remote device’s system settings and event logs. Use the file transfer feature to send diagnostic tools or driver files.
- Provide training: Walk new employees through software setup or system usage via screen sharing and voice calls. Record the session for the employee to review later.
2. Remote Work & Team Collaboration
With hybrid work becoming the norm, UltraViewer enables seamless collaboration between team members in different locations:
- Access work devices remotely: Connect to your office computer from home or while traveling to access important documents, software, or company resources. UltraViewer’s stable connection ensures you can work efficiently even with low bandwidth.
- Collaborate on projects: Share your screen with teammates to discuss ideas, review documents, or edit files in real time. Use the chat feature to exchange feedback without interrupting the workflow.
- Manage remote teams: Team leaders can monitor project progress by connecting to team members’ devices (with permission) and provide real-time guidance. The screen recording feature allows you to review work sessions for performance evaluation.
3. Personal & Family Use
UltraViewer is not just for professionals—it’s also a handy tool for personal use and helping family members:
- Access home devices: Connect to your home computer from anywhere to retrieve photos, videos, or important files. For example, if you forgot a document at home, you can remotely access your computer and send it to your phone or work device.
- Help family members: Assist elderly family members or less tech-savvy friends with device issues (e.g., setting up apps, troubleshooting internet problems) without having to travel. Use the "View Only" mode to guide them through steps without taking full control.
- Stream media: Connect to your home computer to stream movies, TV shows, or music to your mobile device while traveling—perfect for long trips or commutes.
4. Educational & Training Purposes
Teachers and trainers use UltraViewer to deliver remote lessons and workshops:
- Remote teaching: Share your screen to present slides, videos, or educational content to students. Use the annotation tools to highlight key points and the chat feature to answer questions in real time.
- One-on-one tutoring: Provide personalized tutoring by connecting to the student’s device, reviewing their work, and guiding them through problems step by step. Record the session for the student to practice later.
- Corporate training: Train employees on new software or processes via screen sharing and voice calls. Use the file transfer feature to distribute training materials and quizzes.
Data Security & Privacy Protection After UltraViewer Download
Data security is a top priority for remote control tools, and UltraViewer implements multiple layers of protection to ensure your sessions and data are safe:
- End-to-end encryption: All remote sessions, file transfers, and communications are encrypted with AES-256, the same standard used by banks and government agencies. This ensures no third party can intercept or access your data.
- Password protection: Each remote device has a unique ID and temporary password (which resets after each session by default). You can set a permanent password for trusted devices, but it’s recommended to use strong, unique passwords to prevent unauthorized access.
- Access control: The remote user must explicitly approve each connection request (unless auto-accept is enabled for trusted devices). They can terminate the connection at any time by clicking "Disconnect" or closing UltraViewer.
- No data storage: UltraViewer does not store any of your remote session data, file transfers, or chat logs on its servers. All data is transmitted directly between the two connected devices and is deleted once the session ends.
- Regular security updates: The official UltraViewer download receives regular security patches to address potential vulnerabilities, ensuring the tool remains protected against emerging threats.
Conclusion: Start Secure Remote Control with Official UltraViewer Download
In 2025, remote control tools are no longer a luxury but a necessity for businesses, teams, and individuals. UltraViewer stands out for its simplicity, stability, and comprehensive features, making it the go-to choice for millions of users worldwide. However, to fully enjoy its benefits, the official UltraViewer download from https://ultraviewer-cn.com is essential—it guarantees security, full functionality, and reliable performance, free from the risks of third-party cracked versions.
Whether you’re an IT professional providing technical support, a team collaborating remotely, or a user helping family members, UltraViewer’s multi-device support, fast connection, and secure features have you covered. From remote control and file transfer to screen sharing and voice calls, it offers everything you need for seamless remote access.
Don’t let unreliable third-party downloads compromise your security or experience. Visit https://ultraviewer-cn.com today to complete the official UltraViewer download, and unlock the full potential of secure, efficient remote control. With UltraViewer, distance is no longer a barrier to productivity, collaboration, or support.
Master UltraViewer in 2025: Safe Official Download & Step-by-Step Usage Guide for Remote Support
In today’s interconnected world, remote support and access have become integral to both professional and personal life. Whether you’re an IT technician helping clients, a freelancer collaborating with teammates, or a parent assisting a child with their computer, a reliable remote control tool can save time, reduce costs, and eliminate geographical barriers. UltraViewer has emerged as a leading choice for users seeking a lightweight, user-friendly, and affordable remote control solution. However, navigating the UltraViewer download process and mastering its features can be daunting for beginners—especially with the risk of malicious third-party downloads. This comprehensive guide is designed to help you safely complete the official UltraViewer download, walk you through step-by-step usage, and share expert tips to become an UltraViewer pro in no time.
Why Beginners Should Prioritize Official UltraViewer Download
For new users, the UltraViewer download process is the first critical step toward secure remote control. Choosing the official channel offers three key advantages that make it the only viable option for beginners and experts alike.
1. Zero Security Risks for Peace of Mind
Beginners often lack the experience to distinguish between legitimate and malicious software. Third-party UltraViewer download links frequently lead to cracked versions laced with malware, spyware, or ransomware—these can steal your personal data, damage your device, or even lock your files for ransom. In contrast, the official UltraViewer download from https://ultraviewer-cn.com is rigorously tested for security, with no hidden threats or unwanted software. The tool’s end-to-end encryption and strict privacy policies ensure your remote sessions and data remain confidential, making it safe for both personal and professional use.
2. Intuitive Setup & Full Feature Access
Cracked UltraViewer versions often come with broken features, confusing interfaces, or missing tutorials—frustrating for beginners trying to learn the tool. The official UltraViewer download provides a streamlined installation process (no technical skills required) and full access to all core features, including remote control, file transfer, screen sharing, and chat. Additionally, the official version includes built-in help resources, video tutorials, and a user-friendly interface with clear navigation—perfect for beginners who want to get up and running quickly.
3. Free Basic Version & Affordable Premium Plans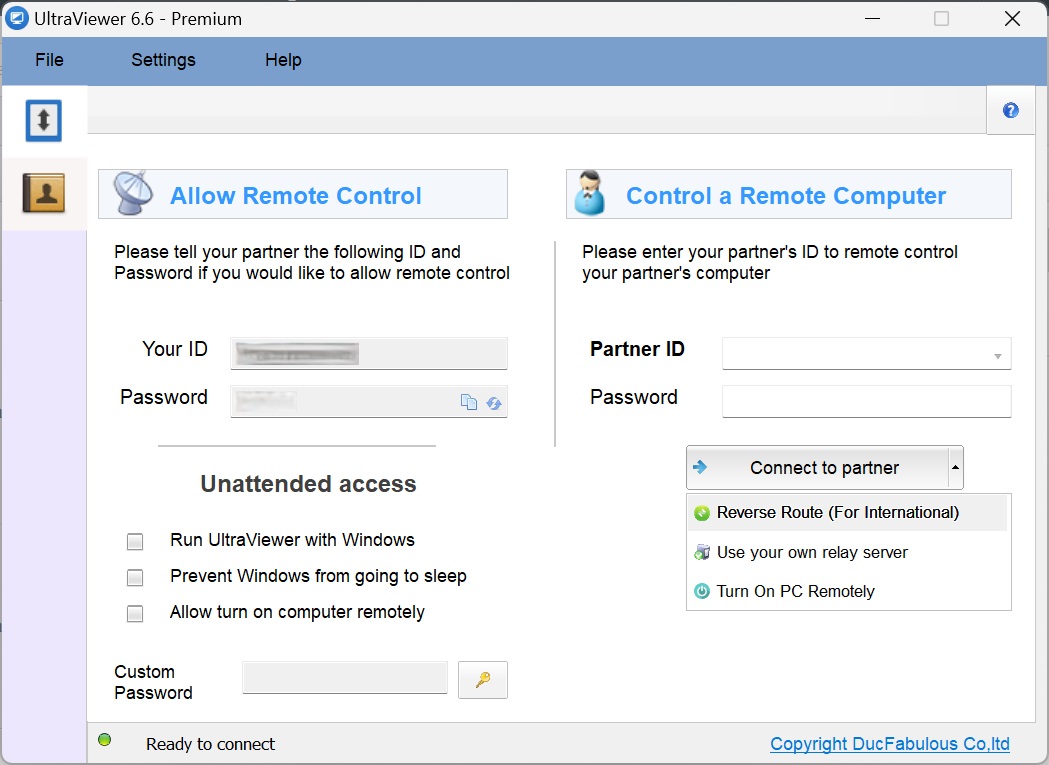
One of the biggest advantages of the official UltraViewer download is its free basic version, which offers all essential remote control features (e.g., full control, file transfer, screen sharing) with no time limits. This allows beginners to practice and use the tool for personal or small-scale professional needs without spending money. For users requiring advanced features (e.g., multi-session management, custom branding, priority support), UltraViewer’s premium plans are affordable (starting at $9.99/month), with no hidden fees—unlike cracked versions that often trick users into paying for "unlocked" features that should be free.
If you’re new to remote control tools, don’t take unnecessary risks with third-party downloads. Visit https://ultraviewer-cn.com to complete the safe, official UltraViewer download, and enjoy a stress-free learning experience.
Step-by-Step UltraViewer Download & Installation for Beginners (2025 Update)
The official UltraViewer download and installation process is designed to be beginner-friendly, with clear prompts and minimal steps. Below is a detailed guide for the most popular platforms: Windows (desktop) and Android/iOS (mobile).
1. Windows Desktop UltraViewer Download & Installation (Windows 10/11)
Windows is the most common platform for remote control, and UltraViewer’s Windows version is optimized for ease of use. Follow these steps to complete the UltraViewer download and installation:
Step 1: Access the Official Website
Open your browser (Chrome, Edge, or Firefox) and type https://ultraviewer-cn.com into the address bar. Press Enter to navigate to the official UltraViewer website. The homepage is clean and easy to navigate—you’ll find the "Download Center" prominently displayed in the top menu.
Step 2: Initiate the UltraViewer Download
Click on "Download Center" and select "Windows Version" from the dropdown menu. The UltraViewer download will start automatically—you don’t need to click any additional buttons or fill out forms. The installer is only 4MB, so the download will finish in seconds (even with slow internet).
Step 3: Run the Installer
Once the download is complete, locate the installer file in your "Downloads" folder (it will be named "UltraViewer_Setup.exe"). Double-click the file to launch the installation wizard. A pop-up window may appear asking for permission to make changes to your device—click "Yes" to proceed.
Step 4: Customize Installation Settings
The installation wizard will guide you through the process:
- License Agreement: Read the agreement (or skip it if you’re in a hurry) and click "I Agree" to continue.
- Installation Path: The default path is "C:\Program Files\UltraViewer," but you can change it by clicking "Browse" and selecting a different folder (we recommend keeping the default for simplicity).
- Additional Tasks: Check the boxes for "Create a desktop shortcut" and "Add to Start Menu"—these will make it easy to launch UltraViewer later.
- Click "Install": Wait for the progress bar to reach 100% (this takes 30-60 seconds).
Step 5: Launch UltraViewer & Complete Initial Setup
Click "Finish" to launch UltraViewer. When the app opens, you’ll see a main interface with two key pieces of information:
- Your ID: A unique number that identifies your device (share this with others to let them connect to you).
- Your Password: A temporary password that resets each time you launch UltraViewer (you can set a permanent password in the settings if needed).
For beginners, we recommend watching the short "Quick Start" tutorial that pops up—this will introduce you to the main features in 2 minutes.
2. Mobile UltraViewer Download & Installation (Android/iOS)
The mobile version of UltraViewer allows you to control desktop devices on the go, making it perfect for quick technical support or accessing files remotely. Here’s how to download and install it:
For Android Users:
- Open your phone’s browser and visit https://ultraviewer-cn.com. Go to "Download Center" and select "Android Version."
- The UltraViewer download will start automatically. When the download finishes, tap the installer file in the notification bar.
- If your phone blocks the installation (saying "Install blocked"), tap "Settings" > "Security" > "Unknown Sources" and enable permission for your browser (this is safe for the official installer).
- Tap "Install" and wait 30 seconds for the installation to complete.
- Tap "Open" to launch UltraViewer. Grant the app permissions for storage, camera, and microphone (these are required for file transfer and voice calls).
For iOS Users:
- Open Safari on your iPhone/iPad and visit https://ultraviewer-cn.com. Go to "Download Center" and select "iOS Version."
- You will be redirected to the App Store. Tap "Get" and authenticate with Face ID, Touch ID, or your Apple ID password.
- The app will download and install automatically. Once installed, tap the UltraViewer icon on your home screen to launch it.
- Grant the app permission to send notifications (so you receive connection alerts) and access your microphone (for voice calls).
Initial Setup for Mobile Users:
The mobile interface is simplified for touchscreens:
- Connect to a Desktop: Enter the desktop device’s ID and password in the "Connect" tab, then tap "Start Control."
- Share Your Mobile Device: Tap "Share" to display your mobile ID and password—others can use these to connect to your phone (useful for troubleshooting mobile issues).
Beginner-Friendly UltraViewer Usage Guide: Core Features Explained
Now that you’ve completed the UltraViewer download and installation, it’s time to learn how to use its core features. We’ll break down each function with step-by-step instructions, so even complete beginners can follow along.
1. How to Establish a Remote Connection
Establishing a remote connection is UltraViewer’s most basic function—here’s how to do it in 3 simple steps:
Step 1: Get the Remote Device’s ID & Password
To connect to another device (e.g., a client’s computer or your home PC), you need two things:
- The remote device’s ID (a unique 9-digit number displayed on the UltraViewer main interface).
- The remote device’s Password (a temporary or permanent password displayed next to the ID).
Ask the remote user to share their ID and password with you (via phone, text, or email).
Step 2: Enter the ID & Password in Your UltraViewer
Open your UltraViewer app (desktop or mobile) and go to the "Control" tab. Enter the remote device’s ID in the "Partner ID" field, and the password in the "Password" field. Double-check the information to avoid typos—incorrect ID or password will result in a failed connection.
Step 3: Initiate the Connection
Click (or tap) "Connect" to send a connection request to the remote device. The remote user will see a pop-up window asking for permission to allow the connection—they must click "Allow" to proceed. Once approved, the connection is established, and you’ll see the remote device’s screen on your own device.
Pro Tips for Beginners:
- If the connection fails, check that both devices are connected to the internet (UltraViewer works with WiFi, 4G, and 5G).
- Ensure the remote user has the latest version of UltraViewer (ask them to complete the official UltraViewer download from https://ultraviewer-cn.com if they’re using an old version).
- If you’re connecting to a work device, make sure your company’s firewall doesn’t block UltraViewer (most firewalls allow it, but you may need to ask your IT department to whitelist the app).
2. How to Use Remote Control (Desktop & Mobile)
Once the connection is established, you can control the remote device as if you were sitting in front of it. Here’s how to navigate the remote control interface:
Desktop Remote Control:
- Mouse Control: Move your mouse as usual—your cursor will appear on the remote screen. Click to open files, launch apps, or select items.
- Keyboard Control: Type on your keyboard, and the text will appear on the remote device. All shortcuts (e.g., Ctrl+S, Ctrl+P) work normally.
- Toolbar Functions: The UltraViewer toolbar (located at the top or bottom of the screen) includes essential controls:
- Disconnect: End the remote session.
- Mode: Switch between "Full Control" and "View Only."
- File Transfer: Open the file manager to send/receive files.
- Chat: Send text messages to the remote user.
- Record: Capture the remote session as a video.
Mobile Remote Control:
- Touch Controls: Tap the remote screen to simulate a mouse click. Swipe to scroll, and pinch to zoom (for web pages or documents).
- On-Screen Keyboard: Tap the keyboard icon to type text on the remote device.
- Gesture Support: Use common mobile gestures (e.g., two-finger tap for right-click) to operate the remote desktop.
Beginner Mistakes to Avoid:
- Don’t click randomly on the remote screen—ask the remote user for permission before making changes (e.g., installing software, deleting files).
- Avoid using the remote device for resource-intensive tasks (e.g., gaming, video editing) unless you have a fast internet connection—this can cause lag.
3. How to Transfer Files Between Devices
UltraViewer’s file transfer feature is perfect for sharing documents, photos, or software between connected devices. Here’s how to use it:
Step 1: Open the File Transfer Tool
During a remote session, click (or tap) the "File Transfer" button in the UltraViewer toolbar. This will open a split-screen file manager:
- Left Panel: Your local device’s files (what you can send to the remote device).
- Right Panel: The remote device’s files (what you can receive from the remote device).
Step 2: Select Files to Transfer
- Sending Files: Navigate to the file/folder you want to send in the left panel. Select it by clicking the checkbox next to it, then click "Send" (desktop) or tap the send icon (mobile).
- Receiving Files: Navigate to the file/folder you want to receive in the right panel. Select it, then click "Receive" (desktop) or tap the receive icon (mobile).
Step 3: Monitor the Transfer
A progress bar will show you the transfer speed and remaining time. You can pause or cancel the transfer at any time. Once complete, the file will be saved to the default download folder (you can change this in the settings).
Pro Tips for Beginners:
- Compress large files (e.g., ZIP folders) before transferring to speed up the process.
- Avoid transferring files during peak internet hours (e.g., 9 AM-5 PM) if you have slow bandwidth.
- Verify that the remote user has enough storage space to receive the file—UltraViewer will notify you if there’s not enough space.
4. How to Use Screen Sharing & Recording
Screen sharing and recording are useful for training, presentations, or documenting technical support sessions. Here’s how to use these features:
Screen Sharing:
- During a remote session, click (or tap) the "Share Screen" button in the toolbar.
- Select whether you want to share your entire screen or a specific application window (selecting a window is more secure if you have sensitive information open).
- The remote user will see your screen in real time. You can use the annotation tools (pen, highlighter, text) to mark key areas—click the "Annotation" button in the toolbar to access these tools.
Screen Recording:
- Click (or tap) the "Record" button in the toolbar to start recording the remote session.
- The recording will capture everything on the screen, including audio (if you enable voice call).
- To stop recording, click the "Stop" button. The video will be saved in MP4 format to your default video folder (you can change the save path in the settings).
Beginner Tips:
- Inform the remote user before starting a recording—this is not only polite but also required by privacy laws in many regions.
- Keep recordings short (under 30 minutes) to avoid large file sizes.
- Use the "Pause" button if you need to stop recording temporarily (e.g., to discuss sensitive information).
Advanced UltraViewer Tips for Beginners to Level Up
Once you’ve mastered the basic features, these advanced tips will help you get more out of UltraViewer, whether you’re using it for professional support or personal use.
1. Set a Permanent Password
By default, UltraViewer generates a temporary password each time you launch the app—this is secure but inconvenient if you frequently connect to the same device (e.g., your home computer). To set a permanent password:
- Open UltraViewer and click "Settings" (gear icon) in the top-right corner.
- Go to the "Security" tab and check the box next to "Set Permanent Password."
- Enter your desired password (use a strong combination of letters, numbers, and symbols) and click "Save."
Now, you can use this permanent password to connect to your device without having to share a new temporary password each time.
2. Add Trusted Devices to Auto-Accept Connections
If you regularly connect to or receive connections from trusted devices (e.g., your work computer or a family member’s device), you can add them to the "Trusted List" to auto-accept connections:
- Go to "Settings" > "Security" > "Trusted List."
- Click "Add" and enter the trusted device’s ID.
- Click "Save"—future connection requests from this device will be automatically approved, saving you time.
3. Customize the UltraViewer Interface
UltraViewer allows you to customize the interface to suit your preferences:
- Toolbar Position: Move the toolbar to the top, bottom, left, or right of the screen (desktop version only).
- Language: Change the interface language (supports 20+ languages, including English, Spanish, French, and Chinese).
- Theme: Switch between light and dark mode (desktop and mobile versions).
To access these settings, click "Settings" > "Interface" (desktop) or "Settings" > "Appearance" (mobile).
4. Use UltraViewer for Multi-Session Management (Premium Feature)
If you’re a professional who needs to support multiple clients at once, UltraViewer’s premium plan allows you to manage multiple remote sessions simultaneously:
- Upgrade to the premium plan via https://ultraviewer-cn.com (starting at $9.99/month).
- Open multiple UltraViewer windows, each with a separate remote connection.
- Switch between sessions by clicking the window tabs—this is ideal for IT technicians or customer support teams.