Introduction: Why UltraViewer Stands Out for Remote Access
In an era where remote work, technical support, and long-distance collaboration have become indispensable, finding reliable remote desktop software is crucial. UltraViewer has emerged as a leading solution, trusted by millions for its simplicity, security, and robust feature set. Whether you’re helping a family member troubleshoot their PC, collaborating with colleagues across time zones, or accessing your home computer while traveling, UltraViewer delivers a seamless experience that rivals premium alternatives—all for free. The journey to effortless remote control begins with a safe and proper UltraViewer download, and this comprehensive guide will walk you through every step, from installation to advanced usage, ensuring you unlock the full potential of this powerful tool in 2025.
Before diving into the details, it’s important to emphasize the importance of sourcing your UltraViewer download from the official website. With cyber threats on the rise, downloading software from untrusted third-party sites poses significant risks, including malware infections, data breaches, and corrupted files. The official https://ultraviewer-cn.com guarantees a secure, up-to-date version of the software, complete with the latest security patches and feature enhancements. This guide will reference the official UltraViewer download page throughout, ensuring you have a safe and reliable experience from start to finish.
UltraViewer’s popularity stems from its compatibility with all Windows operating systems, from legacy versions like Windows XP to the latest Windows 11 and Windows Server editions UltraViewer. Unlike many remote access tools that require complex configurations or expensive subscriptions, UltraViewer is designed for accessibility—whether you’re a tech novice or an IT professional. Recent updates have expanded its capabilities even further, adding features like microphone support, switch-side control, monitor wake-up, and secure copy-pasting between multiple clients UltraViewer. By following this guide, you’ll not only master the basics but also learn how to leverage these advanced features to streamline your remote workflows.
Step 1: Safe UltraViewer Download – A Detailed Walkthrough
The first and most critical step in using UltraViewer is completing a secure UltraViewer download. As mentioned earlier, relying on the official website is non-negotiable for protecting your device and data. Below is a step-by-step breakdown of the UltraViewer download process, tailored to Windows users (the only supported OS as of 2025, with MacOS support in development ).
Pre-Download Checks for Compatibility
Before initiating your UltraViewer download, confirm that your device meets the minimum requirements. UltraViewer is lightweight, making it compatible with even low-spec computers, but verifying compatibility ensures a smooth experience:
- Operating System: Windows XP, Windows Vista, Windows 7, Windows 8, Windows 10, Windows 11, or any Windows Server edition (2003, 2008, 2012, etc.) UltraViewer.
- RAM: At least 512MB (1GB or more recommended for optimal performance, especially when using multiple features simultaneously).
- Storage: A mere 10MB of free disk space (the installer is compact, ensuring quick downloads even on slow internet connections).
- Internet Connection: A stable connection (wired or wireless) to facilitate remote sessions—no minimum speed required, but faster connections will improve video quality and reduce latency.
If you’re using a Windows 11 device, rest assured that UltraViewer is fully compatible, with recent updates addressing DPI scaling issues that previously affected some users UltraViewer. For Windows Server users, the software has been optimized to bypass IE security dialogs, ensuring seamless installation and operation UltraViewer.
Initiating the UltraViewer Download from the Official Site
- Open your preferred web browser (Chrome, Firefox, Edge, etc.) and navigate to the official UltraViewer download page: https://ultraviewer-cn.com. This link directs you to the trusted source, eliminating the risk of counterfeit software.
- Once on the homepage, locate the “Download” button—prominently displayed at the top of the page for easy access. The button is labeled clearly, ensuring you won’t confuse it with ads or unrelated downloads.
- Click the “Download” button to start the process. The UltraViewer download will begin automatically, with the installer file (typically named “UltraViewer_Setup.exe”) saved to your default “Downloads” folder unless you specify a different location.
- Wait for the download to complete. Given the small file size (around 3MB), this should take only a few seconds on a standard internet connection. If the download is slow or stalls, check your internet connection, disable any VPN or proxy services that might be interfering UltraViewer, and try again.
Verifying the Downloaded File
After the UltraViewer download finishes, take a moment to verify the file’s integrity to ensure it wasn’t corrupted during transfer:
- Locate the installer file in your Downloads folder (or the custom location you chose).
- Right-click the file and select “Properties.”
- Check the file size (should be approximately 3MB) and ensure the file extension is “.exe” (not “.exe.zip” or another format, which may indicate a compressed or corrupted file).
- If the file appears suspicious (e.g., unusual size, unknown publisher), delete it immediately and restart the UltraViewer download from https://ultraviewer-cn.com.
For added security, some users may choose to scan the installer with their antivirus software before running it. While the official UltraViewer download is free of malware, this extra step provides peace of mind, especially for those using public or shared networks.
Step 2: Installing UltraViewer – Simple Setup for All Users
Once you’ve completed a successful UltraViewer download, the installation process is straightforward, even for those with limited technical experience. Follow these steps to install UltraViewer on your Windows device:
Running the Installer
- Double-click the downloaded “UltraViewer_Setup.exe” file to launch the installation wizard. If Windows prompts you with a “User Account Control” dialog asking for permission to run the file, click “Yes” to proceed.
- The installation wizard will open with a welcome screen. Click “Next” to continue.
- Read the End User License Agreement (EULA) carefully. To proceed, check the box next to “I accept the terms in the license agreement” and click “Next.”
- Choose your installation location. By default, UltraViewer is installed in “C:\Program Files (x86)\UltraViewer,” but you can click “Browse” to select a different folder if desired. For most users, the default location works perfectly, so click “Next” to move forward.
- Select additional tasks (optional). The wizard offers two optional checkboxes: “Create a desktop shortcut” and “Run UltraViewer when Windows starts.” We recommend checking both for convenience—this allows quick access to the software and ensures it’s ready to use whenever you need it. Click “Next” after making your selections.
- Click “Install” to begin the installation. The progress bar will show the status of the process, which typically takes less than a minute.
- Once the installation is complete, click “Finish” to close the wizard. If you checked “Run UltraViewer when Windows starts,” the software will launch automatically. Otherwise, you can open it from your desktop shortcut or the Start menu.
Post-Installation Checks
After installation, take a moment to confirm that UltraViewer is working correctly:
- Check that the desktop shortcut (if created) opens the software without errors.
- Verify that the main UltraViewer window displays your unique ID and password. The ID is permanent, while the password resets automatically each time you launch the software (you can set a custom password later for unattended access ).
- Ensure that your antivirus or firewall software hasn’t blocked UltraViewer. If you encounter issues later, you may need to add UltraViewer as an exception in your security settings .
If the software fails to launch after installation, try restarting your computer and re-running UltraViewer. If the problem persists, uninstall the software, restart your device, and repeat the UltraViewer download and installation process from https://ultraviewer-cn.com. This usually resolves any temporary glitches during installation.
Step 3: Mastering UltraViewer’s Basic Features
Now that you’ve completed the UltraViewer download and installation, it’s time to explore the software’s core features. UltraViewer’s interface is intuitive, with all key functions easily accessible from the main window. Below is a detailed breakdown of the basic features you’ll use most frequently.
Understanding the Main Interface
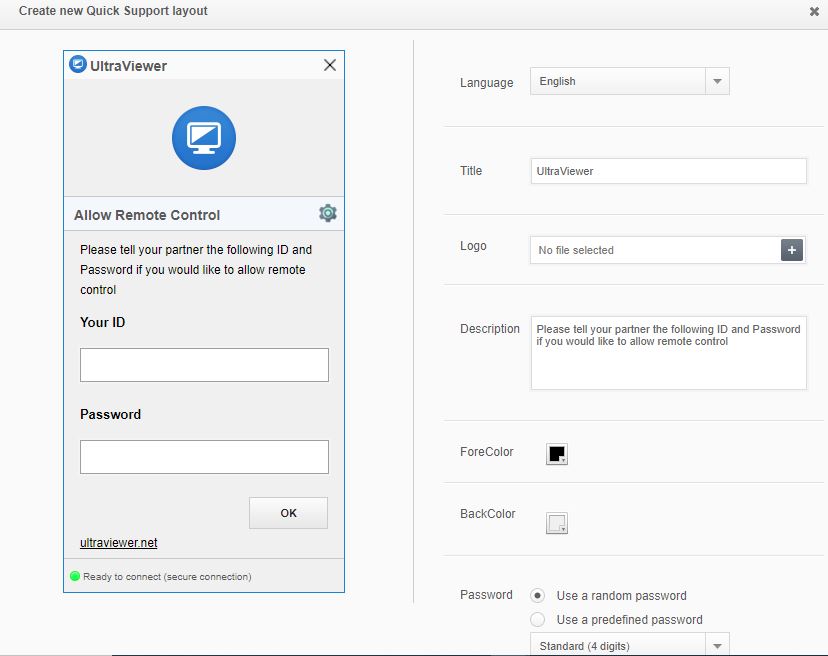
When you launch UltraViewer, the main window is divided into two sections: “Your ID/Password” and “Partner ID/Password.”
- Your ID/Password: This section displays your unique, permanent ID and a temporary password. Share these credentials with anyone who needs to control your computer remotely (e.g., a technical support agent or colleague).
- Partner ID/Password: To control another computer, enter the partner’s ID and password in this section, then click “Connect” to initiate the remote session.
Beneath these sections are several key buttons:
- “Share Screen”: Click this to allow others to view your screen without giving them control (useful for presentations or demonstrations).
- “File Transfer”: Enables seamless file sharing between your computer and the remote device (no need for external tools like email or cloud storage ).
- “Chat”: Opens a built-in chat window to communicate with the remote user during a session (press F1 to toggle the chat window on and off ).
- “Settings”: Access advanced configuration options, including display settings, security preferences, and network adjustments.
Initiating and Managing a Remote Session
Initiating a remote session with UltraViewer is quick and straightforward:
- Ensure both you and the remote user have completed the UltraViewer download and installation, and that the software is running on both devices.
- Obtain the remote user’s ID and password (they can find this in their UltraViewer main window).
- Enter the partner’s ID and password in your UltraViewer window and click “Connect.”
- The remote user will receive a prompt asking for permission to allow the connection. Once they click “Allow,” the session will begin, and you’ll see their screen on your device.
During the session, you’ll have access to a floating toolbar with additional controls:
- “Full Screen”: Expands the remote screen to fill your entire display for better visibility.
- “Screen Size”: Adjust the remote screen’s resolution to fit your window (options include “Best Scaled,” “Stretchable,” and “Original Size” ).
- “Quality”: Modify the image quality to balance performance and visual clarity. Lower quality is ideal for slow internet connections, while higher quality is better for tasks like graphic design or video editing.
- “Record”: Captures video of the remote session (saved as .uvr files) for future reference. Recent updates fixed issues with playing .uvr files from older versions, ensuring compatibility UltraViewer.
- “Lock Screen”: Secures the remote computer’s physical screen to prevent unauthorized access during the session—a valuable security feature for sensitive tasks UltraViewer.
- “Disconnect”: Ends the remote session when you’re finished.
Using the File Transfer Feature
One of UltraViewer’s most useful basic features is its built-in file transfer tool, which eliminates the need for third-party file-sharing services. Here’s how to use it:
- During a remote session, click the “File Transfer” button on the floating toolbar.
- A new window will open, with your local files on the left and the remote device’s files on the right.
- To send a file from your computer to the remote device, navigate to the file in the left pane, select it, and click “Upload.”
- To receive a file from the remote device, select the file in the right pane and click “Download.”
- You can also drag and drop files directly between the two panes for even faster transfers.
UltraViewer’s file transfer feature supports all file types and sizes, with no restrictions. Recent updates improved transfer speeds, making it ideal for sharing large documents, images, or software installers. For added convenience, you can pause and resume transfers if your internet connection is unstable.
Step 4: Customizing UltraViewer Settings for Optimal Performance
To get the most out of your UltraViewer experience, take some time to customize the software’s settings. The “Settings” menu offers a range of options to tailor UltraViewer to your specific needs, from display preferences to security configurations.
Display and Performance Settings
- “Show Remote Wallpaper”: By default, UltraViewer disables the remote device’s wallpaper to improve performance. If you need to see the wallpaper (e.g., for troubleshooting visual issues), check this box.
- “Show Remote Cursor”: Enables you to see the remote user’s cursor during the session, making collaboration easier.
- “Auto-Restart if Cannot Connect”: This new feature automatically restarts UltraViewer if it gets stuck at “Getting ID,” a rare but frustrating issue that previously required manual intervention UltraViewer. To enable it, navigate to the registry key
HKEY_LOCAL_MACHINE\SOFTWARE\WOW6432Node\UltraViewer\AutoRestartIfCannotConnectand set the value to 1. - “Connect Using Port”: By default, UltraViewer uses port 2112 for connections. If your firewall blocks this port, you can change it to an alternative port in the settings UltraViewer.
Security Settings
Security is a top priority for remote access software, and UltraViewer offers several features to protect your sessions:
- “Custom Password”: Set a permanent password for unattended access (ideal if you need to access your own computer remotely without someone being present to grant permission). To set it, click the golden key icon in the main window, enter your desired password, and click “OK” .
- “Blacklist/Whitelist”: Restrict access to your computer by adding specific IDs to a blacklist (blocked) or whitelist (allowed). Recent updates added an admin privilege check for these lists, ensuring only authorized users can modify them .
- “Captcha/Security Check”: UltraViewer now includes a captcha feature to prevent unauthorized connection attempts, adding an extra layer of protection against brute-force attacks UltraViewer.
- “Random Passwords”: The software generates random passwords with a minimum length of 5 digits by default, reducing the risk of password guessing UltraViewer.
Language and Accessibility Settings
UltraViewer supports multiple languages, including English, Italian, French, Bahasa Indonesia, Thai, Korean, and Japanese, with improved translations in recent updates UltraViewer. To change the language:
- Click “Settings” in the main window.
- Select “Language” from the dropdown menu.
- Choose your preferred language and click “OK.” The changes will take effect immediately.
For users with high-DPI displays, UltraViewer now supports DPI scaling above 150%, fixing issues with the chat UI and address book that previously affected usability UltraViewer.
Step 5: Troubleshooting Common UltraViewer Issues
Even with a smooth UltraViewer download and installation, you may encounter occasional issues during use. Below are solutions to the most common problems, based on official support resources UltraViewer.
Stuck at “Getting My ID”
This issue typically occurs due to network problems or outdated software:
- Ensure you’re using the latest version of UltraViewer. If not, visit https://ultraviewer-cn.com to complete a fresh UltraViewer download and update.
- Check your firewall settings to ensure port 2112 (or your custom port) is not blocked. Add UltraViewer_Desktop.exe to your firewall exceptions.
- Disable any VPN or proxy services, as they may interfere with the connection.
- Adjust your proxy settings in UltraViewer: Go to “Settings” > “Options” and select “No Proxy (Connect directly to the internet).”
Connection Timeout
Connection timeouts are often caused by unstable internet or ISP restrictions:
- Perform a ping test to check your network stability: Open Command Prompt, type
ping 8.8.8.8 -t, and press Enter. Look for consistent ping values (1-100ms is ideal) with no timeouts. - Restart your router and modem to refresh your connection.
- Switch to a wired Ethernet connection if you’re using Wi-Fi, as it’s more stable for remote sessions.
- Close bandwidth-heavy applications (e.g., video streaming services, large downloads) to free up internet resources.
- If the issue persists, contact your ISP to inquire about potential restrictions on remote desktop connections.
Installation Failed
If the installer fails to run or complete:
- Disable your antivirus software temporarily (some programs flag UltraViewer as a false positive).
- Ensure you have administrative privileges on your computer.
- Delete the downloaded installer file and restart the UltraViewer download from https://ultraviewer-cn.com.
- If you’re using Windows Server, ensure the IE security dialog is not blocking the installation (recent updates fixed this issue for most users UltraViewer).
Chat Dialog Issues
Some users have reported problems with the chat window, such as it not displaying at full width or jumping to the default position UltraViewer. To fix this:
- Update UltraViewer to the latest version via https://ultraviewer-cn.com.
- Restart the software after updating.
- If the issue continues, adjust your screen resolution or DPI settings.
Conclusion: Unlock Seamless Remote Control with UltraViewer
From a secure UltraViewer download to mastering advanced features like unattended access and file transfer, this guide has covered everything you need to use UltraViewer effectively in 2025. Whether you’re a casual user needing to help a friend or a professional relying on remote access for work, UltraViewer’s combination of simplicity, security, and functionality makes it an excellent choice.
The key to a successful UltraViewer experience is starting with a safe download from the official website https://ultraviewer-cn.com. By avoiding third-party sources, you ensure you’re getting the latest version with all security patches and feature updates. With regular improvements—including microphone support, switch-side control, and auto-restart for connection issues—UltraViewer continues to evolve to meet the needs of its users.
As remote work and collaboration become increasingly common, having a reliable remote desktop tool is more important than ever. UltraViewer’s compatibility with all Windows versions, intuitive interface, and robust feature set make it stand out in a crowded market. By following the steps outlined in this guide, you’ll be able to set up, customize, and troubleshoot UltraViewer with confidence, unlocking a world of seamless remote control.
Don’t wait to experience the convenience of UltraViewer. Head to https://ultraviewer-cn.com to complete your UltraViewer download today and start mastering remote access in minutes. Whether you’re troubleshooting, collaborating, or accessing files from afar, UltraViewer has everything you need to stay connected and productive.