With the deep integration of digital technology and work life, remote control software has been widely used in various scenarios such as technical support, remote office, online teaching, and family assistance. UltraViewer, as a cost-effective remote control tool, has become the first choice of many users due to its advantages of being free, lightweight, and easy to use. However, different user scenarios have different requirements for remote control software. How to complete the UltraViewer download correctly and apply it to specific scenarios has become a problem that many users need to solve. This guide will focus on the UltraViewer download process and provide tailored usage solutions for common scenarios such as technical support, remote office, online teaching, and family assistance. All content is based on the latest 2025 version of UltraViewer, ensuring timeliness and practicality. For the official and safe UltraViewer download, please visit: https://ultraviewer-cn.com.
I. Overview of UltraViewer: Why It Is Suitable for Multiple Scenarios
Before delving into the UltraViewer download and scenario-based applications, let's first have a comprehensive understanding of UltraViewer. Compared with other remote control software on the market, UltraViewer has the following characteristics that make it suitable for multiple scenarios: First, it is free for personal and non-commercial use, which greatly reduces the cost of use for individuals and small teams. Unlike TeamViewer, which charges high subscription fees for commercial use , UltraViewer allows you to use core functions such as remote control, file transfer, and chat for free. Second, it has a simple and intuitive interface, which is easy to learn and use. Even users who have no experience in using remote control software can master its basic operations quickly. Third, it has stable connection performance. After the 2025 version update, UltraViewer has optimized the network connection algorithm and increased server nodes, which greatly improves the stability and speed of cross-region and cross-network connections . Fourth, it supports a variety of practical functions, such as drag-and-drop file transfer, multi-monitor switching, built-in chat, etc., which can meet the needs of different scenarios. Whether you are providing technical support, working remotely, or teaching online, UltraViewer can provide you with reliable remote control services.
II. Detailed UltraViewer Download and Installation Guide: Ensuring Safe and Smooth Use
No matter which scenario you use UltraViewer in, the first step is to complete the UltraViewer download and installation correctly. Choosing the wrong download channel or incorrect installation operation may lead to software failure, malware infection, and other problems. The following is a detailed UltraViewer download and installation guide, helping you complete the process safely and smoothly.
1. Precautions for UltraViewer Download
The most important thing in the UltraViewer download process is to choose the official and safe download channel. At present, there are many third-party download platforms on the Internet that provide UltraViewer download services, but these platforms often bundle adware, malware, or even viruses in the installation package. Once you download and install such a modified installation package, it will not only affect the normal use of UltraViewer but also bring potential risks to the security of your computer and data. Therefore, it is strongly recommended that you complete the UltraViewer download through the official website: https://ultraviewer-cn.com.
In addition, before the UltraViewer download, you need to confirm that your computer meets the minimum system requirements of UltraViewer. The 2025 version of UltraViewer supports Windows 7, Windows 8, Windows 10, Windows 11 and other Windows operating systems, and requires a CPU of 1GHz or higher, 1GB or more of memory, and 100MB or more of free hard disk space. For computers with lower configurations, UltraViewer can also run smoothly because of its lightweight characteristics . If your computer uses a non-Windows operating system (such as macOS or Linux), it should be noted that the current version of UltraViewer does not support these systems . You can choose other remote control software that supports cross-platform use, or install a Windows virtual machine on your computer to run UltraViewer.
2. Step-by-Step UltraViewer Download Process
Step 1: Open your favorite browser, enter the official UltraViewer download link https://ultraviewer-cn.com in the address bar, and press Enter to enter the official website.
Step 2: After entering the official website, you can see the introduction of UltraViewer's functions and advantages on the homepage. The download button is usually located in the prominent position of the homepage, such as the top navigation bar or the center of the homepage. The download button of the official website is usually marked with "Official Download" or "Free Download" to distinguish it from third-party download links.
Step 3: Click the download button, and the browser will automatically start downloading the UltraViewer installation package. The size of the installation package is about 3-5MB, and the download speed is very fast. You can view the download progress in the browser's download manager. During the download process, please do not close the browser or interrupt the network connection, otherwise the download will fail.
Step 4: After the download is complete, find the downloaded installation package in the download folder. The default name of the installation package is "UltraViewer_Setup.exe". Before installation, you can right-click the installation package and select "Scan with Antivirus Software" to ensure that the installation package is safe and free of viruses.
3. Installation Process and Customization Settings
Step 1: Double-click the "UltraViewer_Setup.exe" installation package to start the installation. If the system pops up a User Account Control prompt, click "Yes" to allow the program to run.
Step 2: Select the installation language. The official version of UltraViewer supports multiple languages. You can select English as the installation language (or other languages you are familiar with) and click "Next".
Step 3: Read the end-user license agreement carefully. After understanding the content of the agreement, check "I accept the terms in the license agreement" and click "Next".
Step 4: Customize the installation directory. By default, UltraViewer is installed in the "C:\Program Files\UltraViewer" folder. If you want to change the installation directory, click "Browse", select the target folder (it is recommended to choose a disk with more free space), and click "Next". It should be noted that the installation path should not contain Chinese characters to avoid software runtime errors.
Step 5: Select additional tasks. You can choose to create a desktop shortcut, add UltraViewer to the start menu, and set UltraViewer to start automatically when the system starts. It is recommended to check "Create a desktop shortcut" to facilitate quick startup of the software. For the "Start UltraViewer automatically when Windows starts" option, you can choose whether to check it according to your needs. If you use UltraViewer frequently, checking this option can save the trouble of manual startup; if you use it occasionally, it is not recommended to check it to save system resources.
Step 6: Click "Install" to start the installation. The installation process is very fast, and it will be completed in about 1-2 minutes. During the installation, you can view the installation progress through the progress bar.
Step 7: After the installation is complete, check "Launch UltraViewer" and click "Finish" to start UltraViewer. At this point, the UltraViewer download and installation process is all completed. You can see the UltraViewer shortcut icon on the desktop, and double-click it to start the software at any time later.
III. Scenario-Based UltraViewer Usage Guide
After completing the UltraViewer download and installation, the next step is to apply it to specific scenarios. Different scenarios have different requirements for remote control functions. The following will target four common scenarios: technical support, remote office, online teaching, and family assistance, and provide detailed UltraViewer usage solutions to help you maximize the role of UltraViewer in different scenarios.
1. Scenario 1: Technical Support - Efficient Remote Troubleshooting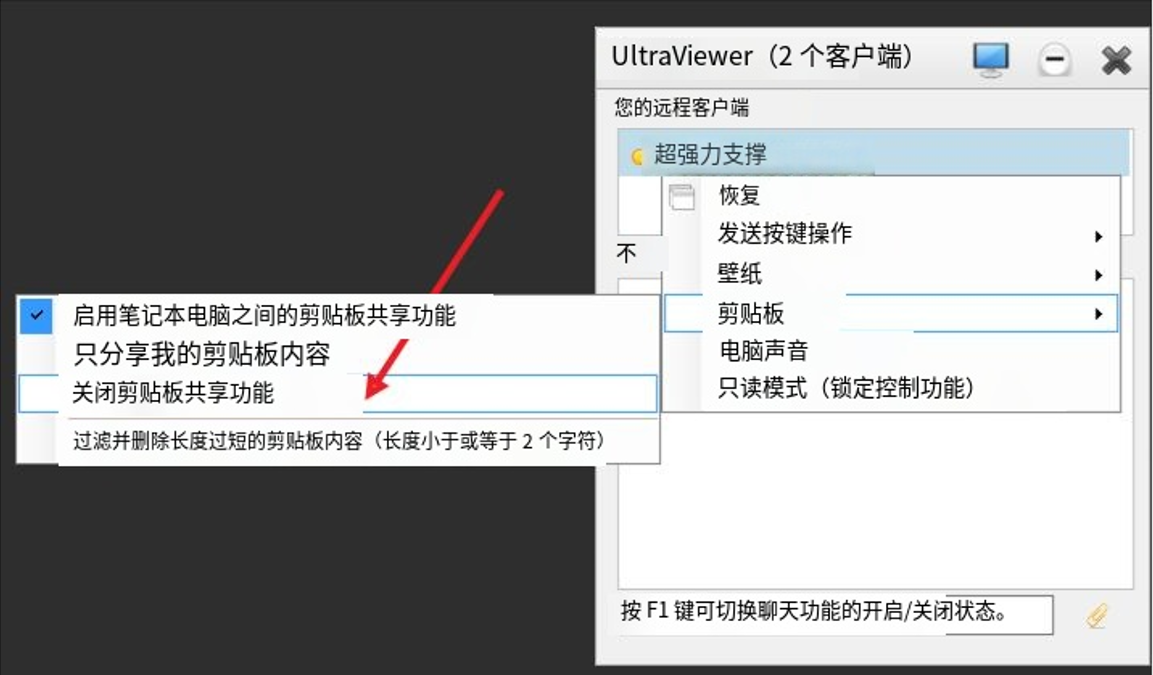
Technical support personnel often need to provide remote troubleshooting services for customers or colleagues. UltraViewer's simple operation and stable connection make it an ideal tool for technical support. The following is the specific usage process and skills:
1. Pre-connection preparation: Before providing technical support, you need to guide the customer to complete the UltraViewer download and installation through the official website https://ultraviewer-cn.com. For customers who are not familiar with computer operations, you can provide them with a detailed download and installation guide (such as the steps introduced in this article) to help them complete the operation quickly.
2. Establishing a remote connection: Ask the customer to open UltraViewer and provide their ID and password. You enter the customer's ID and password in your UltraViewer and click "Connect to partner" to establish a remote connection. After the connection is successful, you can see the customer's computer screen and start remote troubleshooting.
3. Practical skills for technical support:
a. Using the chat function to communicate: During the troubleshooting process, you can use UltraViewer's built-in chat function to communicate with the customer in real time. For example, ask the customer about the specific symptoms of the problem, explain the operation steps you are performing, etc. This avoids the trouble of switching between multiple communication tools and improves the efficiency of troubleshooting.
b. Using the task manager to check the system status: If the customer's computer has problems such as freezing or slow running, you can open the customer's computer task manager through the UltraViewer shortcut key Ctrl+Alt+T to check the CPU, memory, and disk usage, and find out the processes that occupy too many resources. You can end the abnormal processes to solve the problem.
c. Transferring repair tools and drivers: If you need to use repair tools or install drivers to solve the problem, you can use UltraViewer's drag-and-drop file transfer function to transfer the required tools and drivers from your local computer to the customer's computer. This is much more convenient than letting the customer download them by themselves.
d. Screen recording (third-party tool assistance): UltraViewer does not have a built-in screen recording function . If you need to record the troubleshooting process for later summary or training, you can install a lightweight screen recording tool on your local computer and record the UltraViewer remote control window. It should be noted that you need to obtain the customer's consent before recording to protect the customer's privacy.
4. Post-troubleshooting work: After solving the customer's problem, you can disconnect the remote connection through the "Disconnect" button or the shortcut key Ctrl+Alt+Q. It is recommended to ask the customer to test the computer function to ensure that the problem is completely solved. In addition, you can send the troubleshooting steps and precautions to the customer through the chat function for their reference.
2. Scenario 2: Remote Office - Seamless Connection to Work Computers
With the popularity of remote work, more and more employees need to access work computers from home or other places to process work tasks. UltraViewer's unattended access function can help you achieve seamless connection to work computers. The following is the specific setup and usage method:
1. Setting up unattended access on the work computer:
Step 1: Open UltraViewer on the work computer, click the "Tools" menu, and select "Options".
Step 2: In the options window, select the "Security" tab, check "Enable Unattended Access", and set a fixed password. This password is used for remote access when no one is on the work computer, so it is recommended to set a complex password (combining letters, numbers, and symbols) to ensure security.
Step 3: Click "OK" to save the settings. It should be noted that the work computer needs to be kept on and connected to the internet, and UltraViewer needs to be running in the background. You can set UltraViewer to start automatically when the system starts (set in the installation process or through the "Tools" > "Options" > "General" menu) to avoid forgetting to start the software and being unable to access it remotely.
2. Remotely accessing the work computer from the local computer:
Step 1: Complete the UltraViewer download and installation on your local computer (home computer or laptop) through the official websitehttps://ultraviewer-cn.com.
Step 2: Open UltraViewer, enter the ID of the work computer (you need to remember or record the ID of the work computer in advance) and the fixed unattended access password you set in the "Control Remote Computer" area.
Step 3: Click "Connect to partner" to establish a remote connection. Since unattended access is enabled, you do not need the consent of other people on the work computer, and you can directly access and control the work computer.
3. Remote office practical skills:
a. Multi-monitor switching: If the work computer has multiple monitors, you can switch between different monitors through the "View" > "Switch Monitor" menu to view and operate files on different monitors.
b. File synchronization: Use the drag-and-drop file transfer function to transfer the work files completed on the local computer to the work computer, or transfer the files needed for work from the work computer to the local computer. This ensures that you can continue to process work tasks on different computers.
c. Adjusting screen resolution: If the local computer's screen resolution is different from that of the work computer, you can adjust the remote screen resolution through the "View" > "Screen Resolution" menu to make the display more comfortable.
d. Closing unnecessary programs: To improve the speed of remote control, you can close unnecessary programs and background processes on the work computer through the task manager to free up system resources.
4. Security precautions for remote office: 1. Do not disclose the work computer's UltraViewer ID and unattended access password to others to avoid data leakage. 2. It is recommended to change the unattended access password regularly (once a month) to improve security. 3. After completing the remote work, disconnect the UltraViewer connection in time and lock the work computer to prevent others from using it.
3. Scenario 3: Online Teaching - Real-Time Screen Demonstration
Teachers or trainers often need to conduct online teaching and use screen demonstration to explain knowledge points to students. UltraViewer's stable screen transmission and clear display make it suitable for online teaching scenarios. The following is the specific usage method:
1. Pre-class preparation: 1. Guide students to complete the UltraViewer download and installation through the official websitehttps://ultraviewer-cn.com in advance. For students with poor computer operation ability, you can arrange a pre-class training to explain the basic use of UltraViewer. 2. Prepare teaching materials (PPT, documents, etc.) on the teacher's computer and ensure that the network is stable.
2. Conducting online teaching through UltraViewer:
Step 1: The teacher opens UltraViewer and provides their ID and password to the students. It should be noted that if there are multiple students, the teacher needs to establish a remote connection with each student one by one, or let the students connect to the teacher's computer in turn (suitable for small-class teaching). For large-class teaching, UltraViewer may not be the best choice, and you can choose professional online teaching software. But for small-class or one-on-one tutoring, UltraViewer is completely sufficient.
Step 2: Students enter the teacher's ID and password in their UltraViewer and click "Connect to partner" to establish a connection. After the connection is successful, students can see the teacher's computer screen.
Step 3: The teacher opens the teaching materials (PPT, documents, etc.) and starts the explanation. During the explanation, the teacher can use the mouse to point to the key content, and use the keyboard to type notes or commands. Students can use the built-in chat function to ask questions, and the teacher can answer them in real time.
3. Online teaching practical skills:
a. Full-screen mode: The teacher can switch to full-screen mode through the "View" > "Full Screen" menu or the shortcut key Ctrl+Alt+F, so that the students can see the teaching content more clearly.
b. Screen resolution adjustment: To ensure that the teaching content is displayed clearly on the students' computers, the teacher can adjust the screen resolution of their own computer to a common resolution (such as 1920×1080) before the class, so that the students can see the content completely.
c. File sharing: If you need to share teaching materials with students, the teacher can use the file transfer function to send the teaching materials to the students' computers, so that the students can review them after class.
d. Interactive operation: If you need to let students operate the screen to answer questions or complete exercises, the teacher can give the control right to the students (through the "Tools" > "Give Control" menu). After the students complete the operation, the teacher can take back the control right.
4. Post-class summary: After the class, the teacher disconnects the remote connection with the students. It is recommended to collect the students' feedback on the online teaching effect to adjust the teaching method and content.
4. Scenario 4: Family Assistance - Helping Relatives and Friends Solve Computer Problems
Many elderly people or people who are not familiar with computers often encounter various computer problems in daily use, and they need the help of relatives and friends. UltraViewer's simple operation makes it very suitable for family assistance scenarios. The following is the specific usage process:
1. Guiding relatives and friends to complete UltraViewer download and installation:
Since relatives and friends may not be familiar with computer operations, you need to guide them to complete the UltraViewer download and installation step by step through phone calls or video calls. You can tell them the official UltraViewer download linkhttps://ultraviewer-cn.com, and guide them to click the download button, install the software, and other operations. It is recommended to use simple and easy-to-understand language to avoid using professional terms.
2. Establishing a remote connection and providing assistance:
Step 1: Ask your relatives and friends to open UltraViewer and tell you their ID and password.
Step 2: You enter their ID and password in your UltraViewer and click "Connect to partner" to establish a remote connection.
Step 3: After the connection is successful, you can see their computer screen and start to solve the problem. For example, help them install software, clean up the computer, solve the problem of unable to open web pages, etc.
3. Family assistance practical skills:
a. Simple operation explanation: During the assistance process, you can use the chat function to explain the operation steps to your relatives and friends, so that they can learn how to solve similar problems by themselves in the future.
b. Avoid modifying important settings: When helping relatives and friends solve problems, avoid modifying important system settings at will to prevent new problems. If you need to modify the settings, you should first ask clearly and confirm with them.
c. Install security software: After solving the problem, you can help them install a reliable security software and enable automatic updates to prevent the computer from being infected with viruses in the future.
4. Post-assistance work: After solving the problem, disconnect the remote connection. You can call your relatives and friends to confirm that the problem is solved and ask if they have other questions.
IV. UltraViewer Security Settings and Usage Precautions
Remote control software involves computer security and data privacy, so it is very important to master UltraViewer's security settings and usage precautions. The following will introduce UltraViewer's security functions and key precautions to help you use UltraViewer safely.
1. UltraViewer Security Functions
a. Dynamic password: UltraViewer's default password is dynamic, which will change automatically every time the software is restarted. This function can effectively prevent others from accessing your computer without permission through the old password.
b. Unattended access password: The unattended access password set by the user is fixed, but it is encrypted and stored, which is difficult to be cracked. It is recommended to set a complex password to improve security.
c. Access permission control: When allowing others to control your computer, you can choose to grant "View Only" permission (the other party can only view your screen and cannot operate) or "Full Control" permission (the other party can operate your computer). You can set it through the "Tools" > "Options" > "Security" menu.
d. Access log: UltraViewer can record all remote access records, including access time, accessor ID, and operation content. You can view the access log through the "Tools" > "Access Log" menu, which is convenient for checking abnormal access.
2. UltraViewer Usage Precautions
a. Do not disclose ID and password at will: Your UltraViewer ID and password are the keys to remote access to your computer. Do not disclose them to strangers to avoid being accessed by others without permission and causing data leakage or computer damage.
b. Confirm the identity of the accessor: When allowing others to access your computer remotely, you must confirm the identity of the other party to avoid being accessed by impostors. For example, before accepting the connection request, you can call the other party to confirm.
c. Close unnecessary permissions: When using UltraViewer, only grant the necessary permissions to the other party. For example, if you only need the other party to view your screen, you can grant "View Only" permission instead of "Full Control" permission.
d. Update UltraViewer in time: The official will continuously update UltraViewer to fix security vulnerabilities and improve software performance. You should update UltraViewer to the latest version in time through the "Help"