2025 UltraViewer Download & Complete User Tutorial: Master Remote Control Effortlessly
In the era of widespread remote work and global collaboration, reliable remote control software has become an indispensable tool for both individuals and businesses. Whether you need to provide technical support to family and friends, access your office computer from home, or collaborate with team members across different locations, a lightweight, secure, and easy-to-use remote access solution can significantly boost efficiency. UltraViewer stands out among numerous remote control tools with its compact size, free personal usage, stable connection, and user-friendly interface. To unlock its full potential, the first crucial step is to complete a safe and correct UltraViewer download from official channels. This 2025 updated tutorial will guide you through every aspect of UltraViewer, from the importance of choosing the right UltraViewer download source, step-by-step download and installation processes for different Windows systems, basic remote control operations, advanced functional applications, to troubleshooting common issues. By the end of this tutorial, you will be able to use UltraViewer proficiently for various remote access scenarios.
Chapter 1: Why Choose UltraViewer? The Necessity of a Safe UltraViewer Download
Before diving into the UltraViewer download and usage details, it’s essential to understand why UltraViewer has become a preferred choice for millions of users worldwide. In today’s digital landscape, remote access tools are abundant, but many come with limitations such as complex operations, high costs, poor compatibility, or security risks. UltraViewer addresses these pain points effectively, making it a reliable option for both personal and professional use. And a safe UltraViewer download is the foundation to enjoy all these advantages without encountering malware, adware, or version incompatibility issues.
1.1 Core Advantages of UltraViewer
UltraViewer’s popularity stems from its practical features and user-centric design. Here are its key advantages that make the UltraViewer download worthwhile:
- Free for Personal Use: Unlike many remote control software that requires a subscription fee even for basic personal use, UltraViewer offers full free access for individual users. There is no limit on the number of remote control sessions, no sudden disconnections prompting for payment, and no hidden charges, making it ideal for helping family and friends solve computer problems or accessing personal files remotely .
- Lightweight and Efficient: With a file size of only about 1.3 MB, UltraViewer is extremely lightweight and won’t occupy much system resources . The UltraViewer download and installation process takes only a few seconds, even on low-configuration computers, and it runs smoothly without slowing down the host or remote devices.
- Easy Installation and Operation: UltraViewer features a simple and intuitive interface. Even users with no prior experience in remote control tools can complete the UltraViewer download, installation, and remote connection in minutes. The built-in chat box also facilitates real-time communication during remote sessions, enhancing the efficiency of technical support or collaboration .
- Wide Windows Compatibility: UltraViewer supports almost all Windows operating systems, including Windows XP, 7, 8, 10, and the latest Windows 11 (both 32-bit and 64-bit versions) . This broad compatibility ensures that most users can complete the UltraViewer download and use it without system compatibility issues.
- Secure Remote Connection: UltraViewer uses advanced encryption technology to protect data transmission during remote sessions, preventing unauthorized access to sensitive information. When you complete the UltraViewer download from the official channel, you can be assured of the software’s security and reliability.
- Rich Practical Functions: In addition to basic remote control, UltraViewer also supports file transfer between local and remote computers, screen sharing, remote printing, and multi-user simultaneous access to the same remote device, meeting various remote collaboration needs .
1.2 Risks of Unauthorized UltraViewer Download Channels
While UltraViewer is excellent software, the choice of download channel directly affects your user experience and device security. Many third-party websites offer so-called "UltraViewer download" links, but these are often accompanied by risks:
- Malware and Adware Bundling: Third-party download sites may modify the original UltraViewer installation package, bundling it with malware, adware, or potentially unwanted programs (PUPs). These malicious programs can steal your personal information, damage your device, or constantly pop up annoying ads .
- Outdated Versions: Unauthorized channels often fail to update the UltraViewer download package in a timely manner, providing outdated versions that lack the latest security patches and new features. Using outdated versions may lead to connection instability, functional limitations, or security vulnerabilities.
- Counterfeit Software: Some malicious websites may disguise malware as UltraViewer, tricking users into downloading and installing it. These counterfeit programs can take full control of your device, resulting in serious data loss and security risks.
Therefore, to ensure a safe and smooth user experience, it is crucial to complete the UltraViewer download through official or trusted channels. The following chapters will detail the official UltraViewer download methods for different Windows systems.
Chapter 2: UltraViewer Download Guide 2025: Official Channels and Step-by-Step Operations
As mentioned earlier, the UltraViewer download channel is critical to security and usability. This chapter will focus on the official UltraViewer download methods for various Windows versions (Windows 11, 10, 8, 7, XP), as well as precautions during the download process. Whether you are using a 32-bit or 64-bit system, you can find the most suitable UltraViewer download solution here.
2.1 Pre-Download Preparation
Before starting the UltraViewer download, it is recommended to complete the following preparations to avoid download failures or installation issues:
- Check System Requirements: UltraViewer has very low system requirements. For Windows users, the minimum requirements are: 1 GHz or higher processor, 2 GB or more RAM, at least 100 MB of free hard disk space, and a stable internet connection (wired or wireless) . Ensure your device meets these requirements. For Windows 11 users, there is no additional special requirement; UltraViewer is fully compatible with Windows 11 .
- Close Antivirus Software Temporarily (If Necessary): Some antivirus programs may mistakenly flag the official UltraViewer download package as a potential threat and block the download or installation process. If you encounter such a situation, you can temporarily close the antivirus software before the UltraViewer download and installation, and remember to enable it again after the process is completed.
- Confirm Network Stability: A stable internet connection ensures the smooth progress of the UltraViewer download. It is recommended to use a wired network or a high-speed Wi-Fi connection to avoid download interruptions due to network fluctuations. If the network is unstable, you can choose to download the offline installation package for a more reliable experience.
2.2 Official UltraViewer Download Methods for Different Windows Versions
UltraViewer’s official website provides the latest version of the installation package, which can automatically adapt to different Windows system versions and bit depths. The following are the detailed UltraViewer download steps for common Windows systems:
2.2.1 UltraViewer Download for Windows 11 (32-bit/64-bit)
Windows 11 is the latest mainstream operating system, and UltraViewer has fully adapted to its features. Follow these steps to complete the UltraViewer download:
- Open your preferred browser (such as Microsoft Edge, Google Chrome, or Mozilla Firefox) on your Windows 11 computer.
- Type the official UltraViewer website address into the address bar: https://www.ultraviewer.net. Press Enter to access the official website. It is recommended to bookmark the official website to avoid accessing counterfeit sites by mistake in the future.
- On the official website’s homepage, you will see a prominent "Download" button (usually in green or blue). The official website will automatically detect your Windows 11 system version (32-bit or 64-bit) and the corresponding UltraViewer installation package .
- Click the "Download" button. A pop-up window will appear asking you to save the file. Choose a convenient save location (such as the "Downloads" folder on your desktop or C drive), and click "Save" to start the UltraViewer download. The file name is usually "UltraViewer_setup_6.6_en.exe" (the version number may be updated, but the format is similar) .
- Wait for the download to complete. Due to the small file size (about 1.3 MB), the UltraViewer download process usually takes only a few seconds to a minute, depending on your network speed.
Alternative Method: Microsoft Store Download
If you cannot access the official website or prefer to download software through the Microsoft Store, you can also complete the UltraViewer download via the Microsoft Store:
- Click the "Start" button on the Windows 11 taskbar, find and open the "Microsoft Store" app.
- Type "UltraViewer" into the search box at the top of the Microsoft Store interface and press Enter.
- In the search results, find the UltraViewer app developed by "UltraViewer Official" (verify the developer to avoid counterfeit apps). Click the "Get" or "Install" button to start the automatic UltraViewer download and installation. This method does not require manual configuration and is more convenient for users without administrator rights .
2.2.2 UltraViewer Download for Windows 10/8/7
The UltraViewer download process for Windows 10, 8, and 7 is basically the same as for Windows 11. The official website will automatically detect your system version and provide the appropriate installation package. Here are the key steps:
- Open your browser and visit the official UltraViewer website: https://www.ultraviewer.net.
- Click the "Download" button on the homepage. The website will automatically identify your Windows version (10/8/7) and bit depth (32-bit/64-bit), and start downloading the corresponding UltraViewer installation package.
- Choose a save location and wait for the download to complete. For Windows 7 users, ensure that your system has installed the necessary updates to avoid compatibility issues during installation.
Note for Windows XP Users: UltraViewer also supports Windows XP. However, since Windows XP is an outdated system with potential security risks, it is recommended to upgrade to a newer Windows version if possible. If you must use Windows XP, you can still complete the UltraViewer download through the official website, and the installation package will automatically adapt to the Windows XP system .
2.2.3 UltraViewer Offline Download for Unstable Networks
If your network connection is unstable and you often encounter download interruptions, you can choose the UltraViewer offline installation package for download. The offline installation package is a complete installation file that can be installed without an internet connection after download. Here’s how to get it:
- Visit the official UltraViewer website and scroll to the bottom of the homepage.
- Find the "Offline Installation Package" section, select the appropriate version according to your system (Windows 11/10/8/7/XP, 32-bit/64-bit), and click the download link.
- Save the offline installation package to your local disk or USB flash drive. The offline package size is slightly larger than the online installation package (about 3-4 MB), but it is more reliable for unstable networks .
2.3 Precautions for UltraViewer Download
During the UltraViewer download process, pay attention to the following points to ensure a safe and smooth experience:
- Verify the Official Website Address: The only official UltraViewer website is https://www.ultraviewer.net. Be wary of fake websites with similar domain names (such as adding numbers or misspelling letters). Always check the domain name carefully before clicking the download button .
- Do Not Click Random Ads: Some third-party advertising pop-ups may appear during the browser access process. Do not click these ads, as they may redirect you to malicious download pages. Focus on the official download button on the UltraViewer official website.
- Check File Integrity After Download: After the UltraViewer download is complete, you can check the file size and MD5 value (if provided by the official website) to ensure the file is not corrupted or modified. If the file size is significantly smaller than the official stated size, re-download it.
Chapter 3: Step-by-Step UltraViewer Installation Guide 2025
After completing the UltraViewer download, the next step is the installation process. UltraViewer’s installation is simple and straightforward, and even users with no technical experience can complete it quickly. This chapter will detail the installation steps for different Windows systems, as well as custom settings and common installation issues.
3.1 General Installation Steps for Windows Systems
The basic installation process of UltraViewer is similar across various Windows versions. Here are the general steps:
- Locate the UltraViewer installation package you just downloaded (usually in the "Downloads" folder by default). Double-click the .exe file (such as UltraViewer_setup_6.6_en.exe) to launch the installation wizard .
- If a User Account Control (UAC) pop-up appears on your computer, asking "Do you want to allow this app to make changes to your device?", click "Yes" to grant administrator privileges. This is necessary for the installation program to modify system files and complete the installation .
- The UltraViewer installation wizard will appear. Click the "Next" button to proceed to the next step .
- Read the End User License Agreement carefully. After confirming, check the box "I accept the terms in the license agreement" and click "Next".
- Choose the installation location. By default, UltraViewer is installed in the "C:\Program Files\UltraViewer" folder. If you want to change the installation path (for example, to avoid occupying C drive space), click the "Browse" button, select a new folder (such as D:\Software\UltraViewer), and then click "Next" .
- Select the start menu folder. The default setting is "UltraViewer", which can be kept unchanged. Click "Next".
- Additional tasks: Check the "Create a desktop shortcut" box to create a shortcut on the desktop for easy future launches. You can also choose whether to check "Launch UltraViewer after installation" (it is recommended to check this option to start the software immediately after installation). Click "Next" .
- Click the "Install" button to start the installation. The installation process will take 1-3 seconds (due to the small file size), and you can see the progress bar on the interface .
- After the installation is complete, click the "Finish" button. If you checked "Launch UltraViewer after installation", the software will automatically start .
3.2 Custom Installation Settings for Different Needs
During the installation process, you can make appropriate custom settings according to your actual needs to optimize the user experience:
- Installation Path Selection: For users with limited C drive space, it is recommended to install UltraViewer on a non-system disk (such as D drive or E drive). This can reduce the burden on the system disk and avoid affecting system performance.
- Desktop Shortcut Creation: Creating a desktop shortcut is highly recommended for frequent users, as it allows you to launch UltraViewer with one click without searching for the program in the start menu.
- Automatic Startup Setting: If you need to use UltraViewer frequently, you can set it to start automatically with the system. After installing UltraViewer, open the software, go to "Settings" > "General", and check "Run UltraViewer when Windows starts". Note that this will increase system startup time slightly.
3.3 Common UltraViewer Installation Issues and Solutions
Although UltraViewer’s installation process is simple, you may encounter some issues d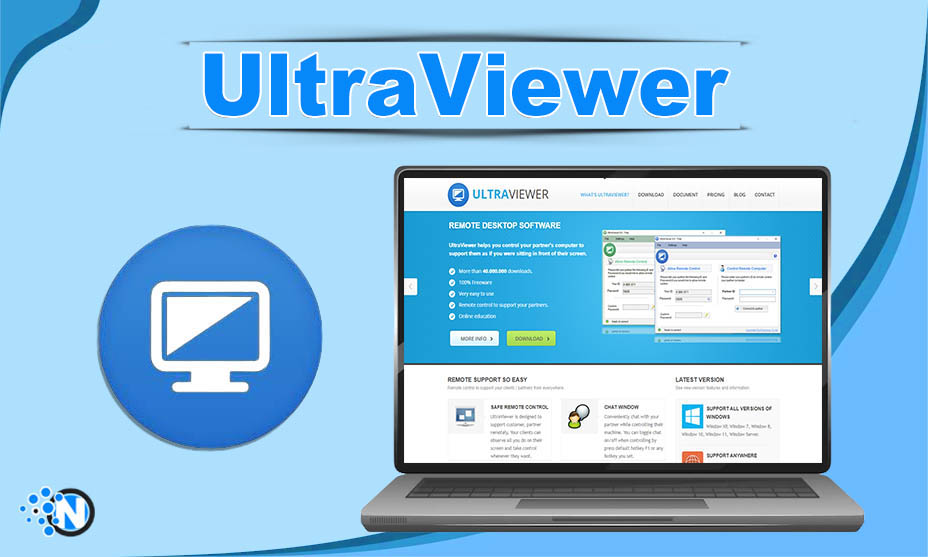 ue to system environment or other factors. Here are the most common installation problems and their solutions:
ue to system environment or other factors. Here are the most common installation problems and their solutions:3.3.1 Installation Failed: Permission Denied
Problem Description: When launching the installation package, a prompt appears saying "Insufficient permissions to install UltraViewer" or the installation program fails to start.
Solution:
- Right-click the UltraViewer installation package and select "Run as administrator" to grant full installation permissions .
- If you are using a work computer and do not have administrator rights, ask your IT department for permission, or use the Microsoft Store to download and install UltraViewer (this method does not require administrator rights) .
- Check if other users are using the computer. If so, log out of other user accounts and try installing again with your own account.
3.3.2 Installation Interrupted by Antivirus Software
Problem Description: During the installation process, the antivirus software pops up a warning and blocks the installation, or deletes the installation package directly.
Solution:
- Temporarily disable the real-time protection function of the antivirus software. Different antivirus software has different operation methods; generally, you can find the disable option in the software’s main interface or system tray icon.
- Re-launch the UltraViewer installation package and complete the installation as soon as possible.
- After the installation is successful, re-enable the antivirus software’s real-time protection function, and add UltraViewer to the antivirus software’s trusted list to avoid being blocked again when using it.
3.3.3 Installation Completed but UltraViewer Cannot Be Launched
Problem Description: The installation process shows "Completed successfully", but clicking the desktop shortcut or program icon does not launch UltraViewer.
Solution:
- Check if your system meets the minimum requirements. For example, Windows XP users need to ensure that the system has installed Service Pack 3 and necessary runtime libraries.
- Right-click the UltraViewer shortcut, select "Properties" > "Compatibility", check "Run this program in compatibility mode for", and select a compatible system version (such as Windows 7 for Windows 11 users with compatibility issues). Click "Apply" and "OK", then try launching again.
- Uninstall the current UltraViewer, re-download the latest version from the official website, and reinstall it. This can solve the problem caused by a corrupted installation package.
3.3.4 Error Code During Installation (Such as Error 1001, 2003)
Problem Description: An error code is displayed during installation, and the installation cannot continue.
Solution:
- Error 1001 (Missing Runtime Libraries): Download and install the Microsoft Visual C++ Redistributable Package (both 32-bit and 64-bit versions) from the Microsoft official website, then re-install UltraViewer.
- Error 2003 (File Corruption): Delete the current installation package, re-complete the UltraViewer download from the official website, and ensure the download process is not interrupted. Then reinstall.
- If the error persists, restart your computer and try installing again. Restarting can solve temporary system file conflicts.