In today’s digital age, remote control software has become an indispensable tool for both personal and professional use. Whether you need to assist a family member with computer issues from afar, collaborate with colleagues on a project across different locations, or access your home computer while traveling, a reliable remote desktop solution can save time, reduce costs, and boost productivity. Among the numerous options available, UltraViewer stands out as a free, user-friendly, and feature-rich choice that has gained popularity among millions of users worldwide. This comprehensive guide will walk you through every aspect of UltraViewer, from a successful UltraViewer download to mastering its advanced features, ensuring you make the most of this powerful tool in 2025.
What is UltraViewer and Why Choose It?
UltraViewer is a lightweight yet robust remote control software designed to facilitate seamless connections between computers. Developed with both individual users and businesses in mind, it offers a range of features that balance functionality and ease of use. Unlike some premium remote control tools that come with a hefty price tag, UltraViewer provides core features completely free of charge, making it accessible to anyone in need of remote access solutions.
One of the key reasons to choose UltraViewer is its wide compatibility with Windows operating systems. From older versions like Windows XP to the latest Windows 11 and Windows Server editions, UltraViewer runs smoothly on most Windows devices, ensuring you can connect with almost any computer you need to access UltraViewer. Additionally, the software is regularly updated to fix bugs, enhance security, and introduce new features, keeping it relevant and reliable in an ever-evolving tech landscape. The 2025 version (6.6.124) includes notable improvements such as microphone support, switch-side control, lock screen functionality, and the ability to copy-paste between multiple controlled devices, making it more versatile than ever before UltraViewer.
Another advantage of UltraViewer is its intuitive interface. Even if you have little to no experience with remote control software, you can quickly learn how to use its basic functions, such as initiating a connection, sharing files, and using the built-in chat feature. For more advanced users, UltraViewer offers customization options like custom relay server configuration and individual display settings, allowing you to tailor the software to your specific needs UltraViewer. Security is also a top priority for UltraViewer, with features like captcha verification, random password generation (minimum 5 digits), and connection logs that help protect against unauthorized access UltraViewer.
Whether you’re a tech support professional, a remote worker, or someone who simply needs to help a loved one with their computer, UltraViewer provides a cost-effective and efficient solution. Its combination of free access, broad compatibility, regular updates, and user-friendly design makes it a top choice for remote control needs.
Preparing for UltraViewer Download: System Requirements & Precautions
Before you proceed with UltraViewer download, it’s important to ensure your device meets the necessary system requirements and that you take steps to download the software safely. This will help avoid compatibility issues, security risks, and installation errors.
System Requirements
UltraViewer is designed to be lightweight, so it doesn’t require high-end hardware to run effectively. For Windows users, the minimum requirements include:
- Operating System: Windows XP, Windows 7, Windows 8, Windows 10, Windows 11, or any Windows Server edition UltraViewer.
- RAM: At least 512 MB (1 GB or more recommended for smoother performance, especially when running multiple instances).
- Storage Space: A minimum of 50 MB of free disk space for installation.
- Internet Connection: A stable internet connection (broadband recommended) for remote connections.
It’s important to note that UltraViewer currently only supports Windows operating systems. If you’re using a Mac, you’ll need to use a Windows emulator like Parallels Desktop, VMware Fusion, or VirtualBox to run UltraViewer, as the developer is still working on a native Mac version . Linux users should check the official UltraViewer website for detailed installation instructions using terminal commands .
Safety Precautions for UltraViewer Download
To ensure a safe and secure UltraViewer download, follow these key precautions:
- Always download from the official website: The safest way to get UltraViewer is by visiting the official site (https://www.ultraviewer.net) and clicking the “Free Download” button UltraViewer. Avoid third-party websites, as they may offer modified versions of the software that contain malware, viruses, or adware.
- Verify the file integrity: After downloading, check the file size and version to ensure it matches the information on the official website. The latest version as of 2025 is 6.6.124, so make sure you’re not downloading an outdated version UltraViewer.
- Disable unnecessary antivirus temporarily (if needed): Some antivirus programs may flag UltraViewer as a potential threat due to its remote control capabilities. If this happens, you can temporarily disable your antivirus software during installation (ensure you trust the source first) and re-enable it afterward. You can also add UltraViewer to your antivirus whitelist to prevent future issues.
- Check for system updates: Before installing UltraViewer, ensure your Windows operating system is up to date. This helps resolve compatibility issues and ensures you have the latest security patches installed.
By following these precautions, you can ensure that your UltraViewer download is safe and that the software will run smoothly on your device.
Step-by-Step UltraViewer Download & Installation Guide
Now that you’ve prepared your device and taken the necessary safety precautions, it’s time to proceed with the UltraViewer download and installation. This step-by-step guide will walk you through the process, making it easy even for beginners.
Step 1: Access the Official UltraViewer Website
Open your preferred web browser (such as Google Chrome, Mozilla Firefox, or Microsoft Edge) and enter the official UltraViewer URL: https://www.ultraviewer.net. Once the page loads, you’ll see a prominent “Free Download” button on the homepage. This button is typically located at the top of the page or in the center, making it easy to find UltraViewer.
Step 2: Initiate the UltraViewer Download
Click on the “Free Download” button to start the download process. The website will automatically detect your operating system (e.g., Windows 11) and provide the appropriate version of UltraViewer for your device . The download should start immediately, but if it doesn’t, you may need to click a secondary link labeled “Download Now” or “Retry” if the first attempt fails.
The download file size is relatively small (around 5-10 MB), so it should complete quickly even with a slow internet connection. You can monitor the download progress in your browser’s download manager, which is usually located at the bottom of the window or in the browser’s menu.
Step 3: Locate the Downloaded Installer File
Once the UltraViewer download is complete, navigate to the folder where your browser saves downloaded files. By default, this is usually the “Downloads” folder on your computer (you can access it by pressing Windows + E and selecting “Downloads” from the left sidebar). The installer file will typically be named “UltraViewer_setup.exe” or similar, with the version number included (e.g., “UltraViewer_6.6.124_setup.exe”).
Step 4: Run the Installer and Follow the Setup Wizard
Double-click on the installer file to launch the UltraViewer setup wizard. A User Account Control (UAC) prompt may appear, asking for permission to make changes to your device. Click “Yes” to proceed .
The setup wizard will guide you through the installation process with simple, easy-to-follow steps:
- Language Selection: Choose your preferred language from the dropdown menu (UltraViewer supports multiple languages, including English, Italian, French, Bahasa Indonesia, Thai, Korean, and Japanese, with improved translations in the 2025 version UltraViewer). Click “OK” to continue.
- License Agreement: Read the end-user license agreement (EULA) carefully. To proceed, check the box next to “I accept the agreement” and click “Next.”
- Destination Folder: Choose where you want to install UltraViewer. The default folder is usually “C:\Program Files (x86)\UltraViewer,” but you can click “Browse” to select a different location. Click “Next” once you’ve selected the folder.
- Additional Tasks: You may be given the option to create a desktop shortcut or add UltraViewer to your startup programs. Select the options that best suit your needs and click “Next.”
- Install: Click the “Install” button to begin the installation. The progress bar will show you how much of the installation is complete. This process should take less than a minute.
- Finish: Once the installation is complete, you can choose to launch UltraViewer immediately by leaving the “Launch UltraViewer” box checked. Click “Finish” to close the setup wizard.
Step 5: Verify the Installation
After launching UltraViewer, you should see the main interface, which displays your unique ID and a random password. This confirms that the installation was successful. Take a moment to familiarize yourself with the interface—you’ll see buttons for “Connect,” “File Transfer,” “Chat,” and “Settings” prominently displayed, making it easy to access key features UltraViewer.
If you encounter any issues during the installation (such as error messages, slow installation, or the software failing to launch), refer to the troubleshooting section later in this guide for solutions.
Getting Started with UltraViewer: Basic Features & Operations
Now that you’ve completed the UltraViewer download and installation, it’s time to learn how to use its basic features. This section will cover the essential operations you need to know to start using UltraViewer effectively.
Understanding the UltraViewer Interface
The UltraViewer main interface is designed to be simple and intuitive, with all key features easily accessible:
- Your ID and Password: Located at the top of the interface, this is your unique identifier that allows others to connect to your computer. The password is randomly generated (minimum 5 digits for security UltraViewer) and changes each time you launch the software, ensuring unauthorized access is prevented.
- Partner ID and Password Fields: Below your ID and password, there are two fields where you can enter the ID and password of the computer you want to control.
- Connect Button: Click this button after entering the partner’s ID and password to initiate a remote connection.
- File Transfer Button: This allows you to send files to the remote computer without initiating a full remote control session.
- Chat Button: Opens the built-in chat feature, which you can use to communicate with the user of the remote computer while controlling it.
- Settings Button: Accesses the settings menu, where you can customize UltraViewer’s features, such as hotkeys, display settings, and security options.
- Address Book: A feature that lets you save frequently used IDs and passwords for quick access in the future.
Initiating a Remote Connection
To connect to another computer using UltraViewer, follow these steps: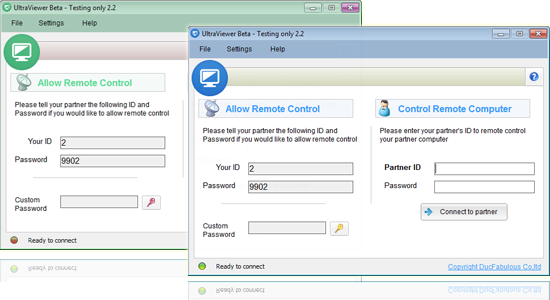
- Ask the user of the remote computer to complete the UltraViewer download and installation (if they haven’t already) and share their ID and password with you. They can find this information on their UltraViewer main interface UltraViewer.
- On your UltraViewer interface, enter the partner’s ID in the “Partner ID” field and their password in the “Password” field.
- Double-check the information to ensure it’s correct (typos can prevent a successful connection) and click the “Connect” button.
- The remote user will receive a prompt asking for permission to allow the connection. They need to click “Allow” to grant access.
- Once permission is granted, you’ll be able to see and control the remote computer’s screen in real time. The remote user will be able to see your cursor movements and actions, ensuring transparency .
Using Basic Features During a Remote Session
Once connected, you can use the following basic features to enhance your remote control experience:
- Chat Feature: Press the F1 key (default hotkey) to open the chat window, where you can type messages to the remote user UltraViewer. Press F1 again to close the window. This is useful for communicating instructions or clarifying details without needing a separate messaging app.
- File Transfer: Click the “File Transfer” button on the UltraViewer toolbar (or use the Ctrl + F hotkey) to open the file transfer window. Select the files you want to send, choose the destination folder on the remote computer, and click “Send.” The remote user can also send files to you using the same method .
- Switch Control Sides: If you need to let the remote user take control of your computer (or vice versa), use the switch-side feature. Click the “Switch” button on the toolbar or use the assigned hotkey to transfer control UltraViewer.
- Lock Screen: To protect the remote computer’s privacy during the session, use the lock screen feature. Click the “Lock Screen” button to prevent the remote user from accessing their keyboard and mouse while you’re in control UltraViewer.
- Turn On Monitor: If the remote computer’s monitor is off, you can use the “Turn On Monitor” feature to activate it, ensuring you can see the screen clearly UltraViewer.
Ending a Remote Connection
To end a remote session, simply click the “Disconnect” button on the UltraViewer toolbar or close the UltraViewer window. The remote user can also end the session by closing their UltraViewer software UltraViewer. It’s important to end the session when you’re done to prevent unauthorized access, especially if you’re using a public computer.
Mastering Advanced UltraViewer Features (2025 Update)
The latest version of UltraViewer (6.6.124) includes several advanced features that can enhance your remote control experience, whether you’re using it for professional or personal purposes. This section will cover these advanced features and how to use them effectively.
Copy-Paste Between Multiple Controlled Devices
One of the most useful new features in the 2025 version of UltraViewer is the ability to copy-paste text, files, and other content between multiple controlled devices UltraViewer. This is particularly helpful for users who need to control multiple computers at once (e.g., tech support professionals or system administrators). To use this feature:
- Ensure both the controlling computer and all controlled devices have the latest version of UltraViewer (6.6.124 or later) installed UltraViewer.
- Initiate connections to all the devices you want to control.
- Copy the content you want to transfer (using Ctrl + C or right-click > Copy) on one controlled device.
- Switch to another controlled device (or your local computer) and paste the content (using Ctrl + V or right-click > Paste).
This feature eliminates the need to use file transfer for small amounts of data, saving time and streamlining your workflow.
Custom Relay Server Configuration
For users who need faster connection speeds or more control over their remote connections, UltraViewer now offers custom relay server configuration UltraViewer. This feature allows you to set up your own relay server, which can improve connection stability and speed, especially when connecting to devices in different regions. To set up a custom relay server:
- Visit the official UltraViewer website and download the relay server setup files (instructions are available on the site).
- Install the relay server on a dedicated computer or server that has a stable internet connection.
- Open UltraViewer on your controlling computer and go to “Settings” > “Network” > “Custom Relay Server.”
- Enter the IP address and port number of your custom relay server.
- Click “Test Connection” to ensure the server is working correctly.
- Save the settings to start using your custom relay server for remote connections.
This feature is ideal for businesses or organizations that require secure, high-speed remote access for multiple users.
Auto-Restart for Stuck Connections
In rare cases, UltraViewer may get stuck at the “Getting ID” stage when trying to initiate a connection UltraViewer. The 2025 version includes an auto-restart feature that automatically restarts the software to resolve this issue. To enable this feature:
- Press Windows + R to open the Run dialog box.
- Enter “regedit” and press Enter to open the Registry Editor.
- Navigate to the following path: HKEY_LOCAL_MACHINE\SOFTWARE\WOW6432Node\UltraViewer.
- Right-click in the right pane and select “New” > “DWORD (32-bit) Value.”
- Name the new value “AutoRestartIfCannotConnect.”
- Double-click the value and set the data to “1” (to enable) or “0” (to disable).
- Close the Registry Editor and restart UltraViewer for the changes to take effect.
This feature ensures that you don’t have to manually restart UltraViewer when encountering connection issues, saving time and frustration.
Individual Display Settings
UltraViewer now allows you to save individual display settings for different remote devices UltraViewer. This is useful if you regularly connect to devices with different screen resolutions or display configurations. To use this feature:
- Connect to a remote device.
- Adjust the display settings (e.g., screen resolution, scaling, full-screen mode) to your preference.
- Go to “Settings” > “Display” > “Save Individual Display Settings.”
- The settings will be saved for that specific device, so the next time you connect, UltraViewer will automatically apply the saved settings.
This feature eliminates the need to adjust display settings every time you connect to a familiar device, making your remote sessions more efficient.
Logging for Rejected Connections
To enhance security, UltraViewer now logs all rejected connection attempts, with the word “Rejected” included in the log file UltraViewer. This allows you to monitor who is trying to access your computer and identify potential security threats. To access the connection logs:
- Go to “Settings” > “Advanced” > “Logs.”
- Click “Open Log Folder” to view the log files.
- The logs will show the date, time, and ID of the device that attempted to connect, as well as whether the connection was accepted or rejected.
This feature is particularly useful for businesses or users who need to maintain a record of remote access attempts for security or compliance purposes.
Troubleshooting Common UltraViewer Issues
While UltraViewer is generally reliable, you may encounter issues from time to time, especially during the download, installation, or connection process. This section will cover the most common problems and their solutions, helping you resolve issues quickly.
Issue 1: UltraViewer Download Fails or Is Interrupted
If your UltraViewer download fails or is interrupted, try the following solutions:
- Check your internet connection: Ensure you have a stable internet connection. If using Wi-Fi, try switching to a wired connection for better stability.
- Clear your browser cache: Corrupted browser cache can cause download issues. Clear your cache and cookies, then restart your browser and try the download again.
- Use a different browser: If the download fails in one browser, try using a different one (e.g., switch from Chrome to Firefox).
- Download from the mirror link: The official UltraViewer website may provide a mirror link for downloads. If the main download link doesn’t work, try the mirror link.
Issue 2: Installation Errors (e.g., “Setup Failed” or “File Missing”)
If you encounter errors during installation, follow these steps:
- Run the installer as an administrator: Right-click on the installer file and select “Run as administrator” to ensure the software has the necessary permissions to install.
- Disable antivirus software temporarily: As mentioned earlier, some antivirus programs may block the installation. Disable your antivirus temporarily and try installing again.
- Check disk space: Ensure you have enough free disk space (at least 50 MB) for the installation. Delete unnecessary files if needed.
- Re-download the installer: If the installer file is corrupted, the installation will fail. Delete the existing installer and re-run the UltraViewer download to get a fresh copy.
Issue 3: Black Screen When Connecting to a Remote Computer
A black screen is a common issue when using remote control software, and UltraViewer is no exception. To fix this problem:
- Update UltraViewer to the latest version: The black screen issue may be a known bug that has been fixed in the latest update. Ensure both the controlling and remote computers have the latest version (6.6.124) installed .
- Ensure the remote monitor is on: If the remote computer’s monitor is off, you may see a black screen. Ask the remote user to turn on the monitor, or use the “Turn On Monitor” feature in UltraViewer UltraViewer.
- Disable display scaling: On the remote computer, go to “Settings” > “System” > “Display” and disable display scaling. This can resolve compatibility issues with certain graphics cards.
- Restart the remote computer: Sometimes, a simple restart of the remote computer can fix the black screen issue. Ask the remote user to restart their computer and try connecting again.
Issue 4: Cannot Connect to the Remote Computer
If you’re unable to establish a connection, try these solutions:
- Verify the ID and password: Double-check that you’ve entered the correct ID and password for the remote computer. The password is case-sensitive, so ensure caps lock is off.
- Check firewall settings: Firewalls (both Windows Firewall and third-party firewalls) may block UltraViewer’s connection. Add UltraViewer to the firewall whitelist on both the controlling and remote computers.
- Ensure both computers are online: The remote computer must have an active internet connection for the connection to work. Ask the remote user to check their internet connection.
- Use the custom relay server: If you’re having trouble connecting due to network restrictions, set up a custom relay server as described earlier in the guide UltraViewer.
Issue 5: File Transfer Fails
If you’re unable to transfer files between computers, follow these steps:
- Check file size: UltraViewer has a file size limit for transfers (usually around 4 GB). If you’re trying to transfer a larger file, split it into smaller parts first.
- Ensure the destination folder is accessible: The remote user must have write permissions for the destination folder. Ask them to select a different folder (e.g., the Desktop) if the transfer fails.
- Restart the file transfer: Close the file transfer window and try again. Sometimes, network glitches can interrupt transfers.
Tips for Optimizing UltraViewer Performance
To get the best possible performance from UltraViewer, follow these tips:
- Use a high-speed internet connection: A stable broadband connection will ensure smooth remote control and file transfers. Avoid using UltraViewer with a slow or unstable internet connection, as this can cause lag or disconnections.
- Adjust image quality: If you’re experiencing lag, reduce the image quality in UltraViewer’s settings. Go to “Settings” > “Display” > “Image Quality” and select a lower quality (e.g., “Low” or “Medium”). This will reduce the amount of data being transferred, improving speed.
- Close unnecessary programs: On both the controlling and remote computers, close any programs that are not in use. This will free up system resources and improve UltraViewer’s performance.
- Keep UltraViewer updated: Regularly check for updates and install the latest version. Updates often include performance improvements and bug fixes that can enhance the software’s speed and reliability UltraViewer.
- Use a wired connection: If possible, connect both computers to the internet using a wired Ethernet cable. Wired connections are more stable and faster than Wi-Fi, reducing lag and disconnections.
Conclusion
UltraViewer is a powerful, user-friendly, and free remote control software that offers a range of features for both personal and professional use. From the initial UltraViewer download to mastering advanced features like custom relay server configuration and multi-device copy-paste, this guide has covered everything you need to know to use UltraViewer effectively in 2025.
By following the step-by-step instructions for download and installation, understanding the basic and advanced features, and knowing how to troubleshoot common issues, you can make the most of this versatile tool. Whether you’re helping a family member with computer issues, collaborating with colleagues, or accessing your home computer while traveling, UltraViewer provides a reliable and efficient solution.
Remember to always download UltraViewer from the official website to ensure safety, keep the software updated to access the latest features and security patches, and follow the optimization tips to get the best performance. With UltraViewer, remote control has never been easier or more accessible.