In an increasingly connected world, the ability to access and control computers remotely has become a necessity. From IT professionals providing technical support to students collaborating on group projects, remote access software bridges the gap between physical locations. UltraViewer has emerged as a leading solution in this space, offering a perfect balance of functionality, security, and ease of use. This complete guide will walk you through everything you need to know, from finding the official UltraViewer download to mastering advanced features, ensuring you can use UltraViewer with confidence in 2025.
An Overview of UltraViewer: What Makes It Stand Out?
Before we dive into the official UltraViewer download and usage steps, let’s explore what sets this software apart from other remote access tools on the market. UltraViewer has been around for years, and its 持续 development and user-centric design have made it a favorite among both casual and professional users.
Key Features of UltraViewer
UltraViewer packs a punch with features that cater to a wide range of use cases:
- Free for Personal Use: Unlike some remote access tools that require a subscription for basic features, UltraViewer is completely free for personal use. This makes it an excellent choice for individuals who need to connect with friends or family members’ computers.
- Commercial Licensing Options: For businesses and professionals, UltraViewer offers paid plans that unlock additional features such as voice chat, PowerPoint remote control, and priority support. These plans are affordable and scalable, making them suitable for small teams and large enterprises alike.
- Compact and Lightweight: With a file size of just 3.5MB, UltraViewer is one of the smallest remote access tools available. This ensures a fast UltraViewer download and installation process, and it doesn’t slow down your computer or consume excessive resources.
- Multi-Language Support: UltraViewer’s interface is available in over 20 languages, including English, Spanish, French, German, Chinese, and Japanese. This global accessibility makes it a popular choice for international teams and users from diverse backgrounds.
- Reliable Performance: UltraViewer is designed to work well even on low-bandwidth connections, ensuring smooth remote sessions without lag or interruptions. Its efficient coding and optimized data transfer protocols make it ideal for users in areas with limited internet access.
How UltraViewer Compares to Competitors
While there are many remote access tools available, UltraViewer holds its own against popular alternatives like TeamViewer, AnyDesk, and UltraVNC:
- vs. TeamViewer: TeamViewer is a well-known remote access tool, but it’s often criticized for its high cost and resource-intensive nature. UltraViewer offers similar core features for free (for personal use) and has a smaller file size, making it a more accessible option.
- vs. AnyDesk: AnyDesk is another lightweight alternative, but it lacks some of UltraViewer’s collaboration features like built-in chat and multi-monitor support. UltraViewer’s broader compatibility with mobile devices also gives it an edge.
- vs. UltraVNC: UltraVNC is open-source and free, but it has a steeper learning curve and less polished interface. UltraViewer’s user-friendly design and additional features like file transfer and voice communication make it more suitable for beginners.
Official UltraViewer Download: A Step-by-Step Guide
The first and most crucial step in using UltraViewer is to download the software from the official website. Using untrusted sources can lead to malware infections, data breaches, or corrupted software. Below is a detailed guide to the official UltraViewer download process for all major operating systems.
Why Choose the Official UltraViewer Download?
Downloading UltraViewer from the official website (https://www.ultraviewer.net/) ensures you get:
- The latest version of the software with all security patches and new features.
- A clean, malware-free installer without bundled adware or spyware.
- Access to official support and documentation if you encounter issues.
- Compatibility with your operating system, as the official website provides tailored installers for different platforms.
UltraViewer Download for Windows
Windows is the most popular operating system for UltraViewer users, and the official download process is straightforward:
- Open your web browser and go to https://www.ultraviewer.net/en/download.html.
- On the download page, you’ll see two options:
- Install (EXE): This is the full version of UltraViewer, including all features and automatic updates. It’s recommended for most Windows users.
- Portable (ZIP): This version doesn’t require installation and can be run from a USB drive or external hard disk. It’s useful for users who need to use UltraViewer on multiple computers without installing it each time.
- Click the “Download” button next to your preferred option. The download will start immediately, and you’ll see a progress bar in your browser.
- Once the download is complete, locate the file in your “Downloads” folder. For the EXE installer, the file will be named something like “UltraViewer_6.6.124.exe” (depending on the latest version). For the ZIP file, it will be named “UltraViewer_Portable.zip.”
UltraViewer Download for macOS
Mac users can enjoy the same great features as Windows users with the official macOS version of UltraViewer:
- Visit the official UltraViewer download page and scroll down to the macOS section.
- Click the “Download” button next to “Install for macOS.” The DMG file will start downloading.
- Once the download is complete, open the DMG file by double-clicking it. A new window will appear with the UltraViewer icon and the Applications folder icon.
- Drag the UltraViewer icon to the Applications folder to install the software. This process may take a few seconds.
- After installation, you can find UltraViewer in your Applications folder. Double-click it to launch the software.
UltraViewer Download for Linux
Linux users can also access UltraViewer’s remote control features. Here’s how to download and install it:
- Go to the official UltraViewer download page and select the Linux version appropriate for your distribution (32-bit or 64-bit).
- Click the “Download” button to start the download of the DEB or RPM file.
- Once the download is complete, open your terminal and navigate to the “Downloads” folder using the command:
cd ~/Downloads. - Install the file using the appropriate command for your distribution:
- For Debian/Ubuntu-based systems (DEB file):
sudo dpkg -i UltraViewer_Linux.deb - For Fedora/RHEL-based systems (RPM file):
sudo rpm -i UltraViewer_Linux.rpm
- For Debian/Ubuntu-based systems (DEB file):
- If you encounter any dependency errors, resolve them using:
- For Debian/Ubuntu:
sudo apt-get install -f - For Fedora/RHEL:
sudo dnf install -y UltraViewer_Linux.rpm
- For Debian/Ubuntu:
- Once installed, you can launch UltraViewer from your applications menu.
UltraViewer Download for Mobile Devices (Android/iOS)
UltraViewer’s mobile app allows you to control computers remotely or share your mobile screen with a computer. Here’s how to download it:
- Android: Open the Google Play Store, search for “UltraViewer,” and select the official app developed by DucFabulous. Click “Install” to download and install it on your device.
- iOS: Open the App Store, search for “UltraViewer,” and tap the “Get” button to download and install the app. You may need to enter your Apple ID password or use Face ID/Touch ID to confirm.
Detailed Installation Instructions
After completing the official UltraViewer download, the next step is to install the software correctly. Below are detailed installation guides for Windows and macOS, the two most popular operating systems for UltraViewer.
Installing UltraViewer on Windows (EXE Version)
- Locate the downloaded EXE file in your “Downloads” folder and double-click it to launch the installation wizard.
- If Windows Defender or another antivirus program prompts you to allow the app to make changes to your device, click “Yes” to proceed.
- The installation wizard will open. Select your preferred language from the dropdown menu at the top and click “OK.”
- Read the End User License Agreement carefully. To continue with the installation, you must accept the terms by checking the box next to “I accept the agreement.” Click “Next.”
- Choose the installation directory. The default directory is “C:\Program Files\UltraViewer,” but you can change it by clicking “Browse” and selecting a different folder. Click “Next” once you’ve made your selection.
- Select a start menu folder for UltraViewer shortcuts. You can use the default folder or create a new one. Click “Next.”
- Choose additional tasks to customize your installation:
- Create a desktop shortcut: This will add an UltraViewer icon to your desktop for easy access.
- Add UltraViewer to Quick Launch: This will add a shortcut to the Quick Launch bar (Windows 7) or taskbar (Windows 10/11).
- Associate UltraViewer with .uv files: This allows you to open UltraViewer connection files directly by double-clicking them.Check the boxes for the tasks you want and click “Next.”
- Review your installation settings. If everything is correct, click “Install” to start the installation process.
- The installation will take just a few seconds. Once it’s complete, you’ll see a “Completed” screen. Check the box next to “Launch UltraViewer” if you want to open the software immediately. Click “Finish” to exit the wizard.
Installing UltraViewer on Windows (Portable Version)
- Locate the downloaded ZIP file in your “Downloads” folder and right-click it. Select “Extract All” from the context menu.
- Choose a destination folder to extract the files. You can extract them to your desktop, a USB drive, or any other location. Click “Extract.”
- Once the extraction is complete, navigate to the destination folder. You’ll see a file named “UltraViewer.exe.” Double-click this file to launch the portable version of UltraViewer.
- The portable version works the same way as the installed version, but it doesn’t create any shortcuts or modify your system registry. When you’re done using it, simply close the program and delete the folder if you no longer need it.
Installing UltraViewer on macOS
- After dragging the UltraViewer icon to your Applications folder, open the Applications folder and find UltraViewer.
- Double-click the UltraViewer icon to launch the software. macOS may display a warning that “UltraViewer is from an unidentified developer.” This is a standard security feature.
- To resolve this warning, go to “System Preferences” > “Security & Privacy” > “General.” You’ll see a message at the bottom of the window saying “UltraViewer was blocked because it is from an unidentified developer.” Click “Open Anyway” to allow the app to run.
- You may be prompted to enter your macOS administrator password to confirm. Enter your password and click “Unlock.”
- UltraViewer will now launch, and you’ll be able to use all its features. The first time you launch the app, you may be asked to grant permission for screen recording and accessibility. These permissions are necessary for UltraViewer to function properly, so click “Allow” when prompted.
Getting Started with UltraViewer: First-Time Setup
Once you’ve completed the UltraViewer download and installation, it’s time to set up the software for your first remote connection. This section will guide you through the basic configuration and help you understand the main interface.
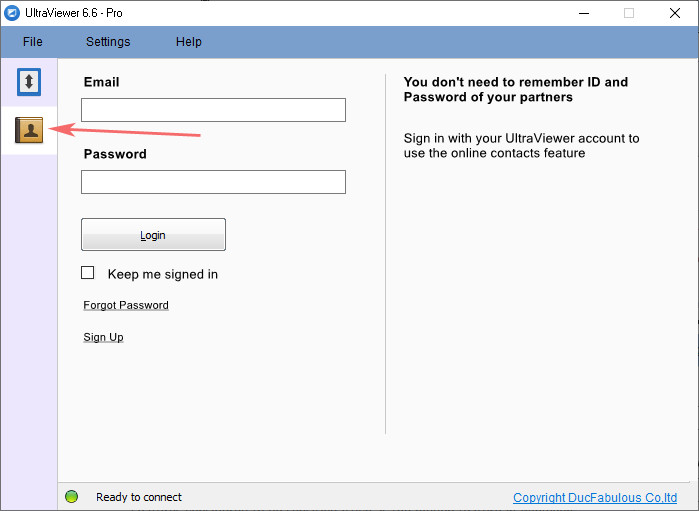
Understanding the Main Interface
When you launch UltraViewer, you’ll see a simple, intuitive interface with two main sections:
- Your ID and Password: This section displays your unique UltraViewer ID and a randomly generated password. This is the information you need to share with others if you want them to control your computer remotely. You can refresh your password by clicking the circular arrow icon next to it.
- Partner’s ID and Password: This section is where you enter the ID and password of the computer you want to control. It also includes three buttons:
- Connect: Initiates a remote control session with the partner’s computer.
- File Transfer: Allows you to transfer files between your computer and the partner’s computer without starting a remote control session.
- Chat: Opens a text chat window to communicate with the partner.
At the top of the window, you’ll find a menu bar with options for “File,” “Edit,” “View,” “Settings,” “Tools,” and “Help.” These menus give you access to advanced features and configuration options.
Configuring Basic Settings
Before making your first connection, take a few minutes to configure the basic settings to suit your needs:
- Language Settings: If you want to change the interface language, click “Settings” > “Language” and select your preferred language from the list. UltraViewer supports over 20 languages, so you’re sure to find one that works for you.
- Display Settings: Click “Settings” > “Display” to customize the remote screen display. You can adjust the screen resolution, enable or disable full-screen mode, and set the color quality. Lowering the color quality can improve performance on slow internet connections.
- Audio Settings: If you’re using the paid version of UltraViewer, you can configure audio settings by clicking “Settings” > “Audio.” You can enable or disable audio transmission during remote sessions and select your preferred microphone and speaker.
- Security Settings: Click “Settings” > “Security” to enhance the security of your remote sessions. You can enable automatic password generation, set a session timeout, and configure permission levels for remote users (e.g., allow or disallow file transfer, screen control, etc.).
Making Your First Remote Connection
Now that you’ve configured the basic settings, it’s time to make your first remote connection. Here’s how to do it:
- To Control Another Computer:
- Ask the person whose computer you want to control to open UltraViewer and share their ID and password with you.
- Enter their ID in the “Partner ID” field in your UltraViewer window.
- Enter their password in the “Password” field.
- Click the “Connect” button.
- The person on the other end will receive a prompt asking for permission to allow the connection. They need to click “Allow” to grant you access.
- Once the connection is established, you’ll see their computer screen in your UltraViewer window. You can use your mouse and keyboard to control their computer just like you would your own.
- To Allow Someone to Control Your Computer:
- Open UltraViewer and share your ID and password with the person who wants to connect.
- When they initiate the connection, you’ll receive a prompt asking for permission. Click “Allow” to grant access, or “Deny” to reject the connection.
- During the session, you can monitor all activities on your screen. If you want to take back control at any time, click the “Take Control” button in the UltraViewer toolbar. You can also end the session by clicking the “Disconnect” button.
Advanced UltraViewer Features You Need to Know
UltraViewer offers more than just basic remote control. Its advanced features can help you work more efficiently, collaborate better, and troubleshoot problems more effectively. Below are some of the most useful advanced features and how to use them.
File Transfer (Without Remote Control)
You don’t need to start a remote control session to transfer files with UltraViewer. The standalone file transfer feature allows you to send and receive files quickly and securely:
- Open UltraViewer and enter the partner’s ID and password in the appropriate fields.
- Click the “File Transfer” button instead of the “Connect” button.
- A file transfer window will open, displaying your local files on the left and the partner’s files on the right.
- To send a file to the partner, select the file from the local files panel and click the right arrow button. To receive a file from the partner, select the file from the partner’s files panel and click the left arrow button.
- The transfer progress will be displayed at the bottom of the window. You’ll receive a notification when the transfer is complete.
This feature is particularly useful for sharing large files that you don’t want to email or upload to a cloud storage service. It’s also more secure than other file transfer methods, as all files are encrypted during transmission.
Multi-Monitor Support
If the remote computer has multiple monitors, UltraViewer allows you to switch between them with ease:
- During a remote control session, click the “Monitor” button in the UltraViewer toolbar.
- A dropdown menu will appear, listing all the monitors connected to the remote computer.
- Select the monitor you want to view or control. The UltraViewer window will switch to display that monitor.
- To view all monitors at once, select “All Monitors” from the dropdown menu. This will display all monitors in a single window, allowing you to switch between them by clicking on the desired monitor.
This feature is invaluable for IT professionals who need to troubleshoot issues on computers with multiple displays, or for anyone who needs to access files or applications on a secondary monitor.
Clipboard Sharing
Clipboard sharing is a handy feature that allows you to copy and paste text, images, and files between your local computer and the remote computer:
- During a remote control session, copy the text, image, or file you want to share from your local computer (using Ctrl+C or Cmd+C).
- Switch to the remote computer’s screen in the UltraViewer window.
- Paste the copied content into the remote computer (using Ctrl+V or Cmd+V).
- You can also copy content from the remote computer and paste it into your local computer using the same method.
This feature eliminates the need to transfer files manually for small amounts of data, saving you time and effort during remote sessions.
Whiteboard Tool
The whiteboard tool allows you to draw, highlight, and annotate the remote computer’s screen, making it easier to explain processes or point out issues:
- During a remote control session, click the “Whiteboard” button in the UltraViewer toolbar.
- A whiteboard toolbar will appear with various drawing tools, including a pen, highlighter, rectangle, circle, and text tool.
- Select the tool you want to use and draw directly on the remote screen.
- To clear the whiteboard, click the “Clear” button in the whiteboard toolbar.
- To close the whiteboard, click the “Whiteboard” button again.
This feature is perfect for technical support sessions, online tutorials, or team meetings where you need to visualize ideas or explain complex concepts.
Voice Chat (Paid Version)
The paid version of UltraViewer includes a voice chat feature that allows you to speak directly with the remote user during a session:
- Upgrade to the paid version of UltraViewer by clicking “Settings” > “Upgrade” and following the prompts to purchase a license.
- During a remote control session, click the “Voice Chat” button in the UltraViewer toolbar.
- A voice chat window will open, and you’ll be able to speak with the remote user using your computer’s microphone and speakers.
- To adjust the volume or mute the microphone, use the controls in the voice chat window.
This feature is particularly useful for technical support sessions where verbal explanations are more effective than text chat, or for team meetings where you need to communicate quickly and efficiently.
Troubleshooting Common UltraViewer Problems
While UltraViewer is generally reliable, you may encounter occasional issues. Below are solutions to some of the most common problems you may face during the UltraViewer download, installation, or usage process.
UltraViewer Download Is Slow
If your UltraViewer download is taking longer than expected, try these solutions:
- Check Your Internet Speed: Use a speed test tool to check your internet connection speed. If your speed is slow, try restarting your router or switching to a different network.
- Download During Off-Peak Hours: Internet speeds are often faster during off-peak hours (late at night or early in the morning). Try downloading UltraViewer during these times to avoid congestion.
- Use a Download Manager: If the download keeps failing or is slow, use a download manager like Internet Download Manager (IDM) to accelerate the download. Most download managers support resuming interrupted downloads, which can save you time.
UltraViewer Won’t Launch After Installation
If UltraViewer doesn’t launch after installation, try these fixes:
- Restart Your Computer: Sometimes, a simple restart can resolve issues with newly installed software. Restart your computer and try launching UltraViewer again.
- Check for Compatibility Issues: Ensure your computer meets the minimum system requirements for UltraViewer. For Windows, you need at least 2GB of RAM and 200MB of free hard disk space. For macOS, you need macOS 10.13 or later.
- Reinstall UltraViewer: If restarting your computer doesn’t work, uninstall UltraViewer and reinstall it. To uninstall UltraViewer on Windows, go to “Control Panel” > “Programs” > “Programs and Features,” select UltraViewer, and click “Uninstall.” On macOS, drag the UltraViewer icon from the Applications folder to the Trash.
Remote Connection Keeps Dropping
If your remote connection keeps dropping, try these solutions:
- Check Your Internet Connection: A unstable internet connection is the most common cause of dropped connections. Use a wired connection instead of Wi-Fi if possible, as wired connections are more reliable.
- Close Background Apps: Close any unnecessary apps running in the background, as they can consume bandwidth and cause the connection to drop. This includes video streaming apps, file downloaders, and cloud storage sync tools.
- Adjust UltraViewer Settings: Lower the screen resolution and color quality in UltraViewer’s display settings to reduce bandwidth usage. This can help stabilize the connection on slow or unstable networks.
- Update UltraViewer: Ensure both the local and remote computers are running the latest version of UltraViewer. Outdated versions may have bugs that cause connection issues.
Unable to Transfer Files
If you’re having trouble transferring files with UltraViewer, try these fixes:
- Check File Size: UltraViewer supports file transfers up to 1TB, but very large files may take a long time to transfer and can sometimes fail. Try splitting large files into smaller parts before transferring them.
- Check File Permissions: Ensure the file you’re trying to transfer isn’t read-only or protected by your operating system. If the file is in a restricted folder, move it to a different folder before transferring.
- Disable Antivirus Software Temporarily: Some antivirus programs may block file transfers 误以为 they’re a threat. Temporarily disable your antivirus software and try transferring the file again. Remember to re-enable your antivirus after the transfer is complete.
- Use the Standalone File Transfer Feature: If you’re having trouble transferring files during a remote control session, try using the standalone file transfer feature instead. This feature is often more reliable for large or multiple files.
Security Tips for Using UltraViewer Safely
Remote access software can be a security risk if not used properly. Follow these tips to ensure your UltraViewer sessions are safe and secure:
- Never Share Your Credentials with Strangers: Your UltraViewer ID and password give others access to your computer, so only share them with people you trust. Be wary of unsolicited requests for remote access, as scammers often use this method to steal personal information.
- Enable Two-Factor Authentication: If available, enable two-factor authentication for your UltraViewer account. This adds an extra layer of security by requiring a verification code in addition to your password.
- Set Strong Passwords: Instead of using the automatically generated password, set a strong, unique password for your UltraViewer sessions. A strong password should be at least 8 characters long and include a mix of letters, numbers, and special characters.
- Monitor Remote Sessions: Always keep an eye on remote sessions when someone is controlling your computer. If you notice any suspicious activity, such as files being deleted or modified without your permission, end the session immediately.
- Update UltraViewer Regularly: Software updates often include security patches that fix vulnerabilities. Make sure you’re running the latest version of UltraViewer by checking for updates regularly.
- Use a Virtual Private Network (VPN): If you’re using UltraViewer on a public Wi-Fi network, use a VPN to encrypt your internet connection. This prevents hackers from intercepting your remote session data.
UltraViewer for Business: How to Use It for Team Collaboration
UltraViewer isn’t just for personal use—it’s also a powerful tool for businesses and teams. Below are some ways businesses can leverage UltraViewer to improve collaboration and productivity:
Technical Support
IT teams can use UltraViewer to provide remote technical support to employees, reducing the need for on-site visits. This saves time and money, and allows issues to be resolved more quickly. IT professionals can troubleshoot problems, install software, and configure settings remotely, without disrupting the employee’s workflow.
Team Collaboration
Teams working on projects can use UltraViewer to collaborate in real time. For example, a designer can share their screen to get feedback on a design, or a developer can demonstrate a new feature to the team. The built-in chat and voice communication features make it easy to discuss ideas and make decisions quickly.
Remote Training
Businesses can use UltraViewer to provide remote training to employees. Trainers can share their screen to demonstrate processes, use the whiteboard tool to highlight key points, and answer questions in real time. This is particularly useful for businesses with remote or distributed teams.
Client Support
Customer service teams can use UltraViewer to provide remote support to clients. This allows them to resolve issues more quickly and efficiently, improving customer satisfaction. For example, a customer service representative can help a client troubleshoot a problem with their software by controlling their computer remotely.
Conclusion
UltraViewer is a versatile, secure, and user-friendly remote access tool that caters to the needs of both individuals and businesses. By following the official UltraViewer download process and using the software correctly, you can enjoy seamless remote control, file transfer, and collaboration features.
Whether you’re a casual user looking to help a friend with their computer, an IT professional providing technical support, or a business owner looking to improve team collaboration, UltraViewer has everything you need. Its compact size, broad compatibility, and advanced features make it a top choice for remote access in 2025.
Remember to prioritize security by downloading UltraViewer from the official website, sharing your credentials only with trusted users, and following best practices for remote sessions. With UltraViewer, you can stay connected and productive no matter where you are in the world.