Introduction: The Rise of UltraViewer in Remote Desktop Software
In today’s digital landscape, remote access tools have become indispensable. Whether you’re helping a family member troubleshoot their computer, collaborating with colleagues across time zones, or managing work files from home, the right remote desktop software can save you time, money, and frustration. Among the many options available, UltraViewer has gained a loyal following for its simplicity, affordability, and constant innovation.
What sets UltraViewer apart is its commitment to user experience and regular updates. The 2025 version introduces game-changing features like microphone support, screen lock, and cross-device copy-pasting, making it more versatile than ever. However, to fully benefit from these features, you need to start with a safe UltraViewer download and proper setup. Many users encounter issues due to downloading from untrusted sources or skipping critical configuration steps, which is why this tutorial is designed to guide you through every phase—from finding the official UltraViewer download link to mastering advanced functionalities.
This step-by-step guide is tailored for both beginners and experienced users. We’ll cover everything you need to know to use UltraViewer effectively in 2025, including system requirements, installation, core features, troubleshooting, and tips for optimizing performance. By the end, you’ll be able to use UltraViewer with confidence, whether you’re using the free version for personal use or the Pro version for business needs.
Part 1: Understanding UltraViewer 2025 – Features and Benefits
Before you proceed with your UltraViewer download, it’s important to understand what the software offers and how it compares to other remote desktop tools. This will help you determine if it’s the right fit for your needs and set realistic expectations for its performance.
1.1 Key Features of UltraViewer 2025
UltraViewer’s 2025 updates have expanded its capabilities, making it a strong competitor to tools like TeamViewer and AnyDesk. Here are the standout features:
- Lightweight Design: At just 3.5 MB, UltraViewer has minimal impact on your computer’s performance, even on low-spec devices . It uses 2-3 times less CPU than older versions, ensuring your computer runs smoothly during remote sessions UltraViewer.
- Enhanced Security: The 2025 version includes captcha security checks, random password generation (minimum 5 digits), and logging for rejected connection attempts UltraViewer. All data is encrypted using industry-standard techniques, protecting your privacy during remote sessions .
- Improved Performance: UltraViewer 6.0 and above offer 8-20 times faster speed than older versions, with support for up to 65,000 colors and high image quality UltraViewer. The 2025 update also fixes latency issues when jumping to specific positions on the remote screen UltraViewer.
- New Functionalities: Microphone support, switch-side control, lock screen, turn-on monitor, and cross-device copy-pasting are just a few of the new features added in 2025 UltraViewer. Pro users can also access audio sharing for voice calls during sessions UltraViewer.
- Multi-Language Support: The software now supports over 20 languages, with improved translations for Italian, French, Bahasa Indonesia, Thai, Korean, and Japanese UltraViewer.
- File Transfer and Clipboard Sharing: Easily transfer files between local and remote devices, and copy-paste text, images, and links across multiple clients UltraViewer.
1.2 UltraViewer vs. Competitors
When choosing a remote desktop tool, it’s helpful to compare UltraViewer with other popular options:
- TeamViewer: TeamViewer offers a similar feature set but has a more complex interface and limits free usage for commercial purposes. UltraViewer’s free version is fully functional for personal use, with no hidden restrictions .
- AnyDesk: AnyDesk is known for speed but has a higher price point for business users. UltraViewer’s Pro version is more affordable, making it ideal for small businesses and freelancers.
- UltraVNC: UltraVNC is open-source but lacks many of UltraViewer’s modern features like microphone support and cross-device copy-pasting. It also has a steeper learning curve for beginners.
UltraViewer’s biggest advantage is its balance of simplicity and power. It’s easy enough for non-technical users to set up but robust enough for IT professionals and businesses. The quick UltraViewer download and lightweight design also make it a top choice for users with limited internet bandwidth or storage space.
1.3 Use Cases for UltraViewer
UltraViewer is versatile enough to handle a wide range of scenarios:
- Technical Support: IT professionals can use UltraViewer to troubleshoot remote devices, install software, and resolve issues without being physically present.
- Remote Work: Freelancers and employees can access their work computers from home, coffee shops, or while traveling, ensuring they have access to important files and applications.
- Family Assistance: Help friends or family members with computer issues from afar, without the need for them to have technical knowledge.
- Team Collaboration: Collaborate on projects with colleagues by sharing screens, transferring files, and communicating via chat or voice calls.
- Server Management: System administrators can manage remote servers efficiently, even from mobile locations.
Part 2: Preparing for UltraViewer Download – System Requirements and Safety Tips
Before you download UltraViewer, it’s crucial to ensure your device meets the necessary requirements and that you’re prepared to download the software safely. This will prevent compatibility issues and protect your device from malware.
2.1 System Requirements for UltraViewer 2025
UltraViewer is designed to be compatible with most Windows devices, but meeting the minimum requirements is essential for optimal performance:
- Operating System: Windows XP, Windows 7, Windows 8, Windows 10, or Windows 11 (32-bit or 64-bit). As of 2025, macOS and Linux versions are not yet available, but developers have announced plans to release a macOS version in the near future .
- RAM: 512 MB minimum (1 GB or more recommended for multiple sessions or high-resolution screen sharing).
- Storage: 3.5 MB of free disk space (the UltraViewer download file is small, so it won’t take up much space) .
- Internet Connection: A stable connection with a minimum speed of 1 Mbps. For high-quality screen sharing or audio calls, a speed of 5 Mbps or more is recommended.
- Hardware: A working mouse and keyboard (for remote control), and a microphone/speaker (for audio features in the Pro version).
2.2 Safety Tips for UltraViewer Download
Downloading software from untrusted sources is one of the biggest risks to your device’s security. Follow these tips to ensure a safe UltraViewer download:
- Stick to the Official Website: The only safe place to download UltraViewer is the official website (https://www.ultraviewer.net). Avoid third-party websites, torrent sites, or social media links, as they may distribute malware or modified versions of the software.
- Verify the Download Link: Before clicking “Download”, check the URL to ensure it’s from ultraviewer.net. Look for the padlock icon in the browser’s address bar to confirm the site is secure (HTTPS).
- Avoid Pop-Up Ads: Some websites may display fake “Download” buttons that redirect you to other software or malware. The official UltraViewer download page has a single, clearly labeled button.
- Scan the Installer: After downloading, run a scan with your antivirus software to confirm the file is safe. The official UltraViewer download is free of viruses, but this step adds an extra layer of protection.
- Check the Version: Ensure you’re downloading the latest version (6.6.124 as of 2025). Older versions may lack critical security updates and new features .
2.3 UltraViewer Download for Different User Types
The UltraViewer download process is the same for all users, but there are slight differences in setup based on your needs:
- Personal Users: The free version of UltraViewer is sufficient for personal use, including remote access to your own devices and helping family/friends. The download and installation are completely free, with no time limits.
- Business Users: For commercial use, you’ll need a Pro or Premium license. The download process is the same, but you’ll need to purchase and activate a license key after installation to unlock advanced features.
- IT Professionals: IT teams may benefit from the Premium license, which includes bulk deployment options and priority support. The UltraViewer download for business use is still free—you only pay for the license.
Part 3: Step-by-Step UltraViewer Download and Installation
Now that you’re prepared, it’s time to proceed with the UltraViewer download and installation. This process is straightforward and takes just a few minutes, even for beginners.
3.1 Step 1: Download UltraViewer from the Official Website
- Open your preferred web browser (Chrome, Firefox, Edge, etc.).
- Type “https://www.ultraviewer.net” into the address bar and press Enter.
- On the homepage, scroll down to the “Download” section or click “Download” in the top menu bar.
- You’ll be directed to the UltraViewer download page, where you’ll see the latest version (6.6.124) and a “Download Now” button.
- Click the “Download Now” button. The file will start downloading automatically. Depending on your internet speed, the download should complete in 1-10 seconds.
- Once the download is finished, locate the file in your “Downloads” folder. The file name will be “UltraViewer_Setup.exe”.
3.2 Step 2: Install UltraViewer on Your Windows Device
- Double-click the “UltraViewer_Setup.exe” file to launch the installation wizard.
- If prompted by User Account Control (UAC) asking if you want to allow the app to make changes to your device, click “Yes”.
- The installation wizard will open. Select your preferred language from the drop-down menu (e.g., English, Spanish, French) and click “OK”.
- Read the End User License Agreement carefully. If you agree to the terms, click “I Agree” to proceed.
- Choose the installation location. The default location is “C:\Program Files\UltraViewer”, but you can click “Browse” to select a different folder. Click “Next” to continue.
- Select additional tasks:
- Create a desktop shortcut (recommended for easy access).
- Add UltraViewer to the Start menu.
- Run UltraViewer after installation.Check the boxes for the tasks you want and click “Next”.
- Click “Install” to begin the installation process. The progress bar will show you how much time remains.
- Once the installation is complete, click “Finish” to launch UltraViewer.
3.3 Step 3: Post-Installation Setup
When UltraViewer launches for the first time, you’ll need to configure a few basic settings to get started:
- Accept the Privacy Policy: Read the privacy policy and click “Accept” to continue.
- View Your ID and Password: On the main interface, you’ll see a unique ID and password. This is your device’s identifier—keep this information secure, as anyone with your ID and password can access your computer remotely.
- Customize Your Settings: Click the “Settings” icon (gear icon) in the top-right corner of the interface to access the settings menu. Here are some important settings to configure:
- General: Enable “Run UltraViewer with Windows” if you want the app to start automatically when your computer turns on.
- Display: Adjust the image quality (low, medium, high) and resolution to match your internet speed.
- Security: Enable “Auto-generate password” to have a new password generated each time you launch UltraViewer.
- Chat: Customize chat settings, such as font size and notification preferences.
- Save Your Settings: After making your changes, click “OK” to save them.
3.4 Step 4: Update UltraViewer to the Latest Version (If Needed)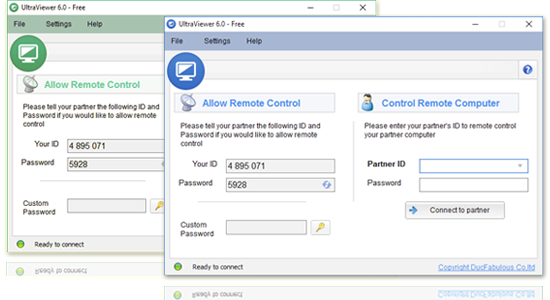
While the UltraViewer download from the official website should give you the latest version, it’s always a good idea to check for updates after installation:
- Open UltraViewer.
- Click the “Help” menu in the top toolbar.
- Select “Check for Updates” from the drop-down menu.
- If an update is available, click “Download and Install” to update UltraViewer.
- Restart UltraViewer to apply the updates.
Part 4: Mastering UltraViewer 2025 – Core Features in Detail
Now that you’ve completed your UltraViewer download and installation, it’s time to learn how to use its core features. This section will walk you through each feature step by step, with a focus on the 2025 updates.
4.1 Remote Control: Accessing Another Computer
The primary function of UltraViewer is to allow you to control another computer remotely. Here’s how to do it:
- Get the Remote Device’s ID and Password: Ask the person using the remote computer to open UltraViewer and share their ID and password with you.
- Enter the ID and Password: On your local UltraViewer interface, find the “Control Remote PC” section. Enter the remote device’s ID in the “Partner ID” field and their password in the “Password” field.
- Customize Connection Settings: Before connecting, click the “Settings” icon next to the “Connect” button to adjust:
- Image quality (low, medium, high).
- Screen resolution (auto, 1024x768, 1920x1080, etc.).
- Enable/disable sound (Pro version only).
- Enable/disable clipboard sharing.
- Click “Connect”: Once you’ve customized the settings, click the “Connect” button. You’ll be connected to the remote computer within a few seconds.
- Control the Remote Computer: You can now use your mouse and keyboard to control the remote computer. The remote user will see a notification that someone is accessing their device.
- End the Session: When you’re done, click the “Disconnect” button in the top toolbar or close the UltraViewer window.
4.2 Screen Sharing: Presenting Your Screen to Others
Screen sharing is useful for presentations, training, or showing someone how to do something on your computer:
- Open UltraViewer and get your ID and password.
- Share Your ID and Password with the person you want to share your screen with.
- Ask the Remote User to Connect: The remote user should open their UltraViewer, enter your ID and password, and click “Connect”.
- Select What to Share: When the connection is established, you can choose to share your entire screen or a specific application window. To switch between sharing options, click the “Share” icon in the toolbar and select “Entire Screen” or “Application Window”.
- Annotate the Screen (Pro Version): Use the annotation tools in the toolbar to draw, highlight, or add text to your screen. This is useful for emphasizing important points during presentations.
- Stop Sharing: Click the “Stop Sharing” button in the toolbar or disconnect the session to end the screen share.
4.3 File Transfer: Sending Files Between Devices
UltraViewer makes it easy to transfer files between your local device and the remote computer:
- Establish a Remote Connection with the target device.
- Click the “File Transfer” Button in the top toolbar. A file transfer window will open, showing the local files on the left and the remote files on the right.
- Select the Files to Transfer: Navigate to the folder containing the files you want to transfer. Select the files by clicking on them (hold Ctrl to select multiple files).
- Initiate the Transfer: Click the arrow button pointing to the remote device (to send files from local to remote) or the arrow button pointing to the local device (to receive files from remote to local).
- Monitor the Transfer Progress: A progress bar will show you how much of the transfer is complete. The transfer speed depends on your internet connection.
- Verify the Transfer: Once the transfer is complete, check the target folder to ensure the files were transferred successfully.
4.4 New 2025 Features: Microphone Support, Switch-Side Control, and More
The 2025 version of UltraViewer introduces several new features that enhance functionality. Here’s how to use them:
4.4.1 Microphone Support
Microphone support allows you to make voice calls during remote sessions, making communication more efficient:
- Ensure both local and remote devices are running UltraViewer 6.5 or higher UltraViewer.
- Establish a remote connection.
- Click the “Microphone” button in the top toolbar. A green light will indicate that the microphone is active.
- Speak into your microphone— the remote user will be able to hear you.
- To mute your microphone, click the “Microphone” button again.
4.4.2 Switch-Side Control
This feature allows you to switch control between the local and remote devices, making collaboration easier:
- During a remote session, click the “Switch Side” button in the toolbar UltraViewer.
- A prompt will appear asking if you want to switch control. Click “Yes”.
- The remote user will now have control of your computer, and you’ll lose control of the remote device.
- To switch back, click the “Switch Side” button again and confirm.
4.4.3 Lock Screen Feature
The lock screen feature allows you to lock the remote device’s screen during a session, preventing unauthorized access:
- During a remote session, click the “Lock Screen” button in the toolbar UltraViewer.
- The remote device’s screen will lock, and the user will need a password to unlock it.
- To unlock the screen, click the “Unlock Screen” button and enter the password.
4.4.4 Cross-Device Copy-Pasting
This feature allows you to copy text, images, and files from one device and paste them into another, even across multiple remote sessions:
- Ensure both devices are running the latest version of UltraViewer (6.6.124) UltraViewer.
- Copy the content you want to share (Ctrl+C on Windows).
- Switch to the remote device or another session and paste the content (Ctrl+V).
- The content will be pasted seamlessly, regardless of which device you copied it from.
Part 5: Troubleshooting UltraViewer Issues (2025 Guide)
Even with a successful UltraViewer download and installation, you may encounter occasional issues. Below are solutions to the most common problems, based on the latest 2025 updates and user feedback.
5.1 Common Connection Issues
Connection issues are the most frequent problem users face. Here’s how to resolve them:
- Connection Timeout: If you receive a “Connection Timeout” error, check your internet connection. Restart your router and modem, and close any bandwidth-heavy applications . If the issue persists, try switching to a wired connection.
- Unable to Connect to Remote Device: Ensure the remote device has UltraViewer running and that you have the correct ID and password. Also, check if the remote device’s firewall is blocking UltraViewer—add UltraViewer to the firewall exceptions list .
- Frequent Disconnections: This is often caused by an unstable internet connection. Perform a ping test to check for packet loss. If you’re using Wi-Fi, move closer to the router or switch to Ethernet .
5.2 Installation and Launch Errors
If you encounter errors during installation or when launching UltraViewer:
- “Cannot Start with Window” Error: Right-click the UltraViewer icon and select “Run as administrator”. Go to Settings > General and enable “Run UltraViewer with Windows”, then restart your computer .
- “ActiveX Component Can’t Create Object” Error: Uninstall UltraViewer via Control Panel > Add or Remove Programs, then download and install the latest version from the official website .
- Installation Failed: Ensure you have administrator privileges and that your antivirus software isn’t blocking the installer. Temporarily disable your antivirus, run the installer, and then re-enable the antivirus.
5.3 Feature-Specific Issues
If certain features aren’t working as expected:
- Microphone Not Working: Check if your microphone is connected and working. Ensure both devices are running UltraViewer 6.5 or higher UltraViewer. If you’re using the free version, upgrade to Pro to access microphone support.
- File Transfer Failed: Check if the file size exceeds the free version’s limit (100 MB). If so, compress the file or upgrade to Pro. Also, ensure the remote device has enough storage space.
- Copy-Pasting Not Working: Ensure both devices are running the latest version of UltraViewer UltraViewer. Restart the remote session and try again.
5.4 Security-Related Issues
To address security concerns:
- Unauthorized Access Attempts: Check the connection logs to see if there are any rejected connection attempts (marked with “rejected” in the log file) UltraViewer. Change your password regularly and avoid sharing your ID and password with untrusted individuals.
- Malware Warnings: If your antivirus flags UltraViewer, it’s likely a false positive. Add UltraViewer to your antivirus exceptions list. Ensure you downloaded UltraViewer from the official website .
Part 6: Optimizing UltraViewer for Maximum Performance
To get the best possible experience with UltraViewer, follow these optimization tips. These will help you improve speed, reduce latency, and enhance overall functionality.
6.1 Optimize Network Settings
- Use a Wired Connection: Wi-Fi is convenient but can be unstable. For critical remote sessions, use an Ethernet cable to reduce latency and packet loss .
- Reduce Bandwidth Usage: Close any unnecessary applications that use bandwidth, such as video streaming services, cloud backups, and online games .
- Change DNS Servers: Switch to public DNS servers like Google DNS (8.8.8.8, 8.8.4.4) or Cloudflare DNS (1.1.1.1) to improve connectivity .
6.2 Adjust UltraViewer Settings
- Lower Image Quality for Slow Internet: If you have a slow internet connection, reduce the image quality in the connection settings. This will make the remote session smoother, even with high latency.
- Disable Unnecessary Features: Turn off features you don’t need, such as audio sharing or screen recording, to reduce resource usage.
- Enable Hardware Acceleration: If your computer has a dedicated graphics card, enable hardware acceleration in UltraViewer’s settings to improve performance.
6.3 Maintain Your Device
- Update Windows: Keep your Windows OS up to date with the latest updates and security patches. Outdated OS versions can cause compatibility issues with UltraViewer.
- Scan for Malware: Regularly scan your computer for malware. Malware can slow down your device and interfere with remote sessions.
- Free Up Storage Space: Ensure your computer has enough free storage space (at least 10% of the total drive capacity) to run UltraViewer smoothly.
Part 7: Conclusion and Next Steps
UltraViewer 2025 is a powerful, user-friendly remote desktop tool that offers everything you need for remote access, support, and collaboration. By following this tutorial, you’ve successfully completed a safe UltraViewer download, installed the software, and learned how to use its core features—including the latest 2025 updates like microphone support and cross-device copy-pasting.
To recap, the key steps to using UltraViewer effectively are:
- Download UltraViewer from the official website to ensure safety and access the latest version.
- Follow the installation wizard to set up the software correctly.
- Configure basic settings like your ID and password, startup options, and display preferences.
- Master core features like remote control, screen sharing, and file transfer.
- Troubleshoot common issues using the tips provided.
- Optimize your network and UltraViewer settings for maximum performance.
As UltraViewer continues to evolve, be sure to check for updates regularly to access new features and security patches. The upcoming macOS version will expand its compatibility, making it even more versatile for users across different platforms .
Whether you’re using UltraViewer for personal use or business, it’s a reliable tool that can save you time and effort. With its lightweight design, robust security features, and constant updates, it’s no wonder millions of users trust UltraViewer for their remote access needs.