Introduction: Why UltraViewer Stands Out for Remote Access
In an era where remote work, technical support, and global collaboration have become essential, finding reliable remote desktop software is critical. UltraViewer has emerged as a top choice for millions of users worldwide, thanks to its lightweight design, robust security features, and constant updates that enhance functionality. Whether you’re a freelancer needing to access your home computer while traveling, an IT professional providing remote support, or a team collaborating on projects across locations, UltraViewer offers a seamless experience that balances simplicity and power.
The first step to unlocking these benefits is a safe and correct UltraViewer download. With cyber threats on the rise, downloading software from untrusted sources can expose your device to malware, data breaches, and performance issues. This comprehensive guide will walk you through every aspect of UltraViewer—from finding the official UltraViewer download link to mastering its latest 2025 features. We’ll cover system requirements, step-by-step installation, core functionalities, advanced tips, and troubleshooting common issues, ensuring you get the most out of this versatile tool.
By the end of this guide, you’ll not only have successfully completed your UltraViewer download and setup but also be able to leverage features like microphone support, cross-device copy-pasting, and screen sharing to streamline your remote workflows. Let’s dive into the world of UltraViewer and transform how you connect with computers remotely.
Part 1: System Requirements and Safe UltraViewer Download
Before initiating your UltraViewer download, it’s crucial to ensure your device meets the software’s system requirements. This ensures optimal performance and avoids compatibility issues that could disrupt your remote sessions.
1.1 System Requirements for UltraViewer 2025
UltraViewer is designed to be lightweight, so it doesn’t burden your computer’s resources. However, meeting the minimum requirements is key to a smooth experience:
- Operating System: Windows XP, Windows 7, Windows 8, Windows 10, or Windows 11 (32-bit and 64-bit versions supported). As of 2025, UltraViewer is still Windows-exclusive, but developers have announced plans to release a macOS version soon . Mac users can use alternatives temporarily or wait for the official macOS UltraViewer download.
- RAM: At least 512 MB (1 GB or more recommended for multiple simultaneous remote sessions or high-resolution screen sharing).
- Storage: A mere 3.5 MB of free disk space, making the UltraViewer download quick and storage-friendly .
- Internet Connection: A stable internet connection with a ping rate between 1-100 ms for optimal performance. Wired connections are preferred for low latency, especially during critical tasks like technical troubleshooting .
- Additional Requirements: For audio sharing and microphone support (Pro version feature), ensure your device has a working microphone and speakers. Both the local and remote devices must run UltraViewer 6.5 or higher UltraViewer.
1.2 How to Perform a Safe UltraViewer Download (2025 Guide)
The most critical step in your UltraViewer journey is downloading the software from a trusted source. Third-party websites often distribute modified versions with malware, adware, or outdated features that compromise security and functionality. Follow these steps for a safe UltraViewer download:
- Visit the Official Website: Open your preferred browser and navigate to the official UltraViewer website (https://www.ultraviewer.net). Avoid clicking on search results labeled “sponsored” or from unknown domains.
- Locate the Download Section: On the homepage, scroll down to find the “Download” button or navigate to the dedicated UltraViewer download page via the menu bar. The official site clearly displays the latest version (6.6.124 as of 2025) .
- Verify the Version: Ensure the download link corresponds to the latest version. The 2025 updates include critical bug fixes and new features like microphone support and cross-device copy-pasting, so using an outdated version will limit your experience UltraViewer.
- Initiate the Download: Click the “Download” button. The file will start downloading immediately—thanks to its small size (3.5 MB), the UltraViewer download should complete in seconds, even on slow internet connections .
- Scan for Malware: Before opening the installer, run a quick scan with your antivirus software to confirm the file is safe. The official UltraViewer download is free of malware, but this extra step adds a layer of protection.
1.3 UltraViewer Download for Different Windows Versions
While UltraViewer supports all modern Windows versions, there are slight variations in the download and installation process for older operating systems:
- Windows 11/10: The standard UltraViewer download works seamlessly. Ensure you have administrator privileges to install the software.
- Windows 7/8: The latest version (6.6.124) is compatible, but you may need to enable “Run as administrator” if you encounter installation errors .
- Windows XP: UltraViewer still supports Windows XP, but some advanced features like high-resolution screen sharing may be limited due to the OS’s outdated graphics capabilities.
For users with limited bandwidth or data plans, the small file size of the UltraViewer download is a major advantage. Unlike bulkier alternatives like TeamViewer, UltraViewer doesn’t require lengthy downloads or significant storage space, making it ideal for devices with limited resources.
Part 2: Step-by-Step Installation and Initial Setup
Once your UltraViewer download is complete, the next step is installation and initial configuration. The process is straightforward, even for first-time users, and takes less than 5 minutes.
2.1 Installing UltraViewer on Windows
- Locate the Installer: Find the downloaded file (usually in the “Downloads” folder) named “UltraViewer_Setup.exe”.
- Run the Installer: Double-click the file to launch the setup wizard. If prompted by User Account Control (UAC), click “Yes” to allow the app to make changes to your device.
- Follow the Wizard: The setup wizard will guide you through the process:
- Language Selection: Choose your preferred language (the 2025 version supports Italian, French, Bahasa Indonesia, Thai, Korean, Japanese, and more, with improved translations UltraViewer).
- License Agreement: Read the end-user license agreement and click “I Agree” to proceed.
- Installation Path: By default, UltraViewer installs to “C:\Program Files\UltraViewer”. You can change the path if needed, but the default location works for most users.
- Create Desktop Shortcut: Check the box to create a desktop shortcut for easy access.
- Finish Installation: Click “Install” and wait for the process to complete. Click “Finish” to launch UltraViewer.
2.2 Initial Setup and Interface Overview
When you launch UltraViewer for the first time, you’ll be greeted with a simple, user-friendly interface. Here’s how to configure the basics:
- Retrieve Your ID and Password: On the main screen, you’ll see a unique ID and password. This is your device’s identifier—share these details with anyone who needs to access your computer remotely. The 2025 version automatically generates random passwords with a minimum length of 5 digits for enhanced security UltraViewer.
- Save Recent Connections: Enable the “Store recent ID and password” option in the settings to quickly reconnect to frequently accessed devices. This feature saves time if you lose connection or accidentally close the app UltraViewer.
- Customize Display Settings: Navigate to “Settings” > “Display” to adjust image quality, resolution, and multi-monitor support. The 2025 version fixes DPI issues for displays with scaling above 150%, ensuring the interface works properly on high-resolution screens UltraViewer.
- Configure Startup Options: If you use UltraViewer regularly, check “Run UltraViewer with Windows” in the settings to launch the app automatically when your computer starts. If you encounter the “cannot start with window” error, right-click the UltraViewer icon and select “Run as administrator” before enabling the option .
2.3 Upgrading to UltraViewer Pro (Optional)
The free version of UltraViewer offers all core remote control features, but the Pro version unlocks advanced tools like audio sharing, unlimited file transfer size, and priority technical support. Here’s how to upgrade:
- Purchase a License: Visit the official website and select a Pro or Premium license. Prices are affordable, making it a cost-effective option for businesses and power users.
- Activate the License: In UltraViewer, go to “Help” > “Enter License Key” and paste the key you received after purchase. Ensure you’re using version 6.5 or higher to access the audio sharing feature UltraViewer.
Part 3: Core Features of UltraViewer 2025 (Step-by-Step Usage)
UltraViewer’s 2025 updates have expanded its functionality, making it more versatile than ever. Below is a detailed guide to using its most important features, with a focus on new tools and improvements.
3.1 Remote Control: Access and Control Any Windows PC
The primary function of UltraViewer is remote control, which allows you to take full control of another computer’s mouse and keyboard. Here’s how to use it:
- Initiate a Connection: On your local device, enter the remote device’s ID and password in the “Control Remote PC” section of the UltraViewer interface.
- Adjust Connection Settings: Before clicking “Connect”, you can customize settings like image quality (low, medium, high) and screen resolution. For slow internet connections, select low quality to reduce latency .
- Navigate the Remote Desktop: Once connected, you can use your mouse and keyboard to interact with the remote computer as if you were sitting in front of it. The 2025 version improves the speed of jumping to specific positions on the remote screen, making navigation smoother UltraViewer.
- Switch Control Sides: A new 2025 feature allows you to switch control between the local and remote devices. This is useful for collaborative tasks—simply click the “Switch Side” button in the toolbar to let the remote user control your computer UltraViewer.
3.2 Screen Sharing and Recording
Screen sharing is ideal for presentations, training sessions, or troubleshooting. UltraViewer 2025 enhances this feature with improved image quality and recording capabilities:
- Start Screen Sharing: During a remote session, click the “Screen Share” button in the toolbar. You can choose to share your entire screen or a specific application window.
- Capture Screenshots: Use the “Capture Screen” button to take instant screenshots of the remote desktop. The images are saved to your default “Pictures” folder or a custom location you specify UltraViewer.
- Record Remote Sessions: Click the “Record” button to capture video of the remote session. The 2025 version fixes issues with playing .uvr files from older versions (6.6.110 and below) and allows you to jump to specific positions in the recording UltraViewer.
- Full-Screen Mode: For immersive viewing, click the “Full Screen” button to expand the remote desktop to your entire screen. Press “Esc” to exit full-screen mode UltraViewer.
3.3 File Transfer and Clipboard Sharing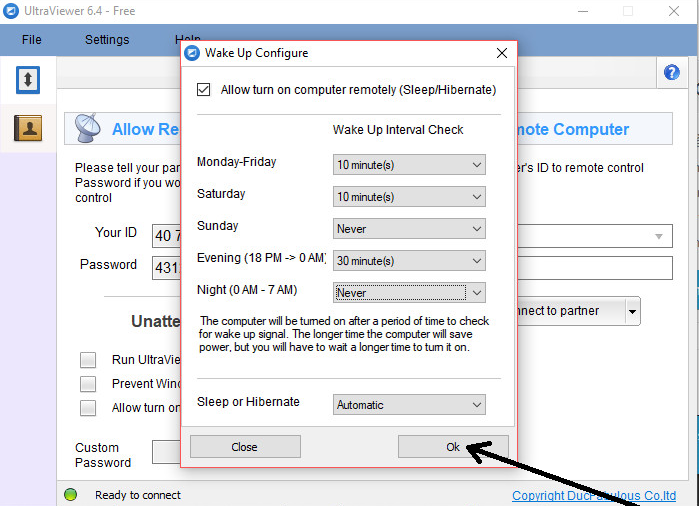
UltraViewer makes it easy to exchange files and text between local and remote devices:
- Transfer Files: Click the “File Transfer” button in the toolbar to open the file transfer window. Drag and drop files or folders between the local and remote directories. The Pro version removes file size limits, while the free version supports transfers up to 100 MB.
- Cross-Device Copy-Pasting: A new 2025 feature allows copy-pasting between multiple remote clients—perfect for teams working on shared documents UltraViewer. Ensure both devices have the latest version installed for this feature to work.
- Clipboard Synchronization: Text, images, and links copied to your local clipboard are automatically available on the remote clipboard and vice versa. This streamlines tasks like sharing URLs or editing documents collaboratively.
3.4 Communication Tools: Chat and Microphone Support
Clear communication is essential during remote sessions. UltraViewer 2025 adds microphone support and improves its built-in chat feature:
- Real-Time Chat: Click the “Chat” button to open a text chat window with the remote user. The 2025 version fixes issues where the chat dialog would jump to the default position when receiving messages and ensures the dialog displays at full width UltraViewer.
- Microphone Support: Pro users can use the “Microphone” button to enable voice calls during remote sessions UltraViewer. Ensure both devices have microphones connected and the latest UltraViewer version installed.
- Logging Connection Attempts: The 2025 update adds logging for rejected connection attempts, with the “rejected” keyword in the log file. This helps you track unauthorized access attempts and enhance security UltraViewer.
3.5 Advanced Security Features
Security is a top priority for UltraViewer. The 2025 version includes several enhancements to protect your remote sessions:
- Captcha/Security Check: To prevent unauthorized access, UltraViewer implements captcha and security checks for connection attempts UltraViewer.
- Unique Session IDs and Passwords: Each session uses a unique ID and randomly generated password, reducing the risk of brute-force attacks.
- Lock Screen Feature: A new 2025 feature allows you to lock the remote device’s screen during a session, preventing unauthorized access to the computer while you’re away UltraViewer.
- Turn-On Monitor Feature: If the remote device’s monitor is off, you can use the “Turn On Monitor” button to activate it remotely UltraViewer.
Part 4: Advanced Tips and Tricks for UltraViewer 2025
To maximize your UltraViewer experience, take advantage of these advanced tips and optimizations. These techniques will help you improve performance, streamline workflows, and resolve common challenges.
4.1 Optimizing Performance for Slow Internet Connections
If you’re working with a weak or unstable internet connection, use these tips to enhance UltraViewer’s performance:
- Reduce Image Quality: Lower the image quality in the connection settings to reduce bandwidth usage. This will make the remote session smoother, even with high latency.
- Close Background Apps: On both local and remote devices, close bandwidth-heavy applications like video streaming services, cloud backups, and large downloads .
- Use Wired Connections: Switch from Wi-Fi to an Ethernet cable for a more stable connection with lower latency .
- Change DNS Servers: Use public DNS servers like Google DNS (8.8.8.8, 8.8.4.4) or Cloudflare DNS (1.1.1.1) to improve connectivity and reduce DNS resolution issues .
4.2 Managing Multiple Remote Sessions
For IT professionals or team leaders who need to control multiple devices simultaneously, UltraViewer 2025 offers improved multi-session management:
- Organize with the Address Book: Save frequently accessed devices to the address book with custom names. This allows you to quickly connect to multiple devices without entering IDs and passwords each time.
- Switch Between Sessions: Use the “Session Manager” in the toolbar to switch between active remote sessions. The 2025 version fixes issues with the address book UI, making it easier to manage multiple connections UltraViewer.
- Copy-Paste Across Sessions: The new cross-device copy-pasting feature works across multiple remote clients, allowing you to share information between different sessions seamlessly UltraViewer.
4.3 Customizing UltraViewer for Specific Use Cases
UltraViewer’s flexibility makes it suitable for a wide range of use cases. Here’s how to customize it for common scenarios:
- Technical Support: Enable “Save Individual Display Settings” to remember the remote device’s display configuration for future sessions UltraViewer. Use the chat and microphone features to communicate with the user while troubleshooting.
- Remote Work: Configure UltraViewer to run at startup and enable “Auto-Reconnect” to resume sessions if your internet connection drops. Use the file transfer feature to sync documents between your home and work computers.
- Team Collaboration: Use screen sharing to present ideas, and the copy-paste feature to share notes and links. The Pro version’s audio sharing is ideal for virtual meetings and brainstorming sessions.
Part 5: Troubleshooting Common UltraViewer Issues (2025)
Even with its user-friendly design, you may encounter occasional issues with UltraViewer. Below are solutions to the most common problems, based on 2025 updates and user feedback.
5.1 Connection Timeout or Disconnection Issues
Connection problems are often caused by network issues, firewall restrictions, or outdated software:
- Check Network Stability: Perform a ping test by opening Command Prompt and typing “ping 8.8.8.8 -t”. If ping values are above 100 ms or show frequent timeouts, your internet connection is unstable .
- Restart Router/Modem: Power off your router and modem for 30 seconds, then restart them to refresh the connection .
- Allow UltraViewer Through Firewall: Add UltraViewer to your firewall exceptions list. Navigate to Windows Security > Firewall & Network Protection > Allow an app through the firewall, and ensure UltraViewer is permitted on both private and public networks .
- Update UltraViewer: Ensure both local and remote devices are running the latest version (6.6.124). Outdated versions may have compatibility issues that cause disconnections .
5.2 ID Retrieval Failure
If UltraViewer fails to generate an ID, follow these steps:
- Change Port Settings: Go to Settings > Options and change the connect port to 2112. Restart UltraViewer to apply the change .
- Disable Proxy Settings: If you’re using a proxy, go to Settings > Options and select “No Proxy (Connect directly to the internet)” .
- Run as Administrator: Right-click the UltraViewer icon and select “Run as administrator” to resolve permission issues that may block ID retrieval .
5.3 Installation Errors
Common installation errors include “cannot start with window” and “ActiveX component can’t create object”:
- Fix “Cannot Start with Window”: Run UltraViewer as administrator, enable “Run UltraViewer with Windows” in settings, and restart your computer .
- Fix ActiveX Error: Reinstall UltraViewer by first uninstalling it via Control Panel > Add or Remove Programs, then performing a fresh UltraViewer download from the official website UltraViewer.
- Check Windows Updates: Ensure your Windows OS is up to date. Missing updates can cause compatibility issues with UltraViewer’s installer.
5.4 Audio Sharing Not Working (Pro Version)
If the microphone or audio sharing feature isn’t working:
- Verify Version Compatibility: Both devices must run UltraViewer 6.5 or higher UltraViewer.
- Check Audio Devices: Ensure microphones and speakers are connected and working on both devices. Test them with another application (e.g., Zoom) to rule out hardware issues.
- Reactivate Pro License: If the feature still doesn’t work, re-enter your Pro license key to ensure activation is valid.
Part 6: Conclusion and Future Updates
UltraViewer has established itself as a reliable, user-friendly remote desktop solution, and its 2025 updates have only strengthened its position in the market. From the quick and secure UltraViewer download to the new features like microphone support and cross-device copy-pasting, it offers everything you need for remote work, technical support, and collaboration.
To get the most out of UltraViewer, remember to:
- Always download from the official website to avoid malware and outdated versions.
- Keep the software updated to access the latest features and security patches.
- Customize settings to match your internet speed and use case.
- Use the troubleshooting tips to resolve common issues quickly.
Looking ahead, UltraViewer’s developers plan to release a macOS version, expanding its compatibility beyond Windows . Future updates may include mobile app support, enhanced cloud integration, and more advanced collaboration tools. By staying informed about these updates and regularly performing an UltraViewer download of the latest version, you’ll ensure your remote access experience remains smooth and secure.
Whether you’re a casual user needing to access files remotely or a business relying on global team collaboration, UltraViewer offers the perfect balance of simplicity, power, and security. With this guide, you’re ready to master UltraViewer and unlock the full potential of remote desktop technology.