Introduction: The Importance of a Reliable UltraViewer Download for Modern Workflows
In today’s interconnected world, remote support and collaboration have become essential components of business operations and personal productivity. Whether you’re an IT professional providing technical assistance to clients, a team leader managing distributed employees, or a student seeking help from a remote tutor, having a reliable remote desktop tool is crucial. UltraViewer has emerged as a leading choice for millions of users due to its simplicity, security, and powerful feature set—all packed into a lightweight package that’s easy to obtain through a quick UltraViewer download.
A successful UltraViewer experience begins with a secure and correct UltraViewer download. With cyber threats on the rise, downloading software from untrusted sources can expose your device to malware, data breaches, and performance issues. This comprehensive tutorial guides you through every stage of UltraViewer usage, from finding the right UltraViewer download source and installing the software to leveraging advanced features for professional remote support and collaboration. Updated for 2025, this guide includes the latest features and best practices to help you become an UltraViewer expert, regardless of your technical background.
1. Understanding UltraViewer: Why It’s the Top Choice for Remote Access
1.1 Key Advantages of UltraViewer
Before proceeding with UltraViewer download, it’s important to understand why this software stands out among other remote desktop solutions:
- Lightweight Design: With a file size of just 1.3 MB, UltraViewer downloads and installs in seconds, without consuming valuable device resources. This makes it ideal for older computers or devices with limited storage.
- 100% Free for Personal Use: Unlike many competitors that restrict free usage with time limits or connection interruptions, UltraViewer offers unlimited free access for personal and non-commercial use. Business users can choose affordable paid plans for advanced features.
- Robust Security: UltraViewer prioritizes user security with 256-bit AES encryption for all connections, brute-force protection, digital signature verification, and blacklist/whitelist functionality. These features ensure your remote sessions and data remain secure from unauthorized access.
- Comprehensive Feature Set: From basic remote control and file transfer to advanced features like remote wake-up, multi-device control, and session recording, UltraViewer offers everything you need for remote support and collaboration.
- Broad Compatibility: UltraViewer works seamlessly with all Windows operating systems from XP to 11, including Windows Server editions. This broad compatibility ensures you can connect to almost any Windows device, regardless of its age or configuration.
- User-Friendly Interface: The intuitive interface makes UltraViewer easy to use for beginners, while advanced users can access powerful settings and customization options to tailor the software to their needs.
1.2 Use Cases for UltraViewer
UltraViewer is versatile and can be used in a variety of scenarios:
- Technical Support: IT professionals can provide remote assistance to clients, troubleshooting issues without the need for on-site visits.
- Remote Work: Employees can access their office computers from home or while traveling, ensuring they have access to important files and applications.
- Team Collaboration: Teams working remotely can share screens, transfer files, and communicate in real time, making collaboration as effective as in-person meetings.
- Education and Training: Teachers can provide remote tutoring, sharing their screen to explain concepts and guide students through exercises.
- Family Assistance: Help friends and family members with computer issues from a distance, avoiding the need for travel.
1.3 Preparing for UltraViewer Download
Before starting your UltraViewer download, take a moment to prepare your device:
- Check System Requirements: Ensure your device runs Windows XP or later (32-bit or 64-bit). The minimum hardware requirements are a 1 GHz processor, 512 MB of RAM, and 10 MB of free disk space.
- Stable Internet Connection: A reliable internet connection is essential for smooth remote sessions. Aim for a minimum speed of 1 Mbps, though faster connections will provide better performance.
- Disable Unnecessary Software: Close any bandwidth-intensive applications (like video streaming services or large file downloads) to ensure the UltraViewer download completes quickly and without interruptions.
- Update Your Operating System: Ensure your Windows operating system is up to date with the latest patches and updates. This helps prevent compatibility issues during installation and usage.
2. UltraViewer Download: Finding the Right Source and Version
2.1 Official UltraViewer Download Sources
The most critical step in the UltraViewer experience is choosing a secure source for download. Here are the official, trusted channels for UltraViewer download:
- Official Website: The primary source for UltraViewer download is the official website (ultraviewer.net). This site provides the latest stable versions, beta releases, and detailed information about the software.
- Authorized Partners: A select number of trusted software download platforms (like Techjockey) are authorized to distribute UltraViewer. Always verify that the platform is authorized by checking for the Sectigo digital signature on the download file.
Avoid These Sources:
- Third-party download sites that offer “cracked” or “modified” versions of UltraViewer. These versions may contain malware, adware, or missing security features.
- File-sharing platforms or peer-to-peer networks. These sources are often used to distribute malicious software disguised as legitimate UltraViewer downloads.
- Email attachments or links from untrusted senders. These may be phishing attempts designed to steal your personal information or infect your device with malware.
2.2 Choosing the Right UltraViewer Version
UltraViewer offers several versions to meet different needs. Choose the right version for your use case before starting the download:
- Stable Version: The latest stable version (6.6.124 as of 2025) is recommended for most users. It includes all the latest features and security updates, with minimal bugs or issues.
- Beta Version: The beta version (6.0 as of 2025) includes experimental features like custom relay server configuration and enhanced microphone support. Beta versions are suitable for advanced users who want to test new features and provide feedback.
- Portable Version: The portable version is a lightweight, no-installation option that runs directly from a USB drive or hard disk. It’s ideal for users who need to use UltraViewer on multiple devices without installing it each time, though it lacks some advanced features.
- Business Version: The business version offers additional features like team management, custom branding, and priority support. It’s designed for businesses and organizations that require advanced remote access solutions.
2.3 Step-by-Step UltraViewer Download Guide
Follow these steps to download UltraViewer safely and efficiently:
- Open your web browser and navigate to the official UltraViewer website (ultraviewer.net).
- Click on the “Download” tab in the top menu bar. This will take you to the UltraViewer download page, where you can select the version that best suits your needs.
- For most users, the “Download UltraViewer” button will automatically detect your system type (32-bit or 64-bit) and download the appropriate stable version. If you need a different version (like beta or portable), scroll down to the “Other Versions” section and select the desired option.
- Click the download button to start the UltraViewer download. The small file size means the download will complete in seconds, even on slow internet connections.
- Once the download is complete, locate the installer file in your browser’s download folder. The file name will typically be “UltraViewer_Setup.exe” for the stable version.
- Before running the installer, verify the digital signature to ensure the file hasn’t been tampered with. Right-click the file, select “Properties,” and navigate to the “Digital Signatures” tab. Check that the signature is from “UltraViewer” and that it’s valid.
2.4 Troubleshooting UltraViewer Download Issues
If you encounter problems during the UltraViewer download, try these solutions:
- Download Doesn’t Start: Disable any pop-up blockers in your browser, as they may be preventing the download from initiating. Clear your browser cache and cookies, then try again.
- Download Is Slow or Interrupted: Pause other downloads and streaming services to free up bandwidth. If the download is interrupted, most browsers allow you to resume it from where it left off. If not, restart the download.
- File Is Corrupted: If the installer file is corrupted (indicated by an error during installation), delete the file and restart the download. Ensure you’re using a stable internet connection to prevent corruption.
- Access Denied: If you receive an access denied error when trying to download, ensure you have permission to download files on your device. If you’re on a work or school computer, check with your IT department to ensure UltraViewer is allowed.
3. UltraViewer Installation: Step-by-Step Guide for 2025
3.1 Pre-Installation Checklist
Before installing UltraViewer, complete this checklist to ensure a smooth installation process:
- Close all unnecessary applications to free up system resources.
- Disable antivirus software temporarily (remember to re-enable it after installation).
- Ensure you have administrative privileges on your device (required for installation).
- Verify that your device meets the minimum system requirements.
- Make sure you have the latest version of the installer from a trusted UltraViewer download source.
3.2 Detailed Installation Steps
Follow these steps to install UltraViewer correctly:
- Double-click the downloaded installer file (UltraViewer_Setup.exe) to launch the installation wizard. If you see a User Account Control prompt asking for permission to run the file, click “Yes.”
- The installation wizard will open, prompting you to select the installation language. Choose your preferred language from the drop-down menu and click “OK.”
- Read the End User License Agreement carefully. To proceed with the installation, you must accept the terms by clicking the “I Agree” button.
- Choose the installation directory. The default directory is “C:\Program Files\UltraViewer,” but you can change it by clicking the “Browse” button and selecting a different folder. Ensure the destination folder has at least 10 MB of free space.
- Select additional installation options:
- Create a desktop shortcut: Recommended for quick access to UltraViewer.
- Add UltraViewer to the Start menu: Makes it easy to find the software later.
- Auto-start with Windows: Useful if you need to access your computer remotely regularly.
- Click the “Install” button to begin the installation. The process will take less than 30 seconds on most devices.
- Once the installation is complete, you’ll see a “Completion” screen. Check the “Launch UltraViewer” box if you want to start the software immediately, then click “Finish.”
3.3 Post-Installation Setup
After installation, complete these steps to set up UltraViewer for optimal use:
- Initial Launch: When UltraViewer launches for the first time, it will generate a unique ID and random password for your device. This information is used to connect to your computer remotely, so keep it secure.
- Password Configuration: For unattended access, set a permanent password by going to “Settings > Security > Set Password.” Choose a strong password that’s difficult to guess, and avoid using personal information like your name or date of birth.
- Update Settings: Go to “Settings > Update” and enable “Automatic Updates” to ensure you receive the latest features and security patches. You can also check for updates manually by clicking “Check for Updates.”
- Security Settings: Review the security settings to ensure they meet your needs. Enable features like brute-force protection and blacklist/whitelist to enhance security.
- Interface Customization: Customize the UltraViewer interface to match your preferences. You can change the theme, adjust the window size, and rearrange the toolbar for easier access to frequently used features.
3.4 Verifying a Successful Installation
To confirm that UltraViewer is installed correctly and ready for use:
- Check that the main UltraViewer window displays your unique ID and password correctly.
- Test the connection by sharing your ID and password with a trusted friend or colleague. Ask them to connect to your computer using their UltraViewer software.
- During the test connection, verify that all core features work properly, including mouse control, keyboard input, chat, and file transfer.
- Check that the software doesn’t cause any system lag or performance issues. UltraViewer’s lightweight design should have minimal impact on your device’s performance.
4. Mastering Basic UltraViewer Functions
4.1 Remote Control: The Core Function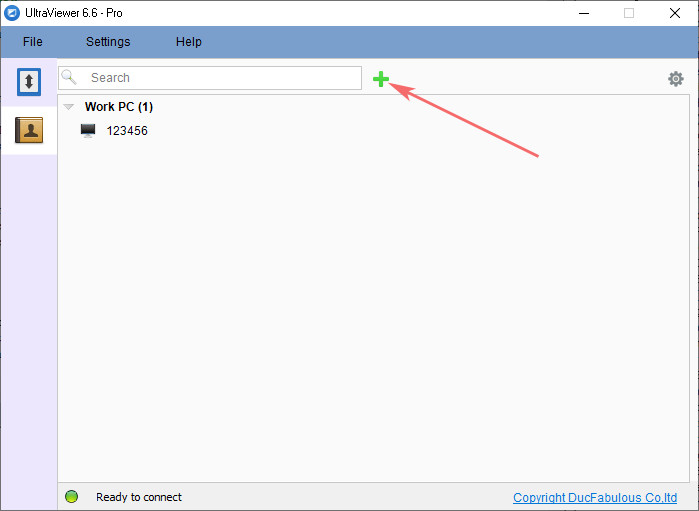
Remote control is the primary feature of UltraViewer, allowing you to access and control another computer from anywhere. Here’s how to use it effectively:
Initiating a Remote Control Session:
- Obtain the remote computer’s UltraViewer ID and password from the device owner. This information is displayed in the main UltraViewer window on their device.
- Open your UltraViewer software and enter the remote ID in the “Partner ID” field.
- Enter the remote password in the “Password” field. Be careful when entering the password, as multiple incorrect attempts will trigger brute-force protection and block your IP address.
- Click the “Start Connection” button. A connection request will be sent to the remote computer, which the owner must accept to establish the session.
- Once the connection is accepted, the remote computer’s screen will appear in a new window on your device. You can now control the remote computer using your mouse and keyboard, just as if you were sitting in front of it.
Navigating the Remote Session Window:
- Full-Screen Mode: Click the “Full-Screen” button in the toolbar to expand the remote session window to fill your screen. Press F8 to exit full-screen mode.
- Zoom Controls: Use the zoom slider in the toolbar to adjust the size of the remote screen. This is useful if the remote computer has a different screen resolution than your device.
- Quality Settings: Adjust the screen quality using the “Quality” dropdown menu. Lower quality settings reduce bandwidth usage, which is helpful for slow internet connections.
- Control Toggle: The remote computer owner can take back control at any time by clicking the “Take Control” button in their UltraViewer window. You’ll receive a notification when control is transferred.
Ending a Remote Session:
- To end the session, click the “Disconnect” button in the UltraViewer toolbar, or close the remote session window.
- You can also press the Ctrl+Alt+D hotkey to disconnect quickly.
- When the session ends, the remote computer will no longer be accessible, and the connection will be terminated securely.
4.2 File Transfer: Securely Sharing Files
UltraViewer’s file transfer feature allows you to share files between connected devices quickly and securely. Here’s how to use it:
Sending Files:
- Establish a remote control session with the target computer.
- Click the “File Transfer” button in the UltraViewer toolbar (icon of a folder with an arrow) or press Ctrl+F.
- The file transfer window will open, showing two panels: your local files (left) and the remote computer’s files (right).
- Navigate to the file or folder you want to send in the local files panel. Select multiple files by holding the Ctrl key while clicking.
- Click the “Send” button (arrow pointing to the right) to transfer the selected files to the remote computer.
- The remote user will receive a notification about the incoming file transfer. They can choose the destination folder and accept the transfer.
- A progress bar will display the transfer status, including the speed and remaining time. The 2025 version supports file transfers up to 12 GB, making it suitable for large files like videos and software installations.
Receiving Files:
- When the remote user sends a file, you’ll receive a pop-up notification.
- Click “Accept” to receive the file, or “Reject” to decline. You can also click “Browse” to select a specific folder for the file.
- The file will be transferred to your computer, and you’ll receive a notification when the transfer is complete.
- UltraViewer automatically verifies the integrity of transferred files to ensure they aren’t corrupted during transmission.
4.3 Real-Time Chat: Communicating During Sessions
The built-in chat feature allows you to communicate with the remote user during a session, making it easier to coordinate actions and provide instructions. Here’s how to use it:
Using the Chat Feature:
- During a remote session, press the F1 hotkey to open the chat window. Press F1 again to close it.
- Type your message in the input field at the bottom of the window and press Enter to send it.
- The remote user will receive your message instantly, and their responses will appear in the chat history panel.
- The 2025 version includes a smart suggestion feature that predicts common phrases based on your chat history. When a suggestion appears, press Tab to insert it into the input field, saving time on typing.
- You can also send files directly through the chat window by clicking the “Attach File” button and selecting the file you want to send.
- Chat logs are automatically saved on both devices, so you can review them later if needed. To access the chat logs, go to “File > Chat History.”
4.4 Screen Sharing: Presenting and Collaborating
Screen sharing is a useful feature for presentations, training sessions, and team collaboration. Unlike remote control, screen sharing allows others to view your screen without granting them control 权限.
Sharing Your Screen:
- Open UltraViewer and click the “Screen Share” button in the toolbar (icon of two monitors).
- Select the screen you want to share. If you have multiple monitors, choose the one you want to present.
- Choose the sharing mode:
- “View Only”: Participants can only watch your screen without interaction.
- “Interactive”: Participants can click and type with your permission.
- Share your UltraViewer ID with the participants. They can connect by entering your ID in their UltraViewer software and clicking “View Screen.”
- During the presentation, use the annotation tools to draw on the screen, highlight important points, and add text. This helps keep participants engaged and clarifies complex information.
- To end the screen sharing session, click the “Stop Sharing” button in the toolbar.
5. Advanced UltraViewer Features for 2025
5.1 Remote Wake-Up: Accessing Computers in Sleep Mode
The remote wake-up feature, introduced in UltraViewer 6.3.4, allows you to turn on a remote computer that’s in sleep or hibernate mode. This eliminates the need to keep computers running 24/7, saving energy and reducing costs.
Setting Up Remote Wake-Up:
- Ensure both your local device and the remote computer are running UltraViewer 6.3.4 or later.
- On the remote computer, open UltraViewer and go to “Settings > Remote Control > Allow Turn On Computer Remotely.” Check the box to enable the feature.
- Configure the wake-up timer on the remote computer. UltraViewer uses the computer’s built-in wake-up timer, which is more reliable than Wake-on-LAN and doesn’t require complex hardware setup.
- To wake up the remote computer, open your local UltraViewer software and enter the remote ID and password.
- Click the “Turn On PC Remotely” button, located next to the “Start Connection” button. The remote computer will power on within a few minutes.
- Once the remote computer is on, you can establish a normal remote control session as usual.
Tips for Using Remote Wake-Up:
- Test the feature before relying on it for important tasks. Some older computers may not support wake-up timers.
- Ensure the remote computer is connected to a power source. The wake-up feature won’t work if the computer is powered off completely.
- If the remote computer doesn’t wake up, check the BIOS settings to ensure the wake-up timer is enabled.
5.2 Blacklist and Whitelist: Controlling Access
UltraViewer’s blacklist and whitelist features allow you to control which devices can connect to your computer, enhancing security and preventing unauthorized access.
Configuring the Whitelist:
- Close UltraViewer completely. Right-click the UltraViewer desktop icon and select “Run as administrator.”
- Go to “Settings > Configuration > Security > Blacklist & Whitelist.”
- In the blacklist section, click “Add New” and enter an asterisk to block all connections by default.
- In the whitelist section, click “Add New” and enter the UltraViewer ID or IPv4 address of the device you want to allow. For IPv4 addresses, use the format “IPv4:192.168.1.100.”
- Click “Apply” to save the settings. Close UltraViewer and reopen it normally to prevent unauthorized changes.
Configuring the Blacklist:
- Run UltraViewer as administrator and navigate to the Blacklist & Whitelist settings.
- In the blacklist section, click “Add New” and enter the UltraViewer ID or IPv4 address of the device you want to block.
- Click “Apply” to save the settings. The blocked device will no longer be able to connect, even with the correct ID and password.
Viewing Connection Logs:The 2025 version of UltraViewer allows you to view detailed connection logs by clicking “File > View Logs.” This log includes information about all connection attempts, including the connecting device’s ID, IP address, and connection status. Use this information to identify suspicious activity and adjust your blacklist/whitelist settings accordingly.
5.3 Multi-Device Control and Session Management
UltraViewer allows you to control multiple remote computers simultaneously, making it ideal for IT professionals and team leaders who need to manage multiple devices at once.
Managing Multiple Sessions:
- Establish the first remote connection as usual.
- To connect to a second device, click “File > New Window” to open a new UltraViewer window.
- Enter the second device’s ID and password, then click “Start Connection.”
- Repeat for additional devices. UltraViewer supports an unlimited number of simultaneous connections.
- Switch between sessions by clicking the corresponding window in your taskbar. Each session runs independently, allowing you to perform different tasks on each device.
- Use the “Session Manager” (accessible via “View > Session Manager”) to view all active connections in one place. From here, you can disconnect sessions, rename them, or minimize them to the system tray.
Copy-Pasting Between Sessions:The 2025 version introduces cross-session copy-paste functionality, allowing you to copy text, images, and files between remote sessions or between a remote session and your local computer. This feature requires both devices to run the latest version of UltraViewer.
5.4 Session Recording and Screenshot Capture
UltraViewer’s session recording and screenshot features are useful for documentation, training, and troubleshooting.
Recording Remote Sessions:
- During a remote session, click the “Record” button in the toolbar (icon of a video camera) to start recording.
- A red recording indicator will appear in the corner of the window, showing that the session is being recorded.
- To pause the recording, click the “Pause” button. Click “Resume” to continue.
- When you’re finished, click the “Stop” button. The recording will be saved as an MP4 file in your default documents folder.
- The 2025 version supports jumping to specific positions in the recording, making it easy to find key moments without watching the entire video.
Capturing Screenshots:
- During a remote session, click the “Capture” button in the toolbar (icon of a camera) or press Ctrl+Alt+C.
- Click and drag your mouse to select the area of the screen you want to capture.
- Choose to copy the screenshot to the clipboard or save it as an image file (JPG or PNG).
- The screenshot will be saved to your default pictures folder, or you can choose a custom location.
6. UltraViewer for Professional Remote Support
6.1 Best Practices for IT Support Professionals
UltraViewer is an invaluable tool for IT support professionals. Follow these best practices to provide efficient, effective remote support:
- Prepare Before the Session: Gather as much information as possible about the user’s issue before starting the remote session. This helps you diagnose the problem more quickly.
- Communicate Clearly: Use the chat feature to explain your actions to the user. This builds trust and helps the user understand how to prevent the issue from recurring.
- Document the Session: Use the session recording and screenshot features to document the issue and the solution. This is useful for future reference and for training other team members.
- Respect User Privacy: Avoid accessing sensitive information (like personal files or emails) unless necessary. Inform the user before accessing any sensitive data.
- Optimize Performance: For users with slow internet connections, lower the screen quality and avoid transferring large files during the session.
- Follow Up: After the session, follow up with the user to ensure the issue has been resolved. This provides excellent customer service and helps identify any additional problems.
6.2 Customizing UltraViewer for Support Workflows
Customize UltraViewer to streamline your support workflows and improve efficiency:
- Create Quick Response Templates: Use the smart chat feature to create templates for common responses. This saves time and ensures consistency in your communications.
- Save Frequently Accessed IDs: Add frequently supported devices to the address book for quick access. This eliminates the need to enter IDs and passwords manually each time.
- Set Up Keyboard Shortcuts: Customize keyboard shortcuts for frequently used features like file transfer and screenshot capture. This speeds up your workflow and reduces mouse clicks.
- Enable Automatic Session Logging: Enable session logging to keep track of all support sessions. This is useful for billing, reporting, and quality control.
6.3 Handling Complex Support Scenarios
UltraViewer can handle even the most complex support scenarios with ease. Here’s how to address common complex issues:
- Malware Removal: Use UltraViewer to access the infected computer and run antivirus scans. Transfer malware removal tools to the remote computer if needed.
- Software Installation/Uninstallation: Guide the user through software installation or uninstallation, or perform the task remotely if the user is uncomfortable doing it themselves.
- System Configuration: Adjust system settings remotely to resolve issues like network connectivity problems or driver conflicts.
- Data Recovery: Use file transfer to back up important data from a malfunctioning computer before performing repairs.
7. Troubleshooting Common UltraViewer Issues
7.1 Connection Problems
Connection Failed:
- Verify that the remote ID and password are correct.
- Check that both devices are connected to the internet.
- Ensure the remote computer’s firewall is not blocking UltraViewer. Add UltraViewer to the firewall whitelist.
- Confirm that both devices are running the latest version of UltraViewer.
Connection Is Slow or Laggy:
- Reduce the screen quality in the UltraViewer settings.
- Close bandwidth-intensive applications on both devices.
- Use the “Reverse Route” feature to select an alternative connection route.
- Ensure the remote computer is not running too many applications at once.
Connection Drops Frequently:
- Check the user’s internet connection for stability.
- Disable power-saving mode on the remote computer.
- Update UltraViewer to the latest version.
- Check if the remote computer is overheating, which can cause performance issues.
7.2 Feature-Specific Issues
File Transfer Fails:
- Check the file size. UltraViewer supports files up to 12 GB; split larger files into smaller parts.
- Ensure the destination folder has enough free space.
- Verify that the user has permission to write to the destination folder.
- Update UltraViewer to the latest version.
Chat Feature Not Working:
- Check that both devices have the chat feature enabled.
- Verify that the chat window is not minimized or hidden.
- Restart the remote session to reset the chat connection.
- Update UltraViewer to the latest version.
Session Recording Not Working:
- Ensure you have enough free space on your hard drive to save the recording.
- Check that you have permission to save files in the default recording location.
- Disable any screen recording software that may be conflicting with UltraViewer.
- Update UltraViewer to the latest version.
7.3 Security Issues
Unauthorized Access Attempts:
- Enable brute-force protection to block IP addresses with multiple incorrect password attempts.
- Add suspicious IP addresses to the blacklist.
- Change your UltraViewer password regularly.
- Enable two-factor authentication if available.
Encryption Concerns:
- Verify that the connection is encrypted by checking the padlock icon in the UltraViewer window.
- Ensure you downloaded UltraViewer from the official website to avoid modified versions with compromised security.
- Regularly update UltraViewer to receive the latest security patches.
8. UltraViewer Tips and Tricks for 2025
8.1 Keyboard Shortcuts to Boost Productivity
Memorize these keyboard shortcuts to speed up your UltraViewer workflow:
- Ctrl+F: Open file transfer window
- F1: Toggle chat window
- Ctrl+Alt+C: Capture screenshot
- Ctrl+Alt+R: Start/stop recording
- Ctrl+Alt+D: Disconnect session
- F8: Toggle full-screen mode
- Ctrl+Alt+S: Toggle screen sharing
- Ctrl+Alt+Z: Undo last action
Customize these shortcuts in the “Settings > Hotkeys” menu to match your preferences.
8.2 Optimizing UltraViewer for Different Network Conditions
Adjust UltraViewer’s settings to work optimally in different network environments:
- Fast Networks (5+ Mbps): Use high screen quality and enable all features for the best user experience.
- Medium Networks (1-5 Mbps): Use medium screen quality and limit file transfers to essential files.
- Slow Networks (<1 Mbps): Use low screen quality, disable animations, and avoid screen sharing. Focus on essential tasks like troubleshooting and configuration.
8.3 Securing Your UltraViewer Sessions
Follow these security best practices to keep your remote sessions secure:
- Never share your UltraViewer ID and password with untrusted individuals.
- Use a strong, unique password for unattended access.
- Enable brute-force protection and blacklist/whitelist features.
- End sessions immediately when not in use.
- Regularly review connection logs for suspicious activity.
- Keep UltraViewer updated to receive the latest security patches.
8.4 Using UltraViewer for Team Collaboration
UltraViewer is not just for remote support—it’s also a powerful collaboration tool. Use these features to enhance team collaboration:
- Screen Sharing: Share your screen with team members to present ideas, review documents, or conduct training sessions.
- File Transfer: Quickly share files with team members without using email or cloud storage.
- Real-Time Chat: Communicate with team members in real time during collaborative sessions.
- Multi-Device Control: Manage multiple team devices at once, ensuring everyone has the latest software and configurations.
Conclusion: From UltraViewer Download to Expertise
UltraViewer is a powerful, user-friendly remote desktop solution that meets the needs of individuals and businesses alike. From the initial UltraViewer download to mastering advanced features like remote wake-up and multi-device control, this guide has provided you with the knowledge and skills to use UltraViewer effectively in 2025.
The key to success with UltraViewer is starting with a secure download from the official website, following the correct installation and setup steps, and familiarizing yourself with both basic and advanced features. Whether you’re providing technical support, collaborating with team members, or accessing your home computer while traveling, UltraViewer’s lightweight design, robust security, and comprehensive functionality make it the ideal tool for all your remote access needs.
As UltraViewer continues to evolve, staying updated with the latest versions and best practices will ensure you always get the most out of the software. By following the tips and techniques outlined in this guide, you can streamline your remote workflow, save time and resources, and enjoy seamless remote access to computers anywhere in the world.