How to Do UltraViewer Download Right: A Step-by-Step Tutorial for Remote Work & Support
Remote desktop software has become a cornerstone of modern productivity, enabling individuals and businesses to break free from physical office boundaries. Among the countless options available, UltraViewer has emerged as a fan favorite for its simplicity, reliability, and cost-effectiveness. However, to fully benefit from its features, it’s crucial to start with a proper UltraViewer download—choosing the right version, avoiding security risks, and following best practices for installation and setup. This in-depth tutorial will guide you through every aspect of UltraViewer download and usage, tailored for remote work and technical support scenarios in 2025.
Whether you’re a small business owner needing to manage multiple computers, a freelancer working from home, or an IT professional providing on-demand support, this guide will help you master UltraViewer. From understanding the software’s capabilities to troubleshooting common issues, we’ll cover everything you need to know to make the most of your UltraViewer download.
Why UltraViewer Download Is a Game-Changer for Remote Work
In a world where remote work is no longer a luxury but a necessity, having the right tools can make or break your productivity. UltraViewer stands out from other remote desktop software for several reasons, making its download a smart investment for anyone needing to access or control computers from afar.
1. Unmatched Simplicity for All Users
One of the biggest barriers to adopting remote desktop software is complexity—many tools require technical expertise to set up and use. UltraViewer eliminates this barrier with an intuitive interface and straightforward workflow. Even if you’re not tech-savvy, you can complete the UltraViewer download, installation, and first connection in less than 10 minutes . The software’s design prioritizes usability, with clear labels, minimal buttons, and helpful prompts that guide you through each step.
2. Lightweight and Resource-Friendly
Unlike heavyweight remote control tools that slow down your computer, UltraViewer is incredibly lightweight. With a download size of just 1.3 MB and minimal system requirements, it runs smoothly on both new and old devices—including those with limited RAM or storage . This makes it ideal for remote work, as you can run it in the background without sacrificing performance for other tasks like video conferencing or document editing.
3. Cost-Effective for Individuals and Businesses
UltraViewer’s pricing model is another major advantage. The free version offers all the core features needed for personal use or small-scale support—including remote control, file transfer, and in-session chat . There are no time limits, hidden fees, or forced upgrades, making it a budget-friendly option for freelancers and small businesses. For enterprise users, paid plans unlock advanced features like multi-device management and priority support, with pricing that’s competitive compared to alternatives like TeamViewer or AnyDesk.
4. Robust Security for Peace of Mind
Remote work often involves accessing sensitive data, so security is non-negotiable. UltraViewer takes security seriously, with features like random password generation (minimum 5 digits), captcha verification for connections, and end-to-end encryption for data transfers . Every UltraViewer download from the official website is regularly updated with security patches, protecting you from emerging threats. The software also gives the controlled party full control—they can monitor your actions and end the connection at any time, building trust in professional settings .
5. Feature-Rich for Diverse Use Cases
UltraViewer isn’t just for basic remote control—it offers a range of features tailored to remote work and technical support:
- Large File Transfer: Send and receive files up to 12 GB, perfect for sharing contracts, project files, or software installers .
- Multi-Monitor Support: Switch between multiple monitors on the remote device, ideal for professionals who use dual screens .
- Wake on LAN: Turn on remote computers from sleep mode, eliminating the need for on-site assistance .
- Video Recording: Document remote sessions for training or compliance purposes, with the ability to jump to specific timestamps .
- Cross-Device Copy-Paste: Share text, images, and files between connected devices with a simple copy-paste .
These features make UltraViewer a versatile tool that adapts to your specific needs, whether you’re collaborating with teammates, supporting clients, or managing remote servers.
UltraViewer Download: Choosing the Right Version for Your Needs
Before you start the UltraViewer download process, it’s important to choose the version that best fits your use case. UltraViewer offers two main versions, each designed for different scenarios. Understanding the differences will ensure you get the most out of your download.
1. Installer Version (EXE)
The Installer Version is the most popular choice for regular users. It’s a full-featured version that installs UltraViewer on your computer, adding desktop shortcuts and integrating with your system. Key benefits include:
- Automatic Updates: The software checks for updates regularly and installs them automatically, ensuring you always have the latest features and security patches .
- Full Feature Access: Supports all UltraViewer functions, including multi-device control, Wake on LAN, and video recording .
- System Integration: Works with Windows Task Scheduler and other system tools, making it easy to automate remote sessions.
This version is recommended for:
- Remote workers who use UltraViewer daily.
- IT professionals providing ongoing technical support.
- Businesses managing multiple computers.
The Installer Version is available for free on the official UltraViewer download page, with paid upgrades for enterprise features .
2. Portable Version
The Portable Version is a lightweight alternative that doesn’t require installation. You can run it directly from a USB drive, external hard drive, or any folder on your computer. Key benefits include:
- No Installation Required: Perfect for troubleshooting client computers or using UltraViewer on public devices where you can’t install software.
- Zero System Impact: Doesn’t leave any files or registry entries on the host computer, making it non-intrusive.
- Easy to Carry: Store it on a USB drive and use it anywhere, anytime.
Limitations of the Portable Version:
- Lacks automatic updates—you’ll need to download the latest version manually from the official site.
- Doesn’t support some advanced features like Wake on LAN or video recording.
This version is recommended for:
- IT technicians who need to support multiple client computers.
- Users who only need UltraViewer occasionally.
- Anyone who wants to use UltraViewer without installing it.
3. Operating System Compatibility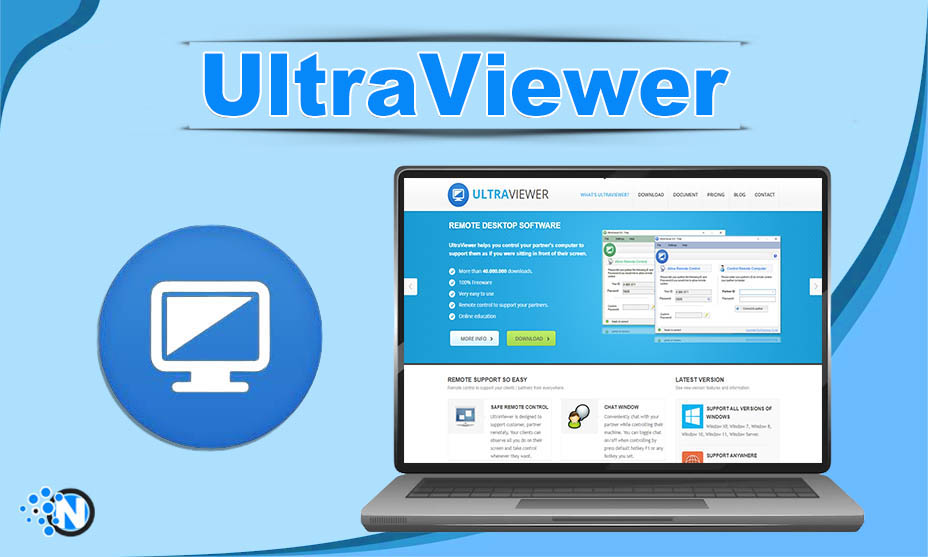
As of 2025, UltraViewer is fully compatible with all Windows operating systems, from Windows XP to Windows 11, including Windows Server editions . This broad compatibility makes it a reliable choice for businesses with mixed device fleets.
For Mac users, the official UltraViewer download for macOS is still in development . However, you can sign up for updates on the UltraViewer website to be notified when the Mac version is released. In the meantime, Mac users can use virtualization software (like Parallels Desktop) to run Windows and install UltraViewer.
Linux users can also use UltraViewer by installing Wine (a compatibility layer for running Windows software) and following the instructions on the official website . While it’s not a native Linux version, it works reliably for most remote control needs.
Step-by-Step Guide to Safe UltraViewer Download (2025)
The most critical part of using UltraViewer is ensuring a safe download. Many users make the mistake of downloading from untrusted sources, which can lead to malware infections, data breaches, or compromised devices. Follow this step-by-step guide to complete a secure UltraViewer download in 2025.
Step 1: Research the Official UltraViewer Download Source
The only reliable source for UltraViewer download is the official website: https://www.ultraviewer.net . Avoid third-party websites, file-sharing platforms, or search engine ads that claim to offer “free UltraViewer downloads”—these often host modified versions of the software with hidden malware or adware.
To confirm you’re on the official site:
- Check the URL: It should start with “https://www.ultraviewer.net” (the “s” in “https” indicates a secure connection).
- Look for the padlock icon in the browser address bar: This confirms the site is encrypted and safe to use.
- Verify the website design: The official site has a clean, professional layout with clear navigation menus (Download, Features, Support, etc.).
Step 2: Navigate to the Download Page
Once on the official website, click the “Download” tab in the top navigation menu. This will take you to the UltraViewer download page, where you’ll find the latest version of the software . As of 2025, the current version is 6.6.124, which includes all the latest features and bug fixes .
The download page is available in multiple languages, so you can switch to your preferred language using the dropdown menu at the top-right corner. This ensures you can understand the instructions even if English isn’t your first language.
Step 3: Select Your Preferred Version
On the download page, you’ll see two main options: “Download UltraViewer” (Installer Version) and “Download Portable UltraViewer” (Portable Version). Choose the version that best fits your needs (as discussed earlier).
- For the Installer Version: Click the large “Download UltraViewer” button. The button will display the latest version number (e.g., “Download UltraViewer 6.6.124”) to confirm you’re getting the most up-to-date release .
- For the Portable Version: Scroll down the page to find the “Portable UltraViewer” section and click the download button there.
Step 4: Start the UltraViewer Download
Once you click the download button, your browser will start downloading the installer file (for the Installer Version) or the ZIP file (for the Portable Version). The download should take only a few seconds—thanks to the software’s small file size (1.3 MB for the Installer Version) .
While the download is in progress:
- Do not close the browser or navigate away from the page.
- Avoid downloading other files or using bandwidth-heavy applications (like video streaming) to prevent interruptions.
- If the download doesn’t start automatically, click the “Retry” link on the page.
Step 5: Verify the Downloaded File
After the UltraViewer download is complete, it’s important to verify the file to ensure it’s not corrupted or tampered with. Here’s how:
- Check the File Size: The Installer Version should be approximately 1.3 MB, and the Portable Version should be around 1.5 MB. If the file size is significantly larger or smaller, the download may be corrupted—delete the file and try again.
- Scan for Malware: Run a virus scan on the downloaded file using your antivirus software (e.g., Windows Defender, Avast, McAfee). The official UltraViewer download is free of malware, but this step adds an extra layer of protection.
- Check the File Name: The Installer Version file should be named “UltraViewer_6.6.124.exe” (or similar, depending on the version), and the Portable Version should be named “UltraViewer_Portable.zip”. If the file name is different (e.g., “UltraViewer_Crack.exe”), it’s likely a malicious file—delete it immediately.
By following these steps, you can ensure a safe UltraViewer download that protects your device and data.
UltraViewer Installation Guide: Step-by-Step for 2025
Once you’ve completed a secure UltraViewer download, the next step is installation. The process is simple and straightforward, but following the steps carefully ensures you avoid common issues and get the software set up correctly.
Installing the Installer Version (EXE)
The Installer Version is the most common choice, so we’ll start with this guide:
- Locate the Downloaded File: Navigate to your browser’s download folder (usually “Downloads” in Windows File Explorer) and find the installer file (“UltraViewer_6.6.124.exe”).
- Run the Installer: Double-click the file to launch the setup wizard. Windows may display a User Account Control (UAC) prompt asking for permission to make changes to your device—click “Yes” to proceed.
- Select the Installation Language: The setup wizard will open with a language selection screen. Choose your preferred language (over 20 options are available, including English, Spanish, French, and Vietnamese) and click “OK”.
- Accept the License Agreement: Read the end-user license agreement (EULA) carefully. To proceed, check the box next to “I accept the agreement” and click “Next”.
- Choose the Installation Directory: By default, UltraViewer installs to “C:\Program Files\UltraViewer”. If you want to install it to a different folder, click “Browse” and select your preferred location. Ensure the drive has at least 5 MB of free space, then click “Next”.
- Create Shortcuts: Decide whether to create a desktop shortcut and/or a Start menu shortcut. These shortcuts make it easy to launch UltraViewer later, so it’s recommended to keep both boxes checked. Click “Next”.
- Start the Installation: Review your settings to ensure everything is correct, then click “Install”. The installation progress bar will appear, and the process will take 1–2 minutes.
- Complete the Installation: Once the installation is finished, click “Finish” to launch UltraViewer. The software will open automatically, displaying your unique ID and password.
Installing the Portable Version
The Portable Version doesn’t require installation, but you still need to set it up correctly:
- Locate the Downloaded ZIP File: Find the “UltraViewer_Portable.zip” file in your download folder.
- Extract the ZIP File: Right-click the file and select “Extract All”. Choose a location to extract the files (e.g., your desktop or a USB drive) and click “Extract”.
- Launch UltraViewer: Open the extracted folder and double-click the “UltraViewer.exe” file to launch the software. No further setup is required—you’ll immediately see your ID and password.
Post-Installation Checks
After installation, perform these quick checks to ensure UltraViewer is working correctly:
- Verify the Version: Click “Help” > “About UltraViewer” to confirm you’re running the latest version (6.6.124 as of 2025).
- Test the Connection: Ask a friend or colleague to share their UltraViewer ID and password, then try connecting to their device. This ensures the software is working properly.
- Check Firewall Settings: Ensure Windows Firewall isn’t blocking UltraViewer. If you can’t connect, add UltraViewer to the firewall exceptions list (Control Panel > System and Security > Windows Defender Firewall > Allow an app or feature through Windows Defender Firewall).
With the installation complete, you’re ready to start using UltraViewer for remote work and support.
Using UltraViewer for Remote Work: Essential Tips & Tricks
Now that you’ve completed the UltraViewer download and installation, it’s time to master the software for remote work. Whether you’re accessing your office computer from home, collaborating with teammates, or managing projects remotely, these tips will help you work efficiently and effectively.
1. Setting Up a Secure Remote Connection
To connect to your office computer or a teammate’s device securely:
- Share Credentials Safely: Never share your UltraViewer ID and password via unencrypted channels (e.g., public chat rooms or email). Use secure messaging apps like Signal or Microsoft Teams instead.
- Enable Two-Factor Authentication (2FA): For added security, enable 2FA in UltraViewer settings (click “Settings” > “Security” > “Enable Two-Factor Authentication”). This requires a verification code in addition to the password for connections.
- Restrict Access to Trusted IDs: Add frequently used IDs to your “Address Book” (click “Address Book” > “Add”) and set them as trusted. This allows automatic connections without entering the password each time, while still blocking untrusted IDs.
2. Optimizing Performance for Remote Work
Remote work requires smooth performance to stay productive. Here’s how to optimize UltraViewer:
- Adjust Image Quality: If you’re working on a slow internet connection, reduce the image quality (click “Settings” > “Display” > “Image Quality”) to minimize lag. For tasks that require high clarity (e.g., graphic design), increase the quality.
- Disable Unnecessary Features: Turn off features you don’t need (e.g., chat or file transfer) during important sessions to free up bandwidth.
- Use Wired Internet: Whenever possible, connect your computer to the internet via an Ethernet cable. Wired connections are more stable than Wi-Fi, reducing lag and disconnections.
3. Collaborating with Teammates
UltraViewer makes remote collaboration easy with these features:
- In-Session Chat: Use the built-in chat to communicate with teammates during remote sessions. This is perfect for discussing projects, sharing ideas, or asking questions without switching to another app .
- File Transfer: Share project files, documents, and presentations quickly using the file transfer feature. The 12 GB file size limit means you can share even large video files or design assets .
- Screen Sharing: Instead of controlling the remote device, you can share your own screen (click “Tools” > “Share Screen”) to present ideas or walk teammates through a process.
4. Accessing Your Office Computer from Home
For remote workers who need to access their office computer regularly:
- Set Up Wake on LAN: Configure Wake on LAN in UltraViewer (click “Tools” > “Wake on LAN”) so you can turn on your office computer from home. This eliminates the need to leave it on overnight .
- Save Connection Details: Add your office computer’s ID to your address book and save the password (with 2FA enabled for security). This allows one-click connections for quick access.
- Automate Tasks: Use Windows Task Scheduler to run frequently used apps (e.g., Microsoft Office, project management tools) on your office computer before you connect. This saves time and lets you start working immediately.
Using UltraViewer for Technical Support: Pro Tips
UltraViewer is an excellent tool for IT professionals and technical support teams. Its user-friendly interface and robust features make it easy to troubleshoot issues, resolve problems, and assist clients remotely. Here are some pro tips for using UltraViewer in technical support scenarios.
1. Preparing the Client for Connection
Before connecting to a client’s device, take these steps to ensure a smooth experience:
- Guide the Client Through UltraViewer Download: If the client doesn’t have UltraViewer installed, send them a link to the official download page and walk them through the installation process. Keep the instructions simple and avoid technical jargon.
- Explain the Process: Let the client know what to expect—they’ll need to share their ID and password, and they’ll see a prompt to allow the connection. Reassure them that they can end the connection at any time .
- Ask for Permission: Always get the client’s consent before accessing their device. This builds trust and ensures compliance with privacy regulations (e.g., GDPR).
2. Troubleshooting Common Client Issues
UltraViewer’s features make it easy to diagnose and fix problems remotely:
- Video Recording: Record the session to document the issue and your solution. This is useful for future reference or if the client has the same problem later .
- File Transfer: Send troubleshooting tools, drivers, or software updates directly to the client’s device using the file transfer feature. This eliminates the need for the client to download files themselves.
- Multi-Device Control: If the client has multiple devices with the same issue, connect to all of them simultaneously to resolve the problem efficiently .
3. Providing Clear Communication
Technical support often involves guiding non-technical clients through steps. Use these communication tips:
- Chat Function: Use the in-session chat to type step-by-step instructions. This allows the client to follow along at their own pace and refer back to the instructions later .
- Voice Communication: Enable the microphone feature (added in the 2025 update) to speak to the client directly. This is faster than typing and helps avoid misunderstandings .
- Screen Annotations: Use the annotation tool (click “Tools” > “Annotate”) to draw on the client’s screen, highlighting buttons or areas they need to focus on.
4. Ensuring Client Privacy
Privacy is crucial in technical support. Follow these steps to protect the client’s data:
- Avoid Accessing Sensitive Information: Only access the files and applications necessary to resolve the issue. Never browse the client’s personal files or data without permission.
- End the Connection When Done: Always disconnect immediately after resolving the issue. Don’t leave the session open, even if you plan to help the client again later.
- Delete Connection Details: If you won’t need to connect to the client’s device again, delete their ID and password from your address book to prevent unauthorized access.
UltraViewer 2025: Latest Features You Need to Know
UltraViewer is constantly evolving, with regular updates that add new features and improve performance. The 2025 updates have made the software even more powerful, with enhancements tailored to remote work and technical support. Here are the latest features you should explore after your UltraViewer download.
1. Microphone Support
The 2025 version added microphone support, allowing you to communicate with clients or teammates via voice during remote sessions . This eliminates the need for separate video conferencing apps and makes communication more seamless. To use this feature:
- Click “Settings” > “Audio” > “Enable Microphone”.
- Select your default microphone from the dropdown menu.
- During a session, click the “Microphone” button in the toolbar to toggle voice communication on/off.
2. Cross-Device Copy-Paste
You can now copy text, images, and files from one device and paste them directly into the remote device (and vice versa) . This feature saves time and eliminates the need for file transfer for small items. Note that both devices must have the latest version of UltraViewer installed for this to work.
3. Improved Video Recording
The video recording feature has been enhanced with the ability to jump to specific positions in recorded videos . This makes it easy to review important parts of a session without watching the entire video. You can also adjust the recording quality to balance file size and clarity.
4. Enhanced Security Features
UltraViewer has strengthened its security with updated captcha verification and random password generation . The captcha check prevents automated connection attempts, while the minimum 5-digit password ensures brute-force attacks are less likely. You can also enable two-factor authentication for an extra layer of protection.
5. Better Multi-Monitor Support
The 2025 update improved multi-monitor support, allowing you to switch between monitors with a single click . You can also right-click the “Switch Monitor” button to view all monitors at once, making it easier to navigate complex setups.
6. Updated Language Support
UltraViewer now supports over 20 languages, with improved translations for Italian, French, Bahasa Indonesia, Thai, Korean, and Japanese . This makes the software more accessible to users around the world, regardless of their native language.
Troubleshooting UltraViewer: Common Issues & Fixes (2025)
Even with a successful UltraViewer download and installation, you may encounter issues from time to time. Below are the most common problems and their solutions, updated for the 2025 version.
1. Can’t Connect to a Remote Device
- Possible Causes: Firewall restrictions, incorrect ID/password, weak internet connection, or outdated software.
- Solutions:
- Ensure both devices have the latest version of UltraViewer (click “Help” > “Check for Updates”).
- Verify the ID and password are correct (passwords are case-sensitive).
- Add UltraViewer to the firewall exceptions list on both devices.
- Check the internet connection—try restarting the router or switching to a wired connection.
2. Lag or Slow Performance
- Possible Causes: Slow internet connection, high image quality settings, or too many apps running in the background.
- Solutions:
- Reduce the image quality in UltraViewer settings (click “Settings” > “Display” > “Image Quality”).
- Close unnecessary apps on both devices to free up resources.
- Use a wired internet connection instead of Wi-Fi.
- Disable features like chat or file transfer during the session if you don’t need them.
3. File Transfer Failed
- Possible Causes: File size exceeds the limit, insufficient storage on the remote device, or network interruption.
- Solutions:
- Ensure the file size is less than 12 GB (the maximum for the 2025 version).
- Check that the remote device has enough free storage to receive the file.
- Use a wired internet connection for large file transfers.
- Pause and resume the transfer if it’s interrupted.
4. Microphone Not Working
- Possible Causes: Microphone not enabled in settings, muted microphone, or outdated audio drivers.
- Solutions:
- Enable the microphone in UltraViewer settings (click “Settings” > “Audio” > “Enable Microphone”).
- Check that your microphone is not muted (both in UltraViewer and your system settings).
- Update your audio drivers (Device Manager > Sound, video and game controllers > Update driver).
5. UltraViewer Crashes or Freezes
- Possible Causes: Outdated software, conflicting apps, or low system resources.
- Solutions:
- Update UltraViewer to the latest version (download from the official site).
- Close other remote control software or apps that may be conflicting.
- Restart your computer to free up RAM and resources.
- If the problem persists, reinstall UltraViewer (uninstall via Control Panel > Programs and Features, then download and install again).
Conclusion: Maximize Productivity with UltraViewer Download
A proper UltraViewer download is the first step toward unlocking the full potential of remote work and technical support. With its lightweight design, intuitive interface, and robust feature set, UltraViewer is the ideal tool for anyone needing to access or control computers from afar. Whether you’re a freelancer, small business owner, or IT professional, this software adapts to your needs and simplifies remote interaction.
From the secure UltraViewer download process to advanced features like microphone support and cross-device copy-paste, the 2025 version offers everything you need to work efficiently and effectively. The free version covers all basic requirements, while paid plans provide scalability for growing businesses. With regular updates and a focus on user experience, UltraViewer continues to be a top choice for remote desktop software.
If you haven’t already, visit the official website to complete a safe UltraViewer download and start enjoying the convenience of remote control. With the tips and tricks in this guide, you’ll be able to master UltraViewer in no time—saving time, reducing costs, and staying connected wherever you are.