In today’s digital age, remote work, technical support, and long-distance collaboration have become integral parts of both personal and professional life. Whether you’re a freelancer needing to access your home computer while traveling, a IT technician providing remote support to clients, or a team manager overseeing employees’ work from afar, a reliable remote desktop tool is essential. Among the numerous options available, UltraViewer stands out for its simplicity, efficiency, and robust feature set—especially when you start with a proper UltraViewer download and follow the right setup steps. This comprehensive guide will walk you through everything from UltraViewer download to advanced usage, ensuring you can harness the full potential of this tool in 2025 and beyond.
Why Choose UltraViewer? Key Advantages Before Your UltraViewer Download
Before diving into the UltraViewer download process, it’s important to understand why this software has gained millions of users worldwide. In a market flooded with remote control tools, UltraViewer differentiates itself with a combination of user-friendliness, performance, and affordability that caters to both beginners and professionals.
First and foremost, UltraViewer is incredibly lightweight. With a file size of just 1.3 MB for the latest version, the UltraViewer download and installation process takes mere seconds, even on devices with limited storage or slow internet connections . Unlike bulkier alternatives that consume significant system resources, UltraViewer runs smoothly in the background without slowing down your computer—making it ideal for older devices or those with low RAM.
Another major advantage is its cost-effectiveness. UltraViewer offers a fully functional free version that covers basic remote control needs, such as accessing files, troubleshooting issues, and simple collaboration . There are no hidden fees, sudden disconnections, or mandatory upgrade prompts that disrupt your workflow—unlike some competitors that restrict core features in their free tiers . For businesses or power users requiring advanced capabilities (like multi-device simultaneous control or large file transfers), paid plans are available at competitive prices, ensuring scalability as your needs grow.
Security is also a top priority for UltraViewer. The software generates random access passwords with a minimum length of 5 digits, adds captcha/security checks to prevent unauthorized access, and allows the controlled party to end the connection at any time . Every UltraViewer download from the official website comes with regular security patches, protecting your data from potential breaches during remote sessions.
Additionally, UltraViewer’s feature set is tailored to real-world needs. From file transfer (supporting up to 12 GB in the latest version) to in-session chat, multi-monitor support, and Wake on LAN functionality, it covers all the tools required for seamless remote interaction . The 2025 updates have further enhanced its utility, adding microphone support, cross-device copy-pasting, and improved translation for multiple languages—making it a global tool for international teams .
For Windows users, compatibility is never an issue. UltraViewer supports all Windows operating systems from XP to 11, including Windows Server editions . While the Mac version is still in development, users can stay updated on the official website for the latest news on UltraViewer download for macOS . With these advantages, it’s clear why UltraViewer is the go-to choice for anyone seeking a reliable remote desktop solution.
Preparing for UltraViewer Download: System Requirements & Safety Tips
To ensure a smooth UltraViewer download and installation process, it’s crucial to check your system requirements and follow safety best practices. Skipping these steps can lead to compatibility issues, slow performance, or even security risks from untrusted sources.
System Requirements for UltraViewer Download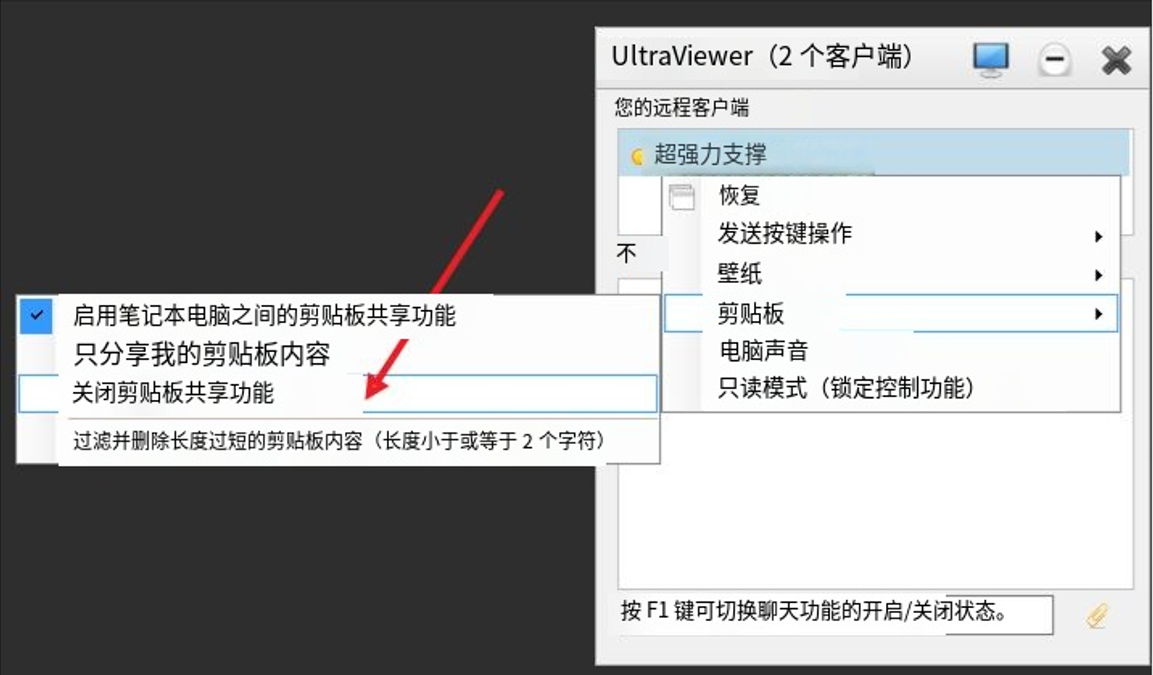
UltraViewer’s lightweight design means it has minimal system requirements, but verifying them beforehand avoids frustration:
- Operating System: Windows XP, Windows Vista, Windows 7, Windows 8, Windows 10, Windows 11, and all Windows Server versions . Mac users should wait for the official macOS release and monitor the UltraViewer website for updates .
- Processor: Any Intel or AMD processor with a clock speed of 1 GHz or higher (works on both 32-bit and 64-bit systems).
- RAM: At least 512 MB (1 GB or more recommended for optimal performance, especially when transferring large files).
- Storage: A mere 5 MB of free disk space (the installer is 1.3 MB, and the installed software takes up minimal additional space) .
- Internet Connection: A stable broadband connection (minimum 1 Mbps) for smooth remote control. Slower connections may work but could result in reduced image quality or lag.
Safety Tips for Secure UltraViewer Download
The most critical step in the UltraViewer download process is ensuring you get the software from a trusted source. Third-party websites often host modified versions of UltraViewer that may contain malware, adware, or spyware—compromising your device’s security. Here’s how to download safely:
- Use the Official Website: The only reliable source for UltraViewer download is the official site (ultraviewer.net) . Avoid search engine results that lead to unfamiliar domains or sites offering “cracked” or “premium” versions for free.
- Verify the Download Link: On the official website, navigate to the “Download” section to find the latest version (as of 2025, the current version is 6.6.124) . The link should end with “ultraviewer.net” to confirm authenticity.
- Check for HTTPS: Ensure the website uses HTTPS (look for the padlock icon in the browser address bar) to encrypt your data during the UltraViewer download process.
- Scan the Installer: After downloading, run a virus scan with your preferred antivirus software to confirm the file is clean. UltraViewer’s official installer is free of malware, but this extra step adds a layer of protection.
By following these requirements and safety tips, you’ll set the stage for a trouble-free UltraViewer download and installation.
Step-by-Step UltraViewer Download & Installation Process (2025 Updated)
Now that you’ve prepared your device and confirmed the safety measures, it’s time to proceed with the UltraViewer download and installation. This step-by-step guide is updated for 2025, covering the latest version and ensuring compatibility with Windows 11 and other modern systems.
Step 1: Access the Official UltraViewer Download Page
Open your preferred web browser (Chrome, Firefox, Edge, etc.) and go to https://www.ultraviewer.net/en/download-html . This is the official UltraViewer download page, where you’ll find the latest stable version. The page is available in multiple languages, so you can switch to your preferred language using the dropdown menu at the top.
Step 2: Select the Right Version for Your Needs
On the download page, you’ll find two main versions of UltraViewer:
- Installer Version (EXE): This is the full version that installs UltraViewer on your computer, adding shortcuts and integrating with your system. It’s recommended for regular use, as it supports all features (including automatic updates) .
- Portable Version: A lightweight version that runs directly from a USB drive or folder without installation. It’s ideal for temporary use (e.g., troubleshooting a client’s computer) but lacks some advanced features like automatic updates.
For most users, the Installer Version is the best choice. Click the “Download UltraViewer” button (labeled with the latest version number, e.g., “Download UltraViewer 6.6.124”) to start the UltraViewer download . The file will be saved to your default download folder (you can change the location in your browser settings if needed).
Step 3: Complete the UltraViewer Download
The download process should take 10–30 seconds, depending on your internet speed. The installer file (typically named “UltraViewer_6.6.124.exe”) is only 1.3 MB, so even with a slow connection, it won’t take long . While waiting, avoid closing the browser or interrupting the download, as this can corrupt the file.
Step 4: Run the Installer and Follow the Setup Wizard
Once the UltraViewer download is complete, locate the installer file in your download folder and double-click it to run. Windows may display a User Account Control (UAC) prompt asking for permission to make changes to your device—click “Yes” to proceed.
The UltraViewer setup wizard will open, guiding you through the installation process. Here’s what to do next:
- Select Language: Choose your preferred language (the 2025 version supports over 20 languages, including English, Spanish, French, German, Italian, and Vietnamese) . Click “OK” to continue.
- Accept the License Agreement: Read the end-user license agreement (EULA) and check the box next to “I accept the agreement” to proceed. Click “Next.”
- Choose Installation Directory: By default, UltraViewer installs to “C:\Program Files\UltraViewer,” but you can click “Browse” to select a different folder. Ensure the drive has at least 5 MB of free space. Click “Next.”
- Create Desktop Shortcut: Check the box to create a desktop shortcut for easy access. You can also choose to add UltraViewer to your Start menu. Click “Next.”
- Start Installation: Review your settings and click “Install” to begin. The installation will take 1–2 minutes, with a progress bar showing the status.
- Complete the Installation: Once finished, click “Finish” to launch UltraViewer. The software will open automatically, displaying your unique ID and random password—these are used to connect to other devices.
Troubleshooting Common UltraViewer Download & Installation Issues
While the process is straightforward, some users may encounter issues. Here are solutions to the most common problems:
- Download Failed: If the UltraViewer download doesn’t complete, check your internet connection and try again. If the issue persists, clear your browser cache or use a different browser. Avoid downloading from mobile data, as signal drops can interrupt the process.
- Installer Won’t Run: If double-clicking the installer does nothing, right-click it and select “Run as administrator.” This resolves permission issues on Windows 10/11.
- Error During Installation: The 2025 version fixed many previous installation bugs (e.g., setup errors on Windows Server) , but if you encounter an error, ensure your system meets the requirements and that no other remote control software is running. Restart your computer and try again.
- DPI Scaling Issues: For devices with DPI greater than 150%, earlier versions had UI glitches, but the 2025 update fixed this problem . If you still see issues, adjust your display settings temporarily during installation.
With the installation complete, you’re ready to start using UltraViewer. The next section will cover basic and advanced usage to help you make the most of the software.
Basic UltraViewer Usage: From Connection to Essential Functions
After a successful UltraViewer download and installation, using the software is intuitive—even for beginners. This section covers the core features you’ll need for everyday remote control, including how to connect to another device, use the chat function, and transfer files.
Understanding the UltraViewer Interface
When you launch UltraViewer, the main window is divided into two sections:
- Your ID and Password: This section displays your unique fixed ID and a randomly generated password (the password resets each time you launch the software for security). Share these credentials with the person who will control your device.
- Partner ID and Password: To control another device, enter the partner’s ID and password here, then click “Connect.”
The interface also includes a toolbar with quick-access buttons for common functions: File Transfer, Chat, Full-Screen Mode, and Disconnect. The 2025 version features an updated, clutter-free design with improved language translation, making it easy to navigate even if English isn’t your first language .
How to Connect to a Remote Device
Connecting to another computer with UltraViewer takes just a few steps:
- Get the Partner’s Credentials: Ask the person whose device you want to control to open UltraViewer and share their ID and password.
- Enter Credentials: In your UltraViewer window, type the partner’s ID in the “Partner ID” field and their password in the “Password” field.
- Initiate the Connection: Click the “Connect” button. The partner will see a prompt asking for permission to allow remote control—they must click “Allow” to proceed.
- Start Controlling: Once connected, you’ll see the partner’s screen in your UltraViewer window. You can use your mouse and keyboard to navigate their computer, open files, and perform tasks as if you were sitting in front of it.
Essential Functions for Everyday Use
1. In-Session Chat
UltraViewer includes a built-in chat function to communicate with the partner during a remote session. To use it:
- Click the “Chat” button in the toolbar (or press the F12 shortcut key).
- Type your message in the chat box and press Enter to send.
- The partner will see the message in a pop-up window, and they can reply directly.
This feature is invaluable for technical support (e.g., guiding the partner through steps) or collaboration (e.g., discussing files you’re viewing together). The 2025 update added the ability to drag and drop files into the chat window for quick sharing .
2. File Transfer
Transferring files between devices is simple with UltraViewer:
- Click the “File Transfer” button in the toolbar (or press F9).
- A file explorer window will open, showing both your computer (left pane) and the remote computer (right pane).
- Navigate to the file/folder you want to transfer, select it, and click “Send” (to send to the remote device) or “Receive” (to get from the remote device).
- The latest version supports file sizes up to 12 GB, making it easy to transfer large documents, videos, or software installers .
The transfer progress is displayed in a pop-up window, and you can pause or cancel the transfer at any time. For security, the partner is notified of all file transfers and can decline if needed.
3. Multi-Monitor Support
If the remote device has multiple monitors, UltraViewer lets you switch between them seamlessly:
- Left-click the “Switch Monitor” button in the toolbar to cycle through individual monitors.
- Right-click the button to view all monitors at once (useful for comparing files across screens) .
This feature is ideal for professionals who use multiple monitors for work, such as graphic designers or programmers.
4. Full-Screen Mode
For a more immersive experience, switch to full-screen mode:
- Click the “Full-Screen” button in the toolbar (or press F11).
- To exit full-screen mode, press Esc or click the “Exit Full-Screen” button in the top-right corner.
Full-screen mode is helpful when working on detailed tasks that require maximum screen space, such as editing documents or troubleshooting software.
Advanced UltraViewer Features: Boost Productivity in 2025
Beyond the basic functions, UltraViewer offers advanced features that make it suitable for professional use. These tools are especially useful for businesses, IT teams, and power users looking to streamline remote work and support.
Multi-Device Simultaneous Control
One of UltraViewer’s most powerful features is the ability to control multiple devices at the same time. This is perfect for IT technicians who need to support multiple clients or managers who want to monitor several team computers:
- To connect to a second device, open a new UltraViewer window (click “File” > “New Window”).
- Enter the second partner’s ID and password, then click “Connect.”
- You can switch between active sessions by clicking the session tabs at the top of the UltraViewer window.
The 2025 version improved the performance of multi-device control, reducing lag even when connected to multiple devices simultaneously . You can also copy and paste text, files, and images between connected devices—provided both have the latest version installed .
Wake on LAN (WoL)
The Wake on LAN feature allows you to turn on a remote computer that’s in sleep or hibernation mode—no need for someone to be physically present to power it on:
- Ensure the remote computer supports Wake on LAN (most modern computers do).
- In UltraViewer, click “Tools” > “Wake on LAN.”
- Enter the remote computer’s IP address and MAC address (you can get these from the computer’s network settings or by asking the owner).
- Click “Wake Up” to send the signal. The computer will turn on within a few minutes .
This feature is a game-changer for remote workers who forget to leave their office computer on or IT teams that need to perform after-hours maintenance.
Video Recording
UltraViewer lets you record remote sessions for training, documentation, or quality control:
- Click “Tools” > “Record” to start recording.
- A pop-up window will let you choose the save location and video format (MP4 or AVI).
- During recording, you can pause or resume by clicking the “Pause”/“Resume” button in the toolbar.
- To stop recording, click “Stop”—the video will be saved to your chosen location.
The 2025 update added the ability to jump to specific positions in recorded videos, making it easier to review important parts of the session . You can also adjust the recording quality to balance file size and clarity.
Security Settings Customization
While UltraViewer’s default security settings are robust, you can customize them to meet your specific needs:
- Password Settings: Click “Settings” > “Security” to change the password length (minimum 5 digits) or enable/disable automatic password generation.
- Captcha Verification: Toggle captcha checks to prevent unauthorized connection attempts—this is especially useful for businesses receiving frequent support requests .
- Connection Permissions: Choose whether to require manual approval for every connection or allow automatic access from trusted IDs.
- Disconnection Timer: Set a timer to automatically end idle sessions (e.g., after 10 minutes of inactivity) to protect sensitive data.
These settings give you full control over who can access your device and how secure the connection is.
Common UltraViewer Issues & Solutions (2025 Updated)
Even with a smooth UltraViewer download and installation, you may encounter occasional issues during use. This section addresses the most common problems and provides up-to-date solutions based on the 2025 version.
Connection Issues
- Connection Failed/Timeout: This is usually caused by a weak internet connection or firewall restrictions. Solution: Check both devices’ internet connections, ensure UltraViewer is allowed through Windows Firewall (add it to the exceptions list), and ask the partner to disable any third-party antivirus/firewall software temporarily.
- Password Not Working: If the partner’s password doesn’t work, ask them to restart UltraViewer—this resets the password. Ensure there are no typos (passwords are case-sensitive) and that both devices are using the latest version .
- Lag or Slow Performance: Reduce image quality in UltraViewer settings (click “Settings” > “Display” > “Image Quality”) to improve speed on slow connections. Closing unnecessary apps on both devices also frees up resources.
Functionality Issues
- Copy-Paste Not Working: The 2025 version added cross-device copy-pasting, but it only works if both devices have the latest version installed . Solution: Update UltraViewer on both computers (click “Help” > “Check for Updates”) and restart the session.
- File Transfer Failed: Ensure the file size doesn’t exceed 12 GB (the maximum for the latest version) and that the remote device has enough free storage. If transferring large files, use a wired internet connection to avoid interruptions.
- Microphone Not Working: The 2025 update added microphone support, but you need to enable it in settings. Solution: Click “Settings” > “Audio” > “Enable Microphone” and ensure both devices’ microphones are connected and not muted.
Software Crashes
- UltraViewer Closes Unexpectedly: This issue was fixed in version 6.6.26, which resolved crashes when clicking “Save Settings” . Solution: Update to the latest version via the official UltraViewer download page. If the problem persists, check for conflicting software (e.g., other remote control tools) and uninstall them.
- Multiple Instances Error: Earlier versions had issues with multiple UltraViewer instances opening on low-RAM devices, but this was fixed in the 2025 update . Restart your computer to close any background instances.
Conclusion: Unlock the Power of Remote Control with UltraViewer Download
A proper UltraViewer download and setup is the first step toward seamless remote work, technical support, and collaboration. With its lightweight design, robust security, and feature-rich interface, UltraViewer stands out as one of the best remote desktop tools in 2025—whether you’re a casual user or a business professional.
From the quick UltraViewer download process to advanced features like multi-device control and Wake on LAN, this software adapts to your needs and simplifies remote interaction. The free version covers all basic requirements, while paid plans offer scalability for growing businesses. With regular updates and a focus on user experience, UltraViewer continues to evolve to meet the demands of the digital world.
If you haven’t already, head to the official website for a safe UltraViewer download and start enjoying the convenience of remote control today. Whether you’re accessing files from afar, supporting clients, or collaborating with teammates, UltraViewer makes it easy to stay connected—anytime, anywhere.