How to Use UltraViewer Like a Pro: Essential Tips with Safe UltraViewer Download
In today’s digital landscape, remote access has become a necessity for individuals and businesses alike. Whether you’re working from home, providing technical support to clients, or collaborating with team members across the globe, the ability to access and control computers remotely can save time, reduce costs, and improve productivity. Among the many remote desktop solutions available, UltraViewer has emerged as a fan favorite—thanks to its intuitive design, robust feature set, and completely free usage model. But to truly harness its power, you need more than just a basic understanding of the software. This guide will take you from a safe UltraViewer download to advanced pro-level techniques, ensuring you get the most out of this versatile tool.
UltraViewer’s rise in popularity is no accident. Unlike many competitors that charge exorbitant fees for basic features or restrict free usage, UltraViewer offers unlimited access to core remote control tools without any hidden costs. This makes it accessible to everyone, from students and freelancers to small business owners and IT professionals. But what truly sets UltraViewer apart is its commitment to continuous improvement. The 2025 update (version 6.6.124) introduces a range of new features and fixes, addressing user feedback and staying ahead of the curve in remote access technology. From enhanced security measures to improved collaboration tools, UltraViewer is designed to meet the evolving needs of modern users.
However, to fully benefit from UltraViewer’s capabilities, it’s crucial to start with a safe and correct UltraViewer download. Many users make the mistake of downloading the software from untrusted third-party websites, which can expose their devices to malware, adware, or other security threats. In this guide, we’ll emphasize the importance of official UltraViewer download channels and walk you through the entire process, from installation to advanced usage. We’ll also share pro tips and tricks to help you navigate the software like an expert, whether you’re managing multiple devices, troubleshooting complex issues, or collaborating with remote teams.
The Importance of Safe UltraViewer Download
Before diving into the features and functionality of UltraViewer, it’s essential to highlight the importance of a safe UltraViewer download. In an age where cyber threats are rampant, downloading software from untrusted sources can have serious consequences—including data breaches, device damage, and identity theft. Here’s why you should always opt for the official UltraViewer download channel:
1. Avoid Malware and Security Threats
Third-party websites often distribute modified versions of UltraViewer that contain malware, spyware, or adware. These malicious programs can infect your device, steal sensitive information (like passwords and financial data), and disrupt your system’s performance. Some modified versions may also have hidden backdoors that allow hackers to access your device remotely, putting your privacy and security at risk.
The official UltraViewer download page (https://www.ultraviewer.net/en/download.html) provides a clean, virus-free version of the software. The developers regularly scan the download files for threats and release updates to patch security vulnerabilities. By downloading from the official site, you can rest assured that you’re getting a safe and reliable version of UltraViewer.
2. Access the Latest Version and Updates
UltraViewer is updated regularly with new features, performance improvements, and bug fixes. Third-party websites often host outdated versions of the software, which may lack critical security patches and new functionalities. Using an outdated version can lead to compatibility issues, connection problems, and security risks.
By downloading UltraViewer from the official website, you’ll get the latest version (6.6.124 as of 2025) with all the newest features, including microphone support, switch-side control, and lock screen. You’ll also receive notifications about future updates, ensuring that your software remains up-to-date and secure.
3. Ensure Compatibility with Your System
The official UltraViewer download page provides clear information about system requirements and compatibility. UltraViewer supports all Windows operating systems from Windows XP to Windows 11, as well as Windows Server versions. The official site also offers guidance for Mac users, including workarounds using Windows emulators.
Third-party websites may not provide accurate compatibility information, leading you to download a version of UltraViewer that doesn’t work with your device. This can result in wasted time and frustration, as well as potential system errors.
4. Receive Reliable Support
If you encounter any issues during the UltraViewer download or installation process, the official website offers comprehensive support resources, including a FAQ page, troubleshooting guides, and contact information for customer support. The support team is responsive and knowledgeable, and they can help you resolve any problems quickly.
Third-party websites typically do not offer support for the software they distribute. If you download UltraViewer from an untrusted source and encounter issues, you’ll have no one to turn to for help.
In summary, a safe UltraViewer download is the foundation of a positive experience with the software. By choosing the official website, you’ll protect your device from security threats, access the latest features, ensure compatibility, and receive reliable support. Now, let’s walk through the step-by-step process of downloading and installing UltraViewer safely.
Step-by-Step Guide to Safe UltraViewer Download and Installation
Downloading and installing UltraViewer is a simple process, but it’s important to follow the steps carefully to ensure a safe and successful setup. Here’s how to do it:
1. Check System Requirements
Before starting the UltraViewer download, ensure that your device meets the minimum system requirements:
- Operating System: Windows XP, Windows 7, Windows 8, Windows 10, Windows 11, or Windows Server (any version).
- Internet Connection: Stable internet connection for downloading the software and establishing remote connections.
- Storage Space: At least 10MB of free disk space (the installation file is around 5MB, and the software requires minimal additional space).
- Processor: Any modern processor (UltraViewer is lightweight and does not require a high-performance CPU).
For Mac users, as mentioned earlier, UltraViewer does not have a native version. You’ll need to install a Windows emulator like Parallels Desktop, VMware Fusion, or VirtualBox first. Ensure that your Mac meets the emulator’s system requirements (most require at least 4GB of RAM and a 64-bit processor).
2. Navigate to the Official UltraViewer Download Page
Open your preferred web browser and go to https://www.ultraviewer.net/en/download.html. This is the official UltraViewer download page, and it’s the only source you should trust for downloading the software.
Take a moment to familiarize yourself with the page. You’ll find information about the latest version of UltraViewer, as well as two download options: the EXE file (full installation) and the ZIP file (portable version). We’ll explain the differences between these options in the next step.
3. Choose the Right Download Option
UltraViewer offers two download options to suit different user needs:
Option 1: EXE File (Full Installation)
The EXE file is the recommended option for most users. It installs UltraViewer on your device, creates a desktop shortcut, and integrates with your system. This allows you to configure settings like auto-start with Windows and access the software quickly whenever you need it.
To download the EXE file:
- Click the “Download UltraViewer (EXE)” button.
- The download will start automatically. Depending on your internet speed, it should take 1-2 minutes.
- Save the file to your “Downloads” folder or a location of your choice.
Option 2: ZIP File (Portable Version)
The ZIP file is a portable version of UltraViewer that does not require installation. It’s ideal for users who want to run the software from a USB drive or external hard drive, or for those who do not have permission to install software on their device.
To download the ZIP file:
- Click the “Download UltraViewer (ZIP)” button.
- Save the ZIP file to your desired location.
- Once the download is complete, extract the files to a folder (you can use Windows’ built-in extraction tool or a third-party tool like WinRAR).
4. Install UltraViewer (for EXE File Users)
If you downloaded the EXE file, follow these steps to install UltraViewer:
- Locate the downloaded EXE file in your “Downloads” folder.
- Double-click the file to launch the installation wizard.
- A User Account Control prompt may appear, asking for permission to make changes to your device. Click “Yes” to proceed.
- The installation wizard will open. Select your preferred language from the dropdown menu (supported languages include English, Italian, French, Bahasa Indonesia, Thai, Korean, Japanese, and more).
- Click “Next” to continue. You’ll be prompted to choose the installation directory. The default directory is usually “C:\Program Files (x86)\UltraViewer,” but you can change it if you prefer.
- Click “Next” again. You can choose to create a desktop shortcut and add UltraViewer to your Start menu (we recommend enabling both options for easy access).
- Click “Install” to start the installation process. The wizard will install UltraViewer in a few seconds.
- Once the installation is complete, click “Finish” to launch UltraViewer.
5. Launch UltraViewer (for Portable ZIP Users)
If you downloaded the portable ZIP file, follow these steps to launch UltraViewer:
- Locate the extracted folder (where you saved the ZIP file’s contents).
- Double-click the “UltraViewer.exe” file to launch the software.
- No installation is required—UltraViewer will run directly from the folder.
6. Verify the Installation
After launching UltraViewer, you should see the main interface, which displays your unique ID and password. These credentials are used to connect to your device remotely, so keep them secure. To verify that the installation was successful:
- Check that the software opens without any error messages.
- Test the chat feature by sending a message to yourself (you can do this by connecting to your own ID, but you’ll need to approve the connection).
- Ensure that the toolbar (with options for file transfer, recording, and chat) is visible and functional.
If you encounter any issues, refer to the troubleshooting section later in this guide or contact UltraViewer support for assistance.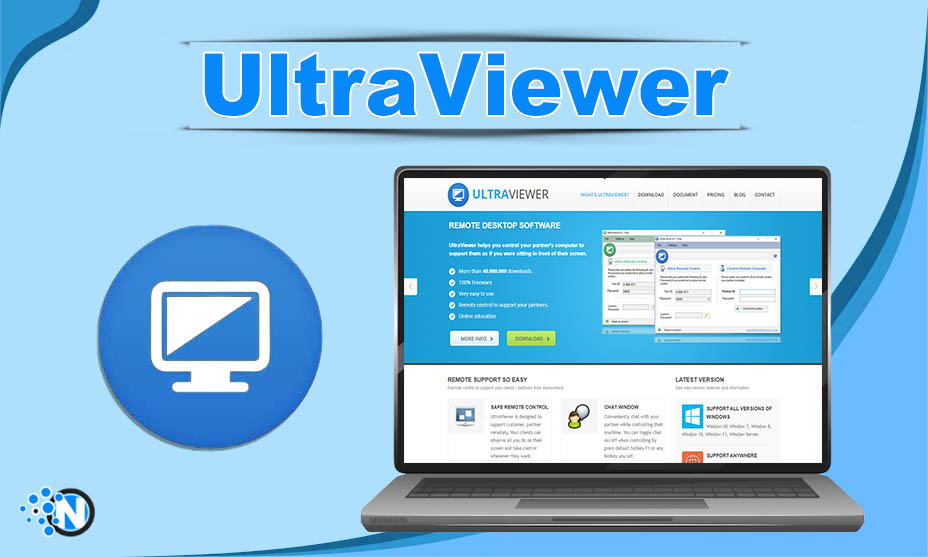
Getting Started with UltraViewer: Basic Pro Tips
Now that you’ve completed a safe UltraViewer download and installation, it’s time to learn the basics of using the software like a pro. These tips will help you navigate the interface, establish connections, and make the most of UltraViewer’s core features.
1. Customize Your Interface
UltraViewer’s interface is designed to be user-friendly, but customizing it to your preferences can improve your workflow. Here’s how to do it:
- Change the Language: If you prefer to use UltraViewer in a language other than English, go to “Settings” > “Language” and select your preferred language. The latest version supports multiple languages, including Italian, French, Bahasa Indonesia, Thai, Korean, and Japanese.
- Adjust the Toolbar: The toolbar at the top of the remote session window contains essential controls like file transfer, chat, and recording. You can customize which icons are displayed by right-clicking the toolbar and selecting “Customize Toolbar.”
- Set Default Hotkeys: Hotkeys allow you to perform common actions quickly without clicking the toolbar. Go to “Settings” > “Hotkeys” to configure default hotkeys for actions like toggling chat (default F1), ending the session (default Ctrl+Alt+End), and switching control sides.
2. Manage Your ID and Password
Your UltraViewer ID and password are the keys to remote access, so it’s important to manage them securely:
- Refresh Your Password: UltraViewer generates a random password automatically, but you can refresh it at any time by clicking the “Refresh” button next to the password field. This is useful if you suspect someone has gained unauthorized access to your credentials.
- Share Credentials Securely: When sharing your ID and password with others, use a secure communication channel like encrypted email or a password manager. Never share your credentials over public Wi-Fi or unencrypted messaging apps.
- Enable “Access Anytime”: If you want to access your device remotely without needing to approve each connection, enable the “Access Anytime” feature. Go to “Settings” > “Access Anytime” and set a permanent password. This is convenient for accessing your own computer but should be used with caution—ensure your permanent password is strong and unique.
3. Establish a Secure Remote Connection
Establishing a secure remote connection is crucial for protecting your data. Here’s how to do it like a pro:
- Verify the Remote User’s Identity: Before connecting to a remote device, confirm the user’s identity. Scammers may try to trick you into connecting to their device to steal information, so always verify who you’re connecting to.
- Use Captcha Verification: UltraViewer’s captcha feature adds an extra layer of security by requiring the remote user to enter a code before connecting. To enable this, go to “Settings” > “Security” > “Enable Captcha for Incoming Connections.”
- Restrict Access with Whitelist/Blacklist: As mentioned earlier, UltraViewer’s whitelist and blacklist features allow you to control who can connect to your device. Add trusted IDs or IP addresses to the whitelist and block suspicious ones to prevent unauthorized access.
4. Master File Transfer
File transfer is one of UltraViewer’s most useful features, and mastering it can save you time and effort. Here are some pro tips:
- Transfer Large Files Efficiently: UltraViewer’s premium plan allows for unlimited large file transfers, but even the free version can handle large files with ease. To speed up transfers, compress files into a ZIP folder before sending.
- Schedule Transfers: If you’re transferring multiple large files, you can schedule the transfer for a time when both devices are idle (e.g., overnight). This ensures that the transfer doesn’t slow down your workflow during the day.
- Verify File Integrity: After transferring files, always verify that they’ve been received correctly. Check the file size and open the file to ensure it’s not corrupted.
5. Use Chat for Effective Communication
The chat feature is more than just a way to send text messages—it’s a powerful collaboration tool. Here’s how to use it like a pro:
- Attach Files to Chat: Instead of using the file transfer tool for small files (like screenshots or documents), attach them directly to chat messages. This is faster and more convenient for quick sharing.
- Use Voice Chat: With the 2025 update, UltraViewer now supports microphone access for voice chat. This is ideal for complex troubleshooting tasks or meetings where verbal communication is more efficient than text.
- Save Chat History: UltraViewer automatically saves chat history locally on both devices. You can access past chats by going to “Settings” > “Chat” > “View Chat History.” This is useful for referencing important information or keeping a record of conversations.
Advanced UltraViewer Techniques for Pros
Once you’ve mastered the basics, it’s time to explore UltraViewer’s advanced features. These techniques will help you streamline your workflow, improve productivity, and handle complex remote access scenarios like a pro.
1. Control Multiple Devices Simultaneously
UltraViewer allows you to control multiple devices at once, which is a game-changer for IT professionals and anyone managing multiple computers. Here’s how to do it:
- Open Multiple UltraViewer Windows: Launch UltraViewer multiple times to open separate windows. Each window can connect to a different remote device.
- Switch Between Sessions Easily: Use the taskbar to switch between UltraViewer windows, or use the “Window” menu in UltraViewer to select the session you want to access.
- Copy-Paste Between Sessions: With the latest update, you can copy text, files, or images from one remote device and paste them into another. This is useful for transferring information between devices without using file transfer.
2. Use the Switch-Side Feature for Collaboration
The switch-side feature allows you to swap control between your device and the remote device, making it ideal for training, troubleshooting, and collaboration. Here’s how to use it effectively:
- Demonstrate Tasks and Let Others Practice: If you’re training someone to use a software program, take control of their device to demonstrate the task, then switch control back to them so they can practice.
- Collaborate on Projects: For team projects, use the switch-side feature to take turns working on a document or application. This eliminates the need to send files back and forth and ensures everyone is working on the latest version.
- Troubleshoot with the Remote User: If the remote user is having trouble with a task, switch control to them so they can show you the issue firsthand. This makes troubleshooting faster and more accurate.
3. Record Remote Sessions for Documentation
Recording remote sessions is a valuable tool for training, documentation, and quality control. Here’s how to do it like a pro:
- Start and Stop Recording: Click the record icon in the toolbar to start recording. Click it again to stop. The recording will be saved as a .uvr file on your local device.
- Skip to Specific Positions in Recordings: The latest version of UltraViewer allows you to skip to a specific position in recordings, making it easy to review specific parts of a session without watching the entire video.
- Share Recordings with Team Members: Save recordings to a shared drive or cloud storage service (like Google Drive or Dropbox) to share them with team members. This is useful for training new employees or documenting troubleshooting processes.
4. Optimize Performance for Slow Internet Connections
If you’re working with a slow or unstable internet connection, UltraViewer’s performance can suffer. Here are some pro tips to optimize performance:
- Reduce Screen Resolution: Lower the screen resolution of the remote device to reduce the amount of data being transmitted. This will make the remote screen more responsive.
- Disable Visual Effects: Turn off visual effects (like animations and transparency) on the remote device to reduce system resource usage.
- Use the “Fast Mode”: UltraViewer has a “Fast Mode” that prioritizes speed over image quality. Enable this mode by clicking the “Fast Mode” icon in the toolbar.
5. Automate Tasks with UltraViewer
UltraViewer allows you to automate certain tasks to save time and effort. Here are some useful automation tips:
- Auto-Start UltraViewer with Windows: Enable this feature to have UltraViewer launch automatically when your computer starts. This is useful if you need to access your device remotely frequently.
- Set Up Auto-Response Messages: If you’re unavailable to respond to chat messages during a remote session, set up an auto-response message. Go to “Settings” > “Chat” > “Auto-Response” and enter your message.
- Schedule Remote Sessions: Use Windows Task Scheduler to launch UltraViewer and connect to a remote device at a specific time. This is useful for performing routine maintenance tasks (like updates) overnight.
Troubleshooting Advanced UltraViewer Issues
Even pros encounter issues from time to time. Here are some advanced troubleshooting tips to help you resolve common problems:
1. Connection Drops Frequently
If your remote connection drops frequently, try the following:
- Check Internet Stability: Use a tool like Speedtest to check your internet connection speed and stability. A weak or intermittent connection is the most common cause of dropped connections.
- Update UltraViewer: Ensure both devices are running the latest version of UltraViewer. Recent updates have improved connection stability and fixed issues with dropped sessions.
- Disable Firewall or Antivirus Interference: Some firewalls or antivirus programs may block UltraViewer’s connection. Add UltraViewer to the list of allowed programs in your firewall and antivirus settings.
- Use a Wired Connection: If possible, connect both devices to the internet using a wired Ethernet cable. Wired connections are more stable than Wi-Fi and can reduce connection drops.
2. Remote Screen is Blurry or Laggy
If the remote screen is blurry or laggy, try these solutions:
- Adjust Image Quality: Click the “Image Quality” icon in the toolbar and select a lower quality setting. This will reduce the amount of data being transmitted and improve speed.
- Close Background Applications: Close any unnecessary applications on both devices to free up system resources. Running too many programs can slow down the remote connection.
- Update Graphics Drivers: Outdated graphics drivers can cause display issues. Update the graphics drivers on both devices to the latest version.
3. File Transfer Fails for Large Files
If you’re having trouble transferring large files, try the following:
- Use the Premium Plan: UltraViewer’s premium plan allows for unlimited large file transfers. If you frequently transfer large files, consider upgrading to the premium plan (starting at $47.88 per user per year).
- Split Large Files: Use a tool like WinRAR to split large files into smaller parts. Transfer the parts separately and then merge them on the remote device.
- Check Storage Space: Ensure the remote device has enough storage space to receive the file. If the remote device’s hard drive is full, the transfer will fail.
4. Microphone Not Working During Voice Chat
If the microphone isn’t working during voice chat, try these steps:
- Check Microphone Permissions: Ensure UltraViewer has permission to access your microphone. Go to “Settings” > “Privacy” > “Microphone” and enable access for UltraViewer.
- Test the Microphone: Use Windows’ built-in microphone test tool to ensure your microphone is working correctly. If the microphone isn’t working, check the connections or try a different microphone.
- Update Audio Drivers: Outdated audio drivers can cause microphone issues. Update the audio drivers on both devices to the latest version.
5. UltraViewer Crashes When Launching
If UltraViewer crashes when launching, try the following:
- Run UltraViewer as Administrator: Right-click the UltraViewer shortcut and select “Run as administrator.” This ensures the software has the necessary permissions to run.
- Reinstall UltraViewer: Uninstall UltraViewer and then download and install the latest version from the official website. This can fix corrupted installation files.
- Check for System Conflicts: Use Windows Event Viewer to check for system conflicts that may be causing UltraViewer to crash. Look for error messages related to UltraViewer and resolve the underlying issue.
Conclusion: Elevate Your Remote Access Game with UltraViewer
UltraViewer is more than just a remote desktop tool—it’s a powerful collaboration platform that can transform the way you work. From its user-friendly interface to its advanced features like switch-side control and voice chat, UltraViewer is designed to make remote access seamless, secure, and efficient. By following the steps outlined in this guide, you’ve completed a safe UltraViewer download, mastered the basics, and learned pro-level techniques to take your remote access skills to the next level.
Whether you’re a casual user needing to access your home computer or a professional managing multiple devices, UltraViewer has everything you need to succeed. Its free usage model, broad compatibility, and continuous updates make it a top choice for remote access in 2025 and beyond. By implementing the tips and tricks shared in this guide, you’ll be able to use UltraViewer like a pro, saving time, reducing costs, and improving productivity.
As remote work and collaboration continue to evolve, UltraViewer will remain at the forefront of remote desktop technology. With its commitment to user feedback and innovation, you can expect even more exciting features in future updates. So why settle for less? Complete your safe UltraViewer download today and experience the power of professional remote access.