UltraViewer Download 2025: The Complete Step-by-Step Guide to Remote Control Mastery
In an era where remote work, technical support, and global collaboration have become indispensable, finding reliable remote desktop software is crucial. Among the myriad of options available, UltraViewer stands out as a free, user-friendly, and feature-rich solution that has gained millions of users worldwide. Whether you’re a freelancer needing to access your home computer while traveling, an IT professional providing remote support to clients, or a small business team collaborating across locations, UltraViewer offers the tools to make remote interactions seamless. The first step to unlocking these capabilities is a successful UltraViewer download and proper setup—and this guide will walk you through every detail, from choosing the right version to mastering advanced features.
Remote desktop software has evolved significantly, and UltraViewer has kept pace with regular updates to address user needs and technological advancements. As of 2025, the latest version (6.6.124) comes with enhanced security protocols, improved performance, and new features that make remote control more intuitive than ever. Unlike premium alternatives like TeamViewer, which often restricts free usage or flags commercial activity, UltraViewer provides unlimited free access for both personal and business use, with no hidden fees or forced upgrades. This accessibility has made it a top choice for users seeking a cost-effective yet powerful remote control tool—and the journey starts with a safe and straightforward UltraViewer download.
Why Choose UltraViewer in 2025?
Before diving into the UltraViewer download process, it’s essential to understand why this software has become a go-to solution for remote access. UltraViewer’s popularity stems from its unique blend of simplicity, functionality, and security—three factors that matter most for remote interactions.
First, UltraViewer is completely free for basic and even advanced use. Unlike competitors that limit free sessions to a few minutes or restrict the number of connections, UltraViewer allows unlimited remote sessions with no time constraints. This makes it ideal for IT support teams that need to troubleshoot issues for hours or individuals who frequently access their home computers. Additionally, UltraViewer offers premium plans for users needing advanced features like remote wake-up and large file transfers, but the core functionality remains free, making it accessible to everyone.
Second, UltraViewer prioritizes security—a critical concern for remote access. The software uses industry-standard encryption to protect data transmitted between devices, ensuring that sensitive information like passwords, files, and screen content remains confidential. Recent updates have added captcha and security checks to prevent unauthorized access, and random passwords (with a minimum length of 5 digits) are generated automatically to further enhance protection. These security measures give users peace of mind, whether they’re sharing personal files or accessing work-related data remotely.
Third, UltraViewer is designed for compatibility and performance. It supports all Windows operating systems, from Windows XP to Windows 11, as well as Windows Server versions. This broad compatibility means you can use it to connect to almost any Windows-based computer, regardless of its age or configuration. The software is also lightweight, so it doesn’t consume excessive system resources or slow down the host or client device. Recent updates have improved connection speed, especially when jumping to specific positions on the remote screen, and fixed issues related to multiple monitors and mouse positioning—making the remote control experience smoother than ever.
Finally, UltraViewer is packed with user-centric features that enhance productivity. From real-time chat during remote sessions to file sharing, screen sharing, and multi-device control, it offers everything you need to collaborate effectively. The 2025 version introduces even more useful tools, including microphone support for voice communication, a switch-side feature that lets you swap control between devices, and a lock screen feature to secure the remote computer during sessions. These additions make UltraViewer not just a remote control tool, but a comprehensive collaboration platform.
For Mac users interested in UltraViewer, the software currently does not have a native Mac version. However, you can still use UltraViewer by installing a Windows emulator like Parallels Desktop, VMware Fusion, or VirtualBox on your Mac. This workaround allows you to run Windows applications seamlessly, including UltraViewer, and access all its features without compromising performance. The developers have stated that a native Mac version is in the works, so be sure to follow the official UltraViewer website for updates on future releases.
Step-by-Step UltraViewer Download and Installation Guide
The UltraViewer download and installation process is straightforward, even for users with limited technical expertise. Follow these steps to get started with the latest version of UltraViewer in minutes.
1. Prepare for UltraViewer Download
Before initiating the UltraViewer download, ensure that your device meets the basic requirements. For Windows users, this means having a Windows XP or later operating system (Windows 11 is fully supported) and a stable internet connection. The download file size is small (around 5MB), so even users with slow internet can complete the download quickly.
It’s important to download UltraViewer from the official website to avoid malware or counterfeit versions. Third-party websites may offer modified versions of the software that contain viruses or adware, which can compromise your device’s security. The official UltraViewer download page is https://www.ultraviewer.net/en/download.html—bookmark this link for future updates.
For Mac users, prepare your device by installing a Windows emulator first. Choose a reliable emulator like Parallels Desktop (which offers a free trial) and follow the emulator’s installation instructions. Once the emulator is set up and running Windows, you can proceed with the UltraViewer download as you would on a native Windows device.
2. Complete the UltraViewer Download
Navigate to the official UltraViewer download page using your preferred web browser. On the page, you’ll find two download options: the EXE file (for full installation) and the ZIP file (portable version).
- EXE File (Full Installation): This is the recommended option for most users. It installs UltraViewer on your device, creates a desktop shortcut, and integrates with your system for easy access. The full installation also allows you to configure settings like auto-start with Windows and default hotkeys.
- ZIP File (Portable Version): This option is ideal for users who want to run UltraViewer without installing it on their device. The portable version can be stored on a USB drive or external hard drive, making it convenient for IT professionals who need to use the software on multiple computers. It requires no installation—simply extract the ZIP file and run the executable.
Click on your preferred download option. The UltraViewer download will start automatically. Depending on your internet speed, the download should take 1-2 minutes. Once the download is complete, locate the file in your device’s “Downloads” folder (or the folder you specified for downloads).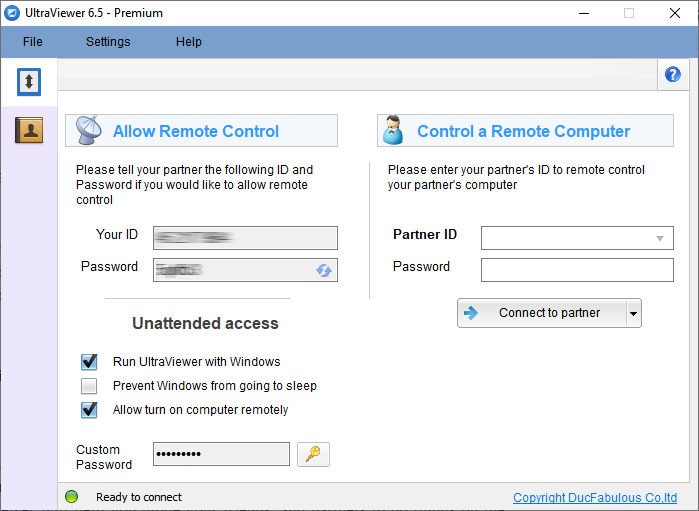
3. Install UltraViewer on Your Device
For users who downloaded the EXE file:
- Double-click the downloaded EXE file to launch the installation wizard.
- A security prompt may appear, asking for permission to run the file. Click “Yes” to proceed.
- The installation wizard will guide you through the process. You can choose the installation language (supported languages include English, Italian, French, Bahasa Indonesia, Thai, Korean, Japanese, and more) and the installation directory.
- Click “Next” to proceed through the steps. The wizard will install UltraViewer on your device in a few seconds.
- Once the installation is complete, check the box next to “Launch UltraViewer” and click “Finish” to open the software.
For users who downloaded the portable ZIP file:
- Locate the ZIP file in your downloads folder and right-click on it.
- Select “Extract All” and choose a destination folder for the extracted files.
- Once extracted, open the folder and double-click the “UltraViewer.exe” file to launch the software. No further installation is required.
4. Post-Installation Setup
After launching UltraViewer for the first time, you’ll see the main interface, which displays your unique ID and password. These credentials are used to connect to your device remotely, so keep them secure. You can change the password by clicking the “Refresh” button next to the password field.
Take a moment to explore the settings menu to customize UltraViewer to your needs. Key settings include:
- Auto-start with Windows: Enable this option if you want UltraViewer to launch automatically when your computer starts, making it easier to access remotely.
- Hotkeys: Configure default hotkeys for common actions like toggling chat (default is F1), ending the session, and switching control sides.
- Language: Change the software’s language if needed.
- Security: Adjust security settings like enabling captcha for incoming connections and setting up a whitelist/blacklist to restrict access to specific IDs or IP addresses.
You can also set up the “Access Anytime” feature, which allows you to connect to your device without needing to approve each connection. This is useful for accessing your own computer remotely but should be used with caution—ensure that your password is strong and that you only share your ID and password with trusted individuals.
Mastering Basic UltraViewer Features
Once you’ve completed the UltraViewer download and installation, it’s time to learn how to use the basic features. These features form the foundation of remote control and collaboration, and mastering them will allow you to access and control remote devices with ease.
1. Connecting to a Remote Device
The primary function of UltraViewer is to connect to remote devices, and the process is simple:
- Ask the remote device’s user to open UltraViewer and share their ID and password.
- On your UltraViewer interface, enter the remote ID in the “Partner ID” field and the password in the “Password” field.
- Click the “Connect” button to initiate the connection.
- The remote user will receive a prompt asking to allow the connection. Once they click “Allow,” you’ll gain access to their screen.
Alternatively, if you want to allow someone to connect to your device, simply share your ID and password with them. They’ll enter these credentials in their UltraViewer and click “Connect,” and you’ll receive a prompt to approve the connection.
It’s important to note that the remote user must have UltraViewer running and must approve the connection (unless the “Access Anytime” feature is enabled). If the connection fails, check that both devices have a stable internet connection, that the ID and password are entered correctly, and that no firewalls or antivirus software are blocking UltraViewer.
2. Navigating the Remote Screen
Once connected to a remote device, you can control it as if you were sitting in front of it. Your mouse and keyboard inputs will be transmitted to the remote device, allowing you to open files, launch applications, and perform any other task.
UltraViewer’s latest version has improved the speed of jumping to specific positions on the remote screen, making it easier to navigate large displays or multiple monitors. If the remote device has multiple monitors, you can switch between them using the monitor icon in the UltraViewer toolbar. The software also displays the original screen resolution with a scrollbar, ensuring that you can see the entire screen even if your device’s resolution is different.
To zoom in on the remote screen for better visibility, use the zoom slider in the toolbar. You can also toggle full-screen mode to take over your entire display, which is useful for detailed tasks like editing documents or troubleshooting software issues.
3. Using the Chat Feature
Communication is key during remote sessions, and UltraViewer’s built-in chat feature allows you to communicate with the remote user in real time. To open the chat window, click the chat icon in the toolbar or use the default hotkey (F1).
The chat feature supports text messages and file attachments, making it easy to share links, documents, or screenshots. Recent updates have fixed issues where the chat dialog would not display at full width or would jump to the default position when a message is received, ensuring a smooth chat experience. You can toggle the chat window on and off during the session to avoid distractions, and all chat history is saved locally on both devices for future reference.
With the 2025 update, UltraViewer now supports microphone access, allowing you to communicate via voice during remote sessions. To use this feature, ensure that both devices have microphones enabled and that UltraViewer has permission to access the microphone. This is particularly useful for complex troubleshooting tasks where verbal communication is more efficient than text.
4. File Sharing
Sharing files between devices is a common need during remote sessions, and UltraViewer makes it simple. To transfer files:
- Click the file transfer icon in the toolbar.
- Select the files or folders you want to send from your device.
- Choose the destination folder on the remote device.
- Click “Send” to start the transfer.
UltraViewer uses advanced compression to ensure fast file transfers, even for large files. The premium version allows for unlimited large file transfers, while the free version has some restrictions—but for most users, the free version’s file transfer capabilities are more than sufficient. You can monitor the transfer progress in the file transfer window, and both users will receive a notification when the transfer is complete.
It’s important to note that file transfers are encrypted, so your files remain secure during transmission. You can also pause or cancel transfers at any time if needed.
Exploring Advanced UltraViewer Features (2025 Updates)
The latest version of UltraViewer (6.6.124) introduces several advanced features that take remote control to the next level. These features are designed to enhance productivity, security, and collaboration, making UltraViewer even more versatile.
1. Switch-Side Feature
The switch-side feature is a game-changer for collaboration. It allows you to swap control between your device and the remote device with a single click. For example, if you’re helping a colleague troubleshoot a problem, you can take control of their device to fix the issue, then switch control back to them so they can continue working.
To use the switch-side feature:
- Ensure both devices are running the latest version of UltraViewer (6.6.28 or later).
- During an active remote session, click the switch-side icon in the toolbar.
- The remote user will receive a prompt to approve the switch. Once approved, control will be transferred.
This feature is particularly useful for training sessions, where the trainer may need to demonstrate a task and then let the trainee practice. It eliminates the need to end and restart the session to switch control, saving time and improving efficiency.
2. Turn-On Monitor and Lock Screen Features
UltraViewer’s 2025 update includes a turn-on monitor feature, which allows you to activate the remote device’s monitor if it’s in sleep mode. This is useful if you need to access a remote computer that’s been left idle. To use this feature, simply connect to the remote device and click the turn-on monitor icon in the toolbar—the monitor will wake up immediately.
The lock screen feature, on the other hand, allows you to lock the remote device’s screen during a session. This prevents unauthorized access to the remote computer while you’re away from your own device. To lock the screen, click the lock screen icon in the toolbar. The remote user will need to enter their Windows password to unlock the screen once the session is ended.
3. Multi-Device Control and Copy-Pasting
UltraViewer now allows you to control multiple devices simultaneously, making it ideal for IT professionals who need to manage multiple computers at once. You can open multiple UltraViewer windows, each connected to a different device, and switch between them with ease.
Another useful feature is the ability to copy-paste between clients while controlling multiple PCs. This means you can copy text, files, or images from one remote device and paste them into another, or copy from your local device and paste into a remote device. For this feature to work, both devices must have the latest version of UltraViewer installed.
4. Video Recording and Playback
UltraViewer allows you to record remote sessions for future reference. This is useful for training purposes, troubleshooting documentation, or keeping a record of important meetings. To start recording, click the record icon in the toolbar. The recording will be saved as a .uvr file on your local device.
Recent updates have fixed issues where .uvr files from version 6.6.110 could not be opened, and added the ability to skip to a specific position when playing back recordings. This makes it easy to review specific parts of a session without watching the entire recording.
5. Whitelist and Blacklist
For users who need to restrict access to their device, UltraViewer offers whitelist and blacklist features. The whitelist allows you to specify which IDs or IP addresses are allowed to connect to your device, while the blacklist blocks specific IDs or IP addresses.
To set up a whitelist or blacklist:
- Open UltraViewer and go to the “Settings” menu.
- Select “Security” and then “Access Control.”
- Enter the IDs or IP addresses you want to allow (whitelist) or block (blacklist).
- Save your settings.
This feature is particularly useful for businesses that want to ensure only authorized employees can access company computers remotely. It adds an extra layer of security and gives administrators greater control over remote access.
Troubleshooting Common UltraViewer Issues
While UltraViewer is reliable, you may encounter occasional issues during the download, installation, or use of the software. Here are some common problems and their solutions:
1. UltraViewer Download Fails
If the UltraViewer download fails, check your internet connection first. A unstable or slow connection can interrupt the download. Try restarting your router or connecting to a different Wi-Fi network.
If the problem persists, clear your browser’s cache and cookies. Corrupted cache files can sometimes prevent downloads from completing. You can also try using a different web browser to download the file—some browsers may have compatibility issues with the UltraViewer download page.
Finally, ensure that your device has enough storage space for the download. The UltraViewer installation file is small (around 5MB), but if your device’s hard drive is full, the download may fail. Free up space by deleting unnecessary files and try again.
2. Installation Issues
If you encounter issues during installation, such as the software not opening after installation or error messages when clicking “Save Settings,” try the following solutions:
- Run the installer as an administrator. Right-click the EXE file and select “Run as administrator” to ensure the installer has the necessary permissions.
- Disable your antivirus software temporarily. Some antivirus programs may flag UltraViewer as a potential threat (false positive) and block the installation. After installation, you can re-enable your antivirus.
- Download the latest version of UltraViewer. Older versions may have compatibility issues with newer Windows operating systems. The latest version (6.6.124) fixes many installation-related bugs, including the issue where the software would close when clicking “Save Settings.”
3. Connection Problems
If you can’t connect to a remote device, check the following:
- Ensure both devices are running UltraViewer. The remote device must have the software open and running for the connection to work.
- Verify the ID and password. Typos in the ID or password are a common cause of connection failures. Ask the remote user to double-check their credentials and share them again.
- Check firewalls and antivirus software. Firewalls or antivirus programs on either device may be blocking UltraViewer’s connection. Add UltraViewer to the list of allowed programs in your firewall and antivirus settings.
- Ensure both devices have a stable internet connection. A weak or intermittent connection can cause the connection to drop or fail. Try restarting both devices’ internet connections.
If you’re still having trouble, check the UltraViewer FAQ page or contact support at support-en@ultraviewer.net for assistance.
4. Performance Issues
If UltraViewer is running slowly or the remote screen is lagging, try the following:
- Close unnecessary applications on both devices. Running too many programs can consume system resources and slow down the remote connection.
- Reduce the screen resolution of the remote device. Lowering the resolution can improve connection speed, especially for users with slow internet.
- Update UltraViewer to the latest version. Recent updates have improved performance, including faster jumping to positions on the remote screen and fixed issues with multiple monitors.
5. Compatibility Issues with Mac
As mentioned earlier, UltraViewer does not have a native Mac version. If you’re a Mac user, the only way to use UltraViewer is to install a Windows emulator. If you’re having trouble with the emulator, ensure that you’re using a compatible version and that your Mac meets the emulator’s system requirements. You can also check the emulator’s support page for troubleshooting tips.
Conclusion: Unlock the Power of Remote Control with UltraViewer Download
UltraViewer has established itself as a top-tier remote desktop software, offering a perfect balance of simplicity, security, and functionality. Whether you’re a casual user needing to access your home computer or a business owner managing a team of remote workers, UltraViewer has everything you need to make remote interactions seamless. The 2025 version’s new features, including microphone support, switch-side control, and lock screen, have only enhanced its value, making it an even more indispensable tool.
The journey to mastering UltraViewer starts with a safe and successful UltraViewer download. By following the steps outlined in this guide, you can install the software in minutes and start connecting to remote devices immediately. With its user-friendly interface, broad compatibility, and robust security features, UltraViewer is the ideal solution for anyone seeking a reliable and free remote control tool.
As remote work and collaboration continue to grow, having a trusted remote desktop software like UltraViewer is more important than ever. Whether you’re troubleshooting technical issues, collaborating on projects, or accessing files from afar, UltraViewer empowers you to work efficiently and effectively—no matter where you are. So why wait? Complete your UltraViewer download today and experience the future of remote control.