In 2025, remote work and technical support have become integral parts of both professional and personal life, driving the demand for reliable, user-friendly remote control software to new heights. UltraViewer, a leading free remote access tool tailored for Windows systems, has responded to this demand with its latest Version 5.1, introducing the highly anticipated unattended access feature that allows automatic startup with Windows . This game-changing update enables users to manage remote computers effortlessly, even without on-site assistance, making tasks like remote restart, file management, and system troubleshooting more efficient than ever.
To unlock the full potential of UltraViewer’s 2025 enhancements—including unattended access, seamless file transfer, and end-to-end encryption—starting with a secure UltraViewer download is essential. This comprehensive tutorial will walk you through every step, from finding the official UltraViewer download source to mastering advanced features, ensuring you can leverage the software for remote work, IT support, family assistance, and more with confidence. Whether you’re a first-time user or upgrading from an older version, this guide provides the latest, most detailed instructions to help you become proficient in UltraViewer 5.1.
## I. Secure UltraViewer Download 2025: Step-by-Step Guide to Official Sources
The foundation of a smooth UltraViewer experience lies in a safe and legitimate UltraViewer download. With cyber threats lurking in third-party platforms, accessing the official version not only guarantees full functionality but also protects your device from malware and hidden plugins. Below is the updated 2025 guide to acquiring UltraViewer safely, including version selection and compatibility checks.
### 1. Official UltraViewer Download Channels
The only trusted source for UltraViewer download is the official website (https://www.ultraviewer.net). Follow these steps to navigate the site and retrieve the correct installation file:
- Open your preferred browser (Chrome, Edge, Firefox) and type the official URL directly—avoid clicking on search engine ads or unknown links to prevent phishing.
- Once on the homepage, locate the prominent green “Download” button in the upper section of the page . The website automatically detects your Windows operating system and recommends the latest stable version (currently UltraViewer 5.1 with unattended access).
- For users who need specific versions (e.g., beta builds or older releases for compatibility), scroll to the bottom of the homepage and click “Download Center” to access the full archive.
### 2. Version Selection for Different Needs
UltraViewer offers two primary versions to suit diverse use cases, and choosing the right one during UltraViewer download ensures optimal performance:
- Standard Installer (EXE): Ideal for regular users who need permanent access to UltraViewer. This version installs all core features, including unattended access, file transfer, and screen annotation, and creates a desktop shortcut for quick launches. The file size is approximately 5MB, ensuring fast download even on slow networks.
- Portable Version (ZIP): Designed for temporary use or users without admin rights. The portable version requires no installation—simply extract the ZIP file and run the executable . It retains all essential functions but does not support unattended access (since this feature requires integration with Windows services).
### 3. Compatibility Checks Before UltraViewer Download
UltraViewer currently supports all Windows operating systems, from Windows XP to Windows 11 and Windows Server editions . Before initiating the UltraViewer download, confirm your system meets the minimum requirements:
- Operating System: Windows XP/Vista/7/8/10/11 (32-bit or 64-bit) or Windows Server 2008/2012/2016/2019/2022.
- Processor: 1GHz or faster CPU (dual-core recommended for smooth remote control).
- RAM: At least 512MB (1GB or more for multi-tasking during remote sessions).
- Storage: 10MB of free disk space for the standard version; no additional space needed for the portable version.
- Internet Connection: Stable broadband connection (minimum 1Mbps upload/download speed) for lag-free remote access.
### 4. UltraViewer Download Safety Tips
To avoid security risks during UltraViewer download, adhere to these best practices:
- Verify the website’s authenticity: The official site uses HTTPS encryption and displays the domain “ultraviewer.net”—avoid third-party platforms like untrusted software directories or file-sharing sites.
- Scan the installer: After download, run a quick scan with your antivirus software to ensure the file is free of malware (though official downloads are always safe).
- Disable unnecessary downloads: During installation, decline any optional browser toolbars or software offers (the official installer does not include bloatware, but some third-party mirrors may add extras).
## II. UltraViewer Installation and Initial Setup (2025 Updated)
Once the UltraViewer download is complete, the installation process is straightforward, but proper setup ensures you can access all new features like unattended access. Follow these steps for a hassle-free installation and initial configuration.
### 1. Standard Installation Process
- Locate the downloaded EXE file (typically in the “Downloads” folder) and double-click it to launch the installer.
- A pop-up window will appear asking for permission to make changes to your device—click “Yes” to proceed.
- The installation wizard will guide you through the process: click “Next” to accept the license agreement, then choose the installation directory (the default path is recommended for most users).
- Select additional options: Check “Create a desktop shortcut” for easy access and “Add UltraViewer to startup” if you want the software to launch automatically when Windows starts (required for unattended access).
- Click “Install” and wait for the process to complete (usually 1-2 minutes). Once finished, click “Finish” to launch UltraViewer automatically.
### 2. Portable Version Setup
- Extract the downloaded ZIP file to a location of your choice (e.g., desktop or external drive) using built-in Windows tools or software like WinRAR.
- Open the extracted folder and double-click “UltraViewer.exe” to run the program—no installation required.
- Note that the portable version will not retain settings between sessions, so you’ll need to reconfigure preferences each time you launch it. It’s best for one-time use or when working on public computers.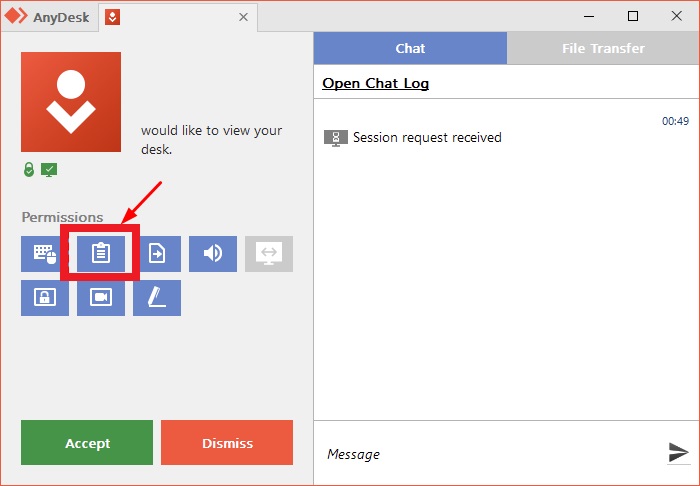 ### 3. Initial Configuration After Launch
- When UltraViewer opens for the first time, you’ll see a simple interface divided into two sections: “Allow Remote Control” (left) and “Control Remote Computer” (right) .
- In the “Allow Remote Control” section, you’ll find your unique “Your ID” (a 6-8 digit number) and “Password” (a 4-digit code). Share these credentials with anyone who needs to control your computer remotely.
- Click the “Settings” icon (gear symbol) in the top-right corner to customize preferences: adjust display quality (low, medium, high) based on your internet speed, enable or disable sound transmission, and configure keyboard shortcuts for common actions.
- For unattended access setup (UltraViewer 5.1+), navigate to the “Unattended Access” tab in settings—this will be covered in detail in the next section.
## III. Mastering Unattended Access: UltraViewer 5.1’s Flagship Feature
The release of UltraViewer 5.1 introduced unattended access, a highly requested feature that allows users to control a remote computer without requiring someone to be present to accept the connection . This is ideal for managing home computers while at work, providing IT support to remote teams, or assisting family members who are not tech-savvy. Below is a step-by-step guide to setting up and using unattended access.
### 1. Enabling Unattended Access on the Remote Computer
- Ensure the remote computer has UltraViewer 5.1 or later installed (upgrade if using an older version via the “Check for Updates” option in settings).
- Launch UltraViewer and go to “Settings” > “Unattended Access.”
- Check the box labeled “Enable unattended access” and select “Start with Windows as a service” . This ensures UltraViewer runs in the background even when no user is logged in.
- Set a permanent password for unattended access: Click “Set Password” and create a strong, unique password (8-16 characters with a mix of letters, numbers, and symbols). This password will replace the temporary 4-digit code for unattended connections.
- Optional: Enable “Prevent Windows from entering sleep mode” to ensure the remote computer stays active—note that this feature requires a paid license for extended use .
- Click “Apply” to save settings. The remote computer is now ready for unattended access.
### 2. Cto a Computer with Unattended Access
- On your local computer, launch UltraViewer (ensure you’ve completed the UltraViewer download and installed the latest version).
- In the “Control Remote Computer” section, enter the remote computer’s “Your ID” (the same permanent ID displayed in its UltraViewer interface).
- Click “Connect” and enter the permanent unattended access password you set earlier.
- Click “Log On” to establish the connection. You’ll now have full control over the remote computer, even if no one is physically present.
### 3. Key Use Cases for Unattended Access
- Remote File Management: Access and transfer files between your local and remote computers without assistance—ideal for retrieving important documents from your home PC while traveling.
- System Maintenance: Perform updates, run antivirus scans, or troubleshoot issues on a remote computer without disrupting the user’s workflow.
- Server Management: Monitor and control Windows servers 24/7, ensuring uptime and resolving issues promptly.
- Family Assistance: Help elderly family members with computer tasks (e.g., installing software, fixing errors) from anywhere, without needing them to navigate complex menus.
## IV. Essential UltraViewer Features: From Basic to Advanced
Beyond unattended access, UltraViewer offers a range of powerful features to enhance remote collaboration and technical support. Below is a detailed breakdown of how to use these features effectively after completing your UltraViewer download.
### 1. Basic Remote Control
- To control another computer (with attended access), ask the remote user to share their “Your ID” and temporary password.
- Enter these credentials in the “Control Remote Computer” section of your UltraViewer interface and click “Connect.”
- Once connected, you can use your mouse and keyboard to operate the remote computer as if you were sitting in front of it.
- Use the toolbar at the top of the remote screen to adjust settings: switch between full-screen and windowed mode, adjust display quality, or disconnect the session.
### 2. Bidirectional File Transfer
- UltraViewer supports fast, secure file transfer between local and remote computers with a simple drag-and-drop function .
- To send a file: Locate the file on your local computer, drag it to the remote screen, and release. A pop-up will confirm the transfer—click “OK” to proceed.
- To receive a file: Ask the remote user to drag the file to their UltraViewer window, and it will automatically download to your default “Downloads” folder (you can change this path in settings).
- File transfer is encrypted end-to-end, ensuring sensitive data remains secure during transmission. There is no file size limit for transfers, making it ideal for large documents, videos, or software installers.
### 3. Built-in Chat and Screen Annotation
- Communication is seamless with UltraViewer’s integrated chat feature. Click the “Chat” icon in the top toolbar to open a text chat window, allowing you to communicate with the remote user in real time while controlling their computer.
- The screen annotation tool lets you mark important areas of the remote screen. Click the “Annotation” icon to access tools like a pen, highlighter, and text box—perfect for guiding the remote user through steps or highlighting errors.
### 4. Screen Recording and Screenshots
- Capture important moments during a remote session by using the screen recording or screenshot features.
- Click the “Record” icon to start recording the remote screen—footage is saved in MP4 format to your specified folder.
- Click the “Screenshot” icon to capture a still image of the remote screen, which is saved as a PNG file.
- These features are useful for documenting technical issues, creating tutorials, or keeping records of remote support sessions.
## V. UltraViewer Security Settings to Protect Your Devices
Security is a top priority for remote control software, and UltraViewer includes multiple layers of protection to safeguard your data and devices. After your UltraViewer download and installation, configure these security settings to minimize risks.
### 1. Password Management
- Regularly change your temporary access password by clicking the “Refresh” icon next to the password in the “Allow Remote Control” section . This prevents unauthorized access if your credentials are accidentally shared.
- For unattended access, use a strong, unique password and avoid sharing it with anyone unnecessary. Update the password every 3-6 months for added security.
### 2. End-to-End Encryption
- UltraViewer uses 256-bit AES encryption for all remote sessions and file transfers, ensuring data cannot be intercepted by third parties . This encryption is enabled by default, so no additional configuration is needed.
### 3. Blacklist Management
- If you encounter unwanted connection attempts, add the offender’s ID to the blacklist. Go to “Settings” > “Security” > “Blacklist,” enter the ID, and click “Add.” The blocked user will no longer be able to request a connection.
### 4. Session Permissions
- Customize the level of access granted to remote users. Go to “Settings” > “Permissions” and choose which actions remote users can perform (e.g., file transfer, keyboard control, screen recording). Restrict permissions for untrusted users to limit potential risks.
## VI. Troubleshooting Common UltraViewer Issues (2025 Updated)
Even with a smooth UltraViewer download and installation, you may encounter occasional issues. Below are solutions to the most common problems users face in 2025.
### 1. Connection Failed Errors
- Check network profiles: Windows 11/10 often assigns public network profiles, which may block UltraViewer’s connection . Change the network profile to “Private” on both local and remote computers (Settings > Network & Internet > Ethernet/Wi-Fi > Network profile).
- Verify credentials: Ensure the remote computer’s ID and password are entered correctly. Temporary passwords change when UltraViewer is restarted, so confirm the latest password with the remote user.
- Disable firewalls temporarily: Antivirus or Windows Firewall may block UltraViewer’s ports. Add UltraViewer to the firewall’s exception list (Settings > Update & Security > Windows Security > Firewall & network protection > Allow an app through firewall).
### 2. Slow or Laggy Remote Control
- Reduce display quality: Go to the session toolbar and select “Low” or “Medium” quality to reduce bandwidth usage.
- Close background apps: Ask the remote user to close unnecessary applications (e.g., video players, games) that consume system resources.
- Check internet speed: Use a speed test tool to confirm both computers have a stable connection with at least 1Mbps upload/download speed.
### 3. Unattended Access Not Working
- Ensure UltraViewer is up to date: Unattended access is only available in version 5.1 and later. Go to “Help” > “Check for Updates” to install the latest version.
- Confirm Windows service integration: In settings, verify that “Start with Windows as a service” is enabled. If not, recheck the box and restart UltraViewer.
- Check user account permissions: The remote computer’s user account must have admin rights to enable unattended access.
## VII. Conclusion: Unlock UltraViewer’s Full Potential with a Secure Download
UltraViewer 5.1 has solidified its position as a top-tier remote control tool in 2025, thanks to its game-changing unattended access feature, user-friendly interface, and robust security measures. Whether you’re a professional needing to support remote teams, a student collaborating on group projects, or someone who wants to assist family members from afar, UltraViewer offers all the tools you need to stay connected.
The first step to leveraging these capabilities is a safe, official UltraViewer download. By following the guide provided, you can avoid security risks, ensure full access to the latest features, and set up the software for optimal performance. From basic remote control to advanced unattended access and file transfer, UltraViewer simplifies cross-device collaboration and technical support, saving you time and effort.
As remote work and digital collaboration continue to evolve, UltraViewer remains committed to updating its features to meet user needs. By keeping your software updated and following best practices for security and configuration, you can enjoy a seamless remote control experience for years to come. If you haven’t already, complete your UltraViewer download today and discover how easy and efficient remote access can be.
### 3. Initial Configuration After Launch
- When UltraViewer opens for the first time, you’ll see a simple interface divided into two sections: “Allow Remote Control” (left) and “Control Remote Computer” (right) .
- In the “Allow Remote Control” section, you’ll find your unique “Your ID” (a 6-8 digit number) and “Password” (a 4-digit code). Share these credentials with anyone who needs to control your computer remotely.
- Click the “Settings” icon (gear symbol) in the top-right corner to customize preferences: adjust display quality (low, medium, high) based on your internet speed, enable or disable sound transmission, and configure keyboard shortcuts for common actions.
- For unattended access setup (UltraViewer 5.1+), navigate to the “Unattended Access” tab in settings—this will be covered in detail in the next section.
## III. Mastering Unattended Access: UltraViewer 5.1’s Flagship Feature
The release of UltraViewer 5.1 introduced unattended access, a highly requested feature that allows users to control a remote computer without requiring someone to be present to accept the connection . This is ideal for managing home computers while at work, providing IT support to remote teams, or assisting family members who are not tech-savvy. Below is a step-by-step guide to setting up and using unattended access.
### 1. Enabling Unattended Access on the Remote Computer
- Ensure the remote computer has UltraViewer 5.1 or later installed (upgrade if using an older version via the “Check for Updates” option in settings).
- Launch UltraViewer and go to “Settings” > “Unattended Access.”
- Check the box labeled “Enable unattended access” and select “Start with Windows as a service” . This ensures UltraViewer runs in the background even when no user is logged in.
- Set a permanent password for unattended access: Click “Set Password” and create a strong, unique password (8-16 characters with a mix of letters, numbers, and symbols). This password will replace the temporary 4-digit code for unattended connections.
- Optional: Enable “Prevent Windows from entering sleep mode” to ensure the remote computer stays active—note that this feature requires a paid license for extended use .
- Click “Apply” to save settings. The remote computer is now ready for unattended access.
### 2. Cto a Computer with Unattended Access
- On your local computer, launch UltraViewer (ensure you’ve completed the UltraViewer download and installed the latest version).
- In the “Control Remote Computer” section, enter the remote computer’s “Your ID” (the same permanent ID displayed in its UltraViewer interface).
- Click “Connect” and enter the permanent unattended access password you set earlier.
- Click “Log On” to establish the connection. You’ll now have full control over the remote computer, even if no one is physically present.
### 3. Key Use Cases for Unattended Access
- Remote File Management: Access and transfer files between your local and remote computers without assistance—ideal for retrieving important documents from your home PC while traveling.
- System Maintenance: Perform updates, run antivirus scans, or troubleshoot issues on a remote computer without disrupting the user’s workflow.
- Server Management: Monitor and control Windows servers 24/7, ensuring uptime and resolving issues promptly.
- Family Assistance: Help elderly family members with computer tasks (e.g., installing software, fixing errors) from anywhere, without needing them to navigate complex menus.
## IV. Essential UltraViewer Features: From Basic to Advanced
Beyond unattended access, UltraViewer offers a range of powerful features to enhance remote collaboration and technical support. Below is a detailed breakdown of how to use these features effectively after completing your UltraViewer download.
### 1. Basic Remote Control
- To control another computer (with attended access), ask the remote user to share their “Your ID” and temporary password.
- Enter these credentials in the “Control Remote Computer” section of your UltraViewer interface and click “Connect.”
- Once connected, you can use your mouse and keyboard to operate the remote computer as if you were sitting in front of it.
- Use the toolbar at the top of the remote screen to adjust settings: switch between full-screen and windowed mode, adjust display quality, or disconnect the session.
### 2. Bidirectional File Transfer
- UltraViewer supports fast, secure file transfer between local and remote computers with a simple drag-and-drop function .
- To send a file: Locate the file on your local computer, drag it to the remote screen, and release. A pop-up will confirm the transfer—click “OK” to proceed.
- To receive a file: Ask the remote user to drag the file to their UltraViewer window, and it will automatically download to your default “Downloads” folder (you can change this path in settings).
- File transfer is encrypted end-to-end, ensuring sensitive data remains secure during transmission. There is no file size limit for transfers, making it ideal for large documents, videos, or software installers.
### 3. Built-in Chat and Screen Annotation
- Communication is seamless with UltraViewer’s integrated chat feature. Click the “Chat” icon in the top toolbar to open a text chat window, allowing you to communicate with the remote user in real time while controlling their computer.
- The screen annotation tool lets you mark important areas of the remote screen. Click the “Annotation” icon to access tools like a pen, highlighter, and text box—perfect for guiding the remote user through steps or highlighting errors.
### 4. Screen Recording and Screenshots
- Capture important moments during a remote session by using the screen recording or screenshot features.
- Click the “Record” icon to start recording the remote screen—footage is saved in MP4 format to your specified folder.
- Click the “Screenshot” icon to capture a still image of the remote screen, which is saved as a PNG file.
- These features are useful for documenting technical issues, creating tutorials, or keeping records of remote support sessions.
## V. UltraViewer Security Settings to Protect Your Devices
Security is a top priority for remote control software, and UltraViewer includes multiple layers of protection to safeguard your data and devices. After your UltraViewer download and installation, configure these security settings to minimize risks.
### 1. Password Management
- Regularly change your temporary access password by clicking the “Refresh” icon next to the password in the “Allow Remote Control” section . This prevents unauthorized access if your credentials are accidentally shared.
- For unattended access, use a strong, unique password and avoid sharing it with anyone unnecessary. Update the password every 3-6 months for added security.
### 2. End-to-End Encryption
- UltraViewer uses 256-bit AES encryption for all remote sessions and file transfers, ensuring data cannot be intercepted by third parties . This encryption is enabled by default, so no additional configuration is needed.
### 3. Blacklist Management
- If you encounter unwanted connection attempts, add the offender’s ID to the blacklist. Go to “Settings” > “Security” > “Blacklist,” enter the ID, and click “Add.” The blocked user will no longer be able to request a connection.
### 4. Session Permissions
- Customize the level of access granted to remote users. Go to “Settings” > “Permissions” and choose which actions remote users can perform (e.g., file transfer, keyboard control, screen recording). Restrict permissions for untrusted users to limit potential risks.
## VI. Troubleshooting Common UltraViewer Issues (2025 Updated)
Even with a smooth UltraViewer download and installation, you may encounter occasional issues. Below are solutions to the most common problems users face in 2025.
### 1. Connection Failed Errors
- Check network profiles: Windows 11/10 often assigns public network profiles, which may block UltraViewer’s connection . Change the network profile to “Private” on both local and remote computers (Settings > Network & Internet > Ethernet/Wi-Fi > Network profile).
- Verify credentials: Ensure the remote computer’s ID and password are entered correctly. Temporary passwords change when UltraViewer is restarted, so confirm the latest password with the remote user.
- Disable firewalls temporarily: Antivirus or Windows Firewall may block UltraViewer’s ports. Add UltraViewer to the firewall’s exception list (Settings > Update & Security > Windows Security > Firewall & network protection > Allow an app through firewall).
### 2. Slow or Laggy Remote Control
- Reduce display quality: Go to the session toolbar and select “Low” or “Medium” quality to reduce bandwidth usage.
- Close background apps: Ask the remote user to close unnecessary applications (e.g., video players, games) that consume system resources.
- Check internet speed: Use a speed test tool to confirm both computers have a stable connection with at least 1Mbps upload/download speed.
### 3. Unattended Access Not Working
- Ensure UltraViewer is up to date: Unattended access is only available in version 5.1 and later. Go to “Help” > “Check for Updates” to install the latest version.
- Confirm Windows service integration: In settings, verify that “Start with Windows as a service” is enabled. If not, recheck the box and restart UltraViewer.
- Check user account permissions: The remote computer’s user account must have admin rights to enable unattended access.
## VII. Conclusion: Unlock UltraViewer’s Full Potential with a Secure Download
UltraViewer 5.1 has solidified its position as a top-tier remote control tool in 2025, thanks to its game-changing unattended access feature, user-friendly interface, and robust security measures. Whether you’re a professional needing to support remote teams, a student collaborating on group projects, or someone who wants to assist family members from afar, UltraViewer offers all the tools you need to stay connected.
The first step to leveraging these capabilities is a safe, official UltraViewer download. By following the guide provided, you can avoid security risks, ensure full access to the latest features, and set up the software for optimal performance. From basic remote control to advanced unattended access and file transfer, UltraViewer simplifies cross-device collaboration and technical support, saving you time and effort.
As remote work and digital collaboration continue to evolve, UltraViewer remains committed to updating its features to meet user needs. By keeping your software updated and following best practices for security and configuration, you can enjoy a seamless remote control experience for years to come. If you haven’t already, complete your UltraViewer download today and discover how easy and efficient remote access can be.
1812
Master UltraViewer 5.1 Unattended Access: A Complete Guide with Safe UltraViewer Download
关于UltraViewer
UltraViewer 由 DucFabulous 研发科技有限公司匠心打造!我们深耕技术创新,致力于引领全球远程控制领域发展,更以优质产品为核心,为你提升生活品质,带来极致使用体验。
产品介绍
联系我们
- +84 391.258.888
- suppor@pm.me
- sales@pm.me
- TeporR pmme
跟着我们
通讯
注册
我们的客户
合作伙伴
@ Copyright UltraViewer 2025 | 保留所有权利。 TM